
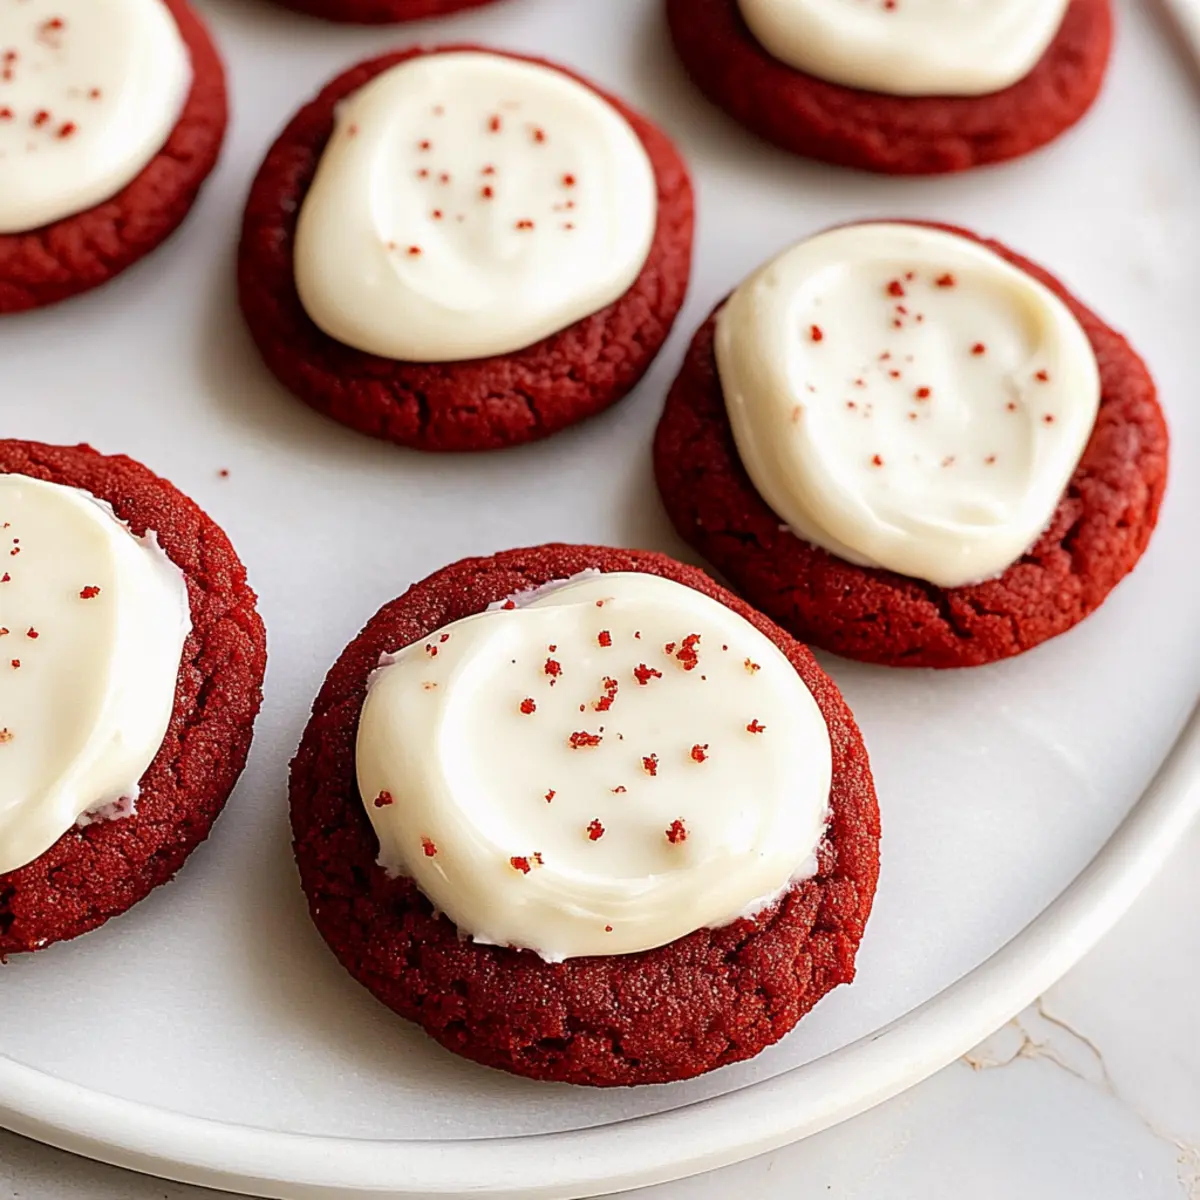
As I sat sipping my morning coffee, I noticed a vibrant red box of cake mix sitting on my kitchen counter, reminding me of a special dessert that never fails to impress: Red Velvet Cookies with Cream Cheese Frosting. The warmth and nostalgia of these cookies are hard to resist, especially when you’re craving a delightful treat. With their perfectly crispy edges and soft, chewy centers, they bring the essence of red velvet cake right into your hands. What’s even better? They’re quick to whip up and perfect for sharing at gatherings or cozy nights in. Plus, the creamy frosting adds a luscious touch—who could say no to that? Are you ready to indulge in this sweet experience? Let’s dive into the recipe!
Why are these cookies so irresistible?
Crispy, Chewy Delight: The contrast of crispy edges and a soft, chewy center means every bite is a textural dream.
Creamy Frosting: With silky cream cheese frosting, each cookie becomes a delightful treat that’s hard to forget.
Quick to Make: These cookies are easy to whip up in less than 30 minutes, making them a perfect last-minute dessert option.
Crowd-Pleasing Treat: Perfect for Valentine’s Day or any festive gathering, these cookies will impress friends and family alike. Looking for a cake version? Check out my Red Velvet Cheesecake!
Versatile Variations: Feel free to personalize with chocolate chips or edible glitter for special occasions. Enjoy the fun of decorating!
Red Velvet Cookies Ingredients
For the Cookies
- Butter – Adds richness and moisture; use vegan butter for a dairy-free option.
- Granulated Sugar – Provides sweetness and structure; no substitutions recommended for this recipe.
- Brown Sugar – Contributes moisture and a caramel-like flavor; light or dark brown sugar both work well.
- Red Gel Food Coloring – Essential for color, giving the cookies their signature red hue; substitute with vegan food coloring for a plant-based option.
- Egg – Binds the ingredients together and adds moisture; for a vegan version, use a flax egg.
- Vanilla Extract – Enhances flavor depth; no substitutions recommended.
- All-Purpose Flour – Forms the structure of the cookie; use gluten-free flour for a gluten-free version.
- Dutch-Process Cocoa Powder – Adds a subtle chocolate flavor essential for a true red velvet taste; no substitutions, but unsweetened cocoa can work if necessary.
- Baking Powder & Baking Soda – Leavening agents that help the cookies rise; no substitutions recommended.
- Salt – Balances sweetness and enhances flavors; don’t omit this essential ingredient.
For the Cream Cheese Frosting
- Full-Fat Cream Cheese – Provides creaminess and tang in the frosting; vegan cream cheese can be used for a dairy-free version.
- Powdered Sugar – Sweetens and thickens the frosting; ensure it’s sifted for a smooth texture—no substitutions needed.
- Vanilla Bean Paste – Adds rich vanilla flavor; can be replaced with additional vanilla extract if necessary.
Get ready to create these delightful Red Velvet Cookies with Cream Cheese Frosting that will surely impress!
Step‑by‑Step Instructions for Red Velvet Cookies with Cream Cheese Frosting
Step 1: Melt the Butter
Begin by melting ½ cup of unsalted butter in a saucepan over low heat. Once fully melted, transfer it to a heatproof bowl and let it cool in the refrigerator until it reaches room temperature. This cooling step is essential to ensure your Red Velvet Cookies have the right texture.
Step 2: Mix Wet Ingredients
In a large mixing bowl, whisk together the cooled butter, 1 cup of granulated sugar, ½ cup of brown sugar, and 2 teaspoons of red gel food coloring. Whisk these ingredients vigorously for about 1 minute until thoroughly combined and smooth. This vibrant mixture sets the foundation for your flavorful cookies.
Step 3: Incorporate Egg and Vanilla
Add one large egg and 1 teaspoon of vanilla extract to the sugar mixture, stirring gently until just combined. Be careful not to overmix; you want a beautifully blended batter for your Red Velvet Cookies. The mixture should have a consistent color and be slightly fluffy.
Step 4: Combine Dry Ingredients
In a separate bowl, sift together 2 cups of all-purpose flour, 2 tablespoons of Dutch-process cocoa powder, 1 teaspoon of baking powder, 1 teaspoon of baking soda, and ½ teaspoon of salt. Gradually add the dry ingredients to the wet mixture, using a spatula to fold until just combined. This gentle mixing will help maintain a soft texture.
Step 5: Form Cookie Balls
Scoop the dough into heaping tablespoon-sized balls and place them on a parchment-lined baking sheet. Make sure to leave space between each ball for spreading. Cover the baking sheet with plastic wrap and refrigerate the cookie dough for at least 1 hour to help firm it up before baking.
Step 6: Preheat the Oven
While the dough chills, preheat your oven to 180ºC (355ºF). This ensures a perfectly baked cookie with crispy edges and a chewy center. The oven should be preheated for at least 15 minutes before the cookies are ready to go in.
Step 7: Bake the Cookies
Remove the cookie balls from the refrigerator and place them onto the prepared baking sheet. Bake in the preheated oven for 10-11 minutes, or until the edges begin to crisp but the centers remain soft. Once done, allow the cookies to cool on the baking sheet for 5 minutes before transferring them to a wire rack.
Step 8: Prepare the Cream Cheese Frosting
In a medium bowl, beat together 4 ounces of softened cream cheese and ¼ cup of unsalted butter until smooth. Gradually add 2 cups of sifted powdered sugar and 1 teaspoon of vanilla bean paste, mixing until the frosting is creamy and spreadable. This luscious frosting will perfectly complement your Red Velvet Cookies.
Step 9: Frost the Cookies
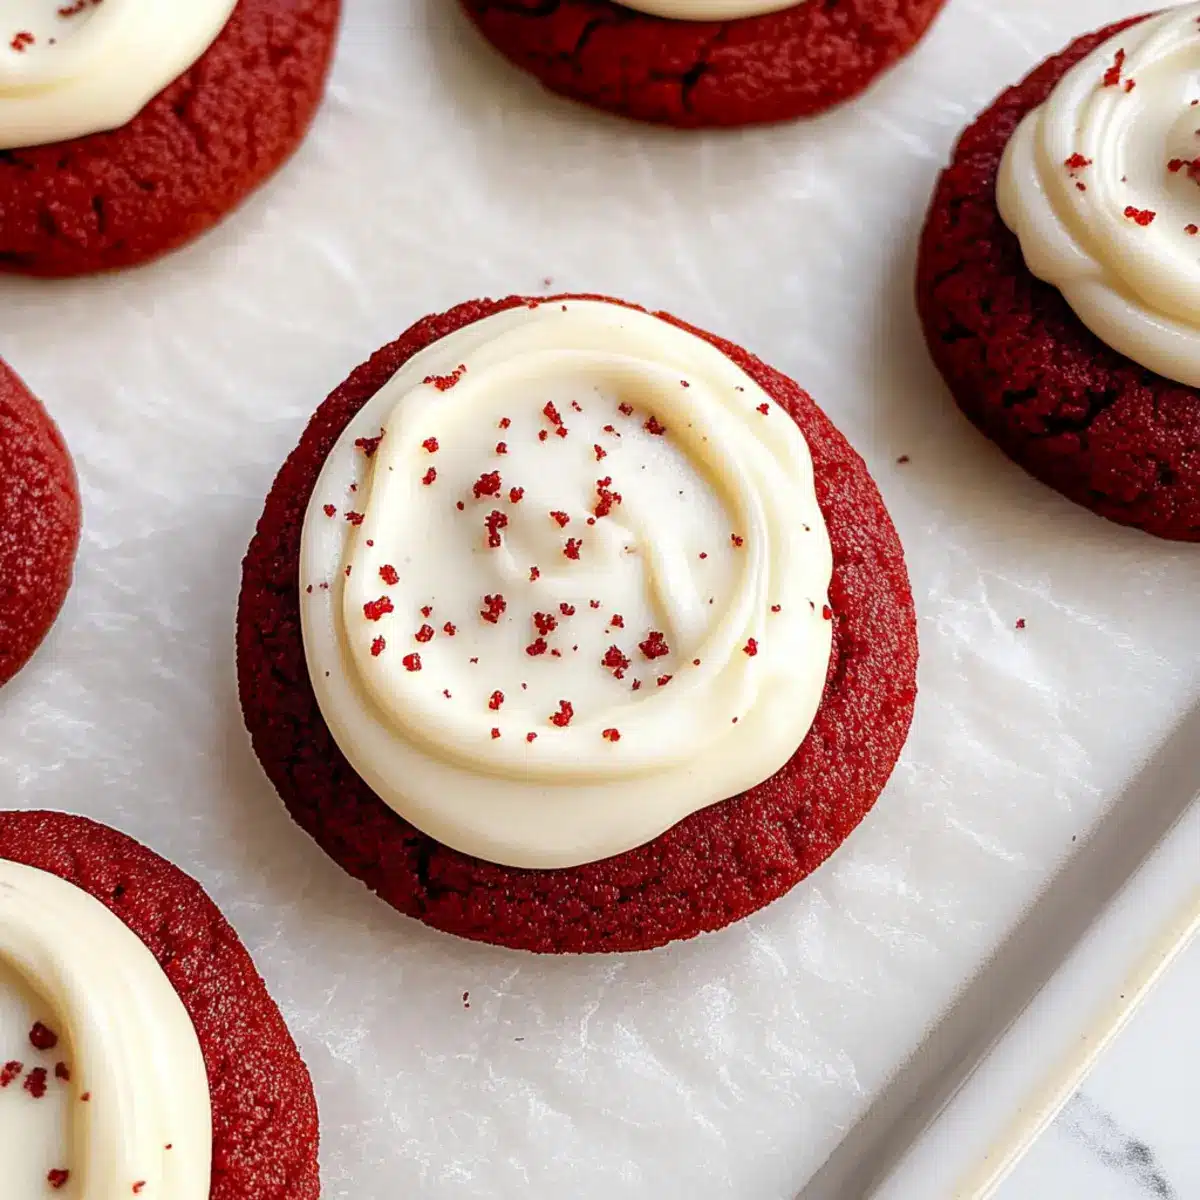
Once the cookies have cooled completely, use a piping bag or a knife to generously frost each cookie with the cream cheese frosting. For an extra touch, consider garnishing with red sprinkles or chocolate shavings to make your cookies even more festive and appealing.
Red Velvet Cookies with Cream Cheese Frosting Variations
Feel free to customize your cookies for an even more delightful experience that will impress everyone!
- Dairy-Free: Swap the butter and cream cheese with dairy-free alternatives to enjoy delicious cookies without the dairy.
- Nutty Flavor: Mix in a ½ cup of chopped pecans or walnuts to add a crunchy, nutty twist to your cookie experience. Nuts add a wholesome texture that complements the sweetness perfectly.
- Chocolate Indulgence: Fold in a cup of chocolate chips or white chocolate chunks into the cookie dough for a luxurious treat. The rich chocolate flavor brings a new dimension to the classic red velvet taste!
- Gluten-Free: Substitute all-purpose flour with a 1:1 gluten-free baking flour to create a cookie that’s suitable for gluten-sensitive individuals. You’ll still enjoy those familiar flavors!
- Extra Sweetness: Add a small sprinkle of coarse sea salt on top of the frosting for a delightful contrast. It’ll enhance the sweetness of the cream cheese frosting and provide a delightful burst of flavor.
- Spiced Up: Incorporate a pinch of cinnamon or nutmeg in the dry ingredients for a heartwarming touch. These spices heighten the cookie’s profile with warmth and depth, making them perfect for cozy gatherings.
- Edible Glitter: For a festive occasion, garnish your cookies with edible glitter or sprinkles—because who doesn’t love a little sparkle? It adds a festive flair that makes these cookies even more inviting.
If you adore the flavors of red velvet, don’t miss trying my delightful Red Velvet Yule Log for a beautiful centerpiece dessert! And if you’re searching for a deliciously fun breakfast option, check out my Vegan Red Velvet Pancakes that everyone will adore!
How to Store and Freeze Red Velvet Cookies
Fridge: Store cookies in an airtight container in the refrigerator for up to 2 days to maintain their soft texture and freshness.
Freezer: For longer storage, freeze the cookies in a single layer on a baking sheet for about 1 hour, then transfer them to a resealable freezer bag for up to 3 months.
Thawing: To enjoy frozen cookies, simply remove them from the freezer and let them sit at room temperature for about 30 minutes before serving.
Reheating: If you prefer warm cookies, pop them in the microwave for 10-15 seconds before enjoying your Red Velvet Cookies with Cream Cheese Frosting.
Make Ahead Options
These Red Velvet Cookies with Cream Cheese Frosting are perfect for busy home cooks looking to save time! You can prepare the cookie dough up to 24 hours in advance; simply scoop the dough into balls and refrigerate it tightly wrapped in plastic wrap. This helps maintain their soft texture while enhancing the flavors. For the cream cheese frosting, make it ahead and store it in an airtight container in the refrigerator for up to 3 days. When you’re ready to bake, simply preheat the oven and pop the chilled cookie dough on a baking sheet. Frost the cookies once they’ve cooled completely, and you’ll have freshly baked cookies with delicious creaminess, just as if they were made that day!
What to Serve with Red Velvet Cookies with Cream Cheese Frosting
Indulging in these festive cookies is delightful, but pairing them with complementary flavors will elevate your dessert experience even more.
-
Velvety Hot Chocolate: A rich cup of homemade hot chocolate intensifies the cocoa notes in the cookies while adding warmth. Perfect for cozy evenings!
-
Creamy Vanilla Ice Cream: The cold, creamy texture of vanilla ice cream contrasts beautifully with the warm cookies, making each bite a soft, sweet dream.
-
Sparkling Water with Lime: A refreshing splash of citrus offers a palate-cleansing burst that balances the dessert’s sweetness while keeping things light.
-
Caramel Sauce Drizzle: Adding a drizzle of salted caramel enhances the flavor complexity, encouraging a luxurious sweet-and-salty experience.
-
Fresh Berry Medley: Juicy strawberries or raspberries provide a tartness that complements the creaminess of the frosting, creating a refreshing bite.
-
Coffee or Espresso: Elevate your cookie enjoyment by pairing it with a robust cup of coffee or smooth espresso; the bitterness beautifully offsets the frosting’s sweetness.
-
Mini Cheesecake Bites: For a layered dessert experience, serve mini cheesecake bites. Their rich texture will harmonize with the soft Red Velvet Cookies for an indulgent treat.
-
Nutty Brownies: Dark, fudgy brownies add a delightful chocolate element, enhancing the overall indulgence of your dessert spread.
-
Lemonade Spritzer: A sparkling lemonade spritzer gives a light, tangy contrast that refreshes your palate after bites of rich frosting.
-
Chocolate-Dipped Strawberries: These decadent treats add a touch of romance, making them a perfect pairing for a sweet, festive occasion.
Expert Tips for Red Velvet Cookies
-
Butter Temperature: Ensure the butter is at room temperature before mixing. Hot butter can cause the cookies to spread too much, affecting texture.
-
Gentle Mixing: Don’t overmix the dough once the dry ingredients are added. Mixing just until combined creates softer Red Velvet Cookies.
-
Chill the Dough: Refrigerate the dough for at least an hour. This helps the cookies hold their shape while baking and enhances flavor.
-
Uniform Portions: Use a cookie scoop to maintain consistent sizes for even baking. This way, you won’t end up with some cookies burnt and others soft.
-
Cooling Time: Allow cookies to cool completely before frosting. This step prevents the frosting from melting and losing its lovely texture.
Red Velvet Cookies with Cream Cheese Frosting Recipe FAQs
How do I select ripe ingredients for these cookies?
Absolutely! For the best results, select unsalted butter that should be softened but not melted, ideal for mixing your dough. Use eggs that are at room temperature for better incorporation. The granulated sugar and brown sugar should be fresh and free of lumps, while red gel food coloring should be vibrant. If you have vanilla beans, use them for a richer aroma; otherwise, use pure vanilla extract.
How should I store leftover cookies?
To keep your Red Velvet Cookies with Cream Cheese Frosting fresh, place them in an airtight container in the fridge for up to 2 days. If you find they’re getting a bit hard, placing a slice of bread in with them can help maintain moisture. Remember, the cream cheese frosting is best enjoyed fresh!
Can I freeze these cookies?
Yes, you can! To freeze these cookies, place them in a single layer on a baking sheet and freeze for about 1 hour. Once solid, transfer them to a resealable freezer bag, where they can be stored for up to 3 months. When you’re ready to enjoy, let them thaw at room temperature for about 30 minutes, or warm them in the microwave for a nostalgic, fresh-from-the-oven experience.
What if my cookies don’t spread while baking?
Very common question! If your cookies don’t spread much, it could be due to the dough being too cold or over-mixing the dry ingredients with the wet. Make sure to chill the dough for the recommended hour, but if they come out too puffy, you can gently reshape them before the oven. Remember, every oven is a little different, so keep an eye on those cookies!
Are these cookies suitable for allergies or dietary restrictions?
Indeed! For those with dietary restrictions, you can make these cookies vegan by substituting butter with vegan butter and using a flax egg (1 tablespoon of ground flaxseed mixed with 2.5 tablespoons of water, let it sit for 5 minutes until thickened). If you’re concerned about gluten, use a gluten-free all-purpose flour blend, but ensure your baking powder is gluten-free as well.
Can I make the frosting ahead of time?
Absolutely! The cream cheese frosting can be prepared in advance and stored in the refrigerator for up to 3 days in an airtight container. Just give it a quick stir before icing your cookies. You can also freeze the frosting; just store it in a freezer-safe container for up to 1 month. Thaw it in the fridge overnight before use for perfectly smooth results.
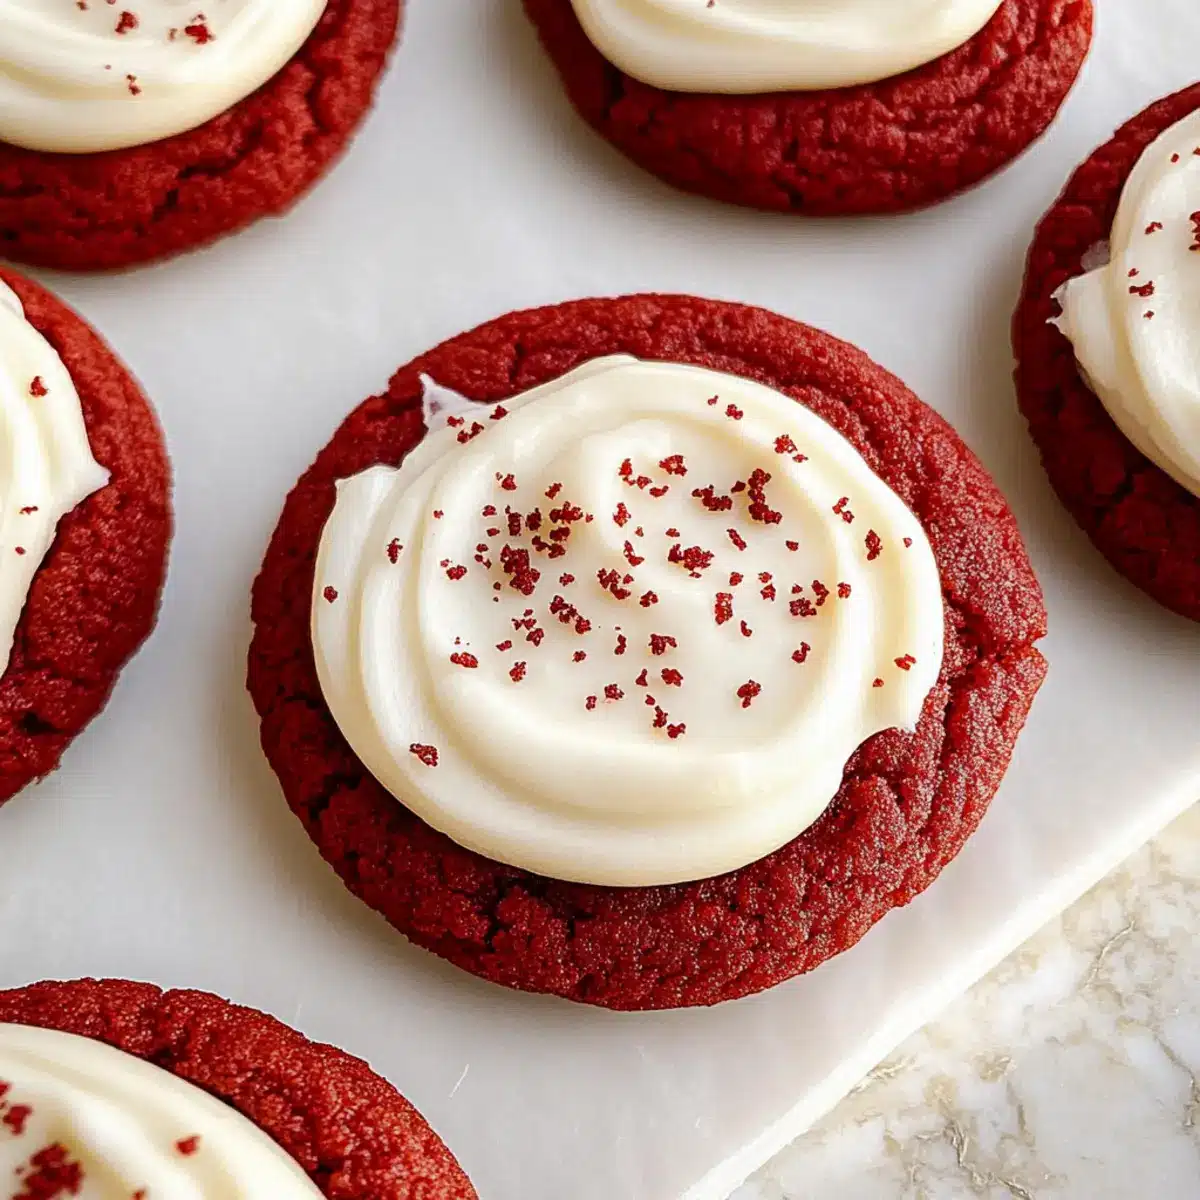
Irresistible Red Velvet Cookies with Cream Cheese Frosting
Ingredients
Equipment
Method
- Melt the butter in a saucepan over low heat. Transfer to a bowl and cool in the fridge.
- Whisk the cooled butter, granulated sugar, brown sugar, and red gel food coloring until smooth.
- Add the egg and vanilla to the mixture; stir gently until just combined.
- Sift together flour, cocoa powder, baking powder, baking soda, and salt. Gradually add to wet mixture.
- Scoop dough into tablespoon-sized balls and place on a baking sheet; refrigerate for 1 hour.
- Preheat oven to 180ºC (355ºF) while dough chills.
- Bake cookies for 10-11 minutes until edges are crisp. Cool for 5 minutes on baking sheet.
- Beat cream cheese and butter until smooth; add powdered sugar and vanilla bean paste until creamy.
- Frost cooled cookies generously with the cream cheese frosting.
Leave a Reply