
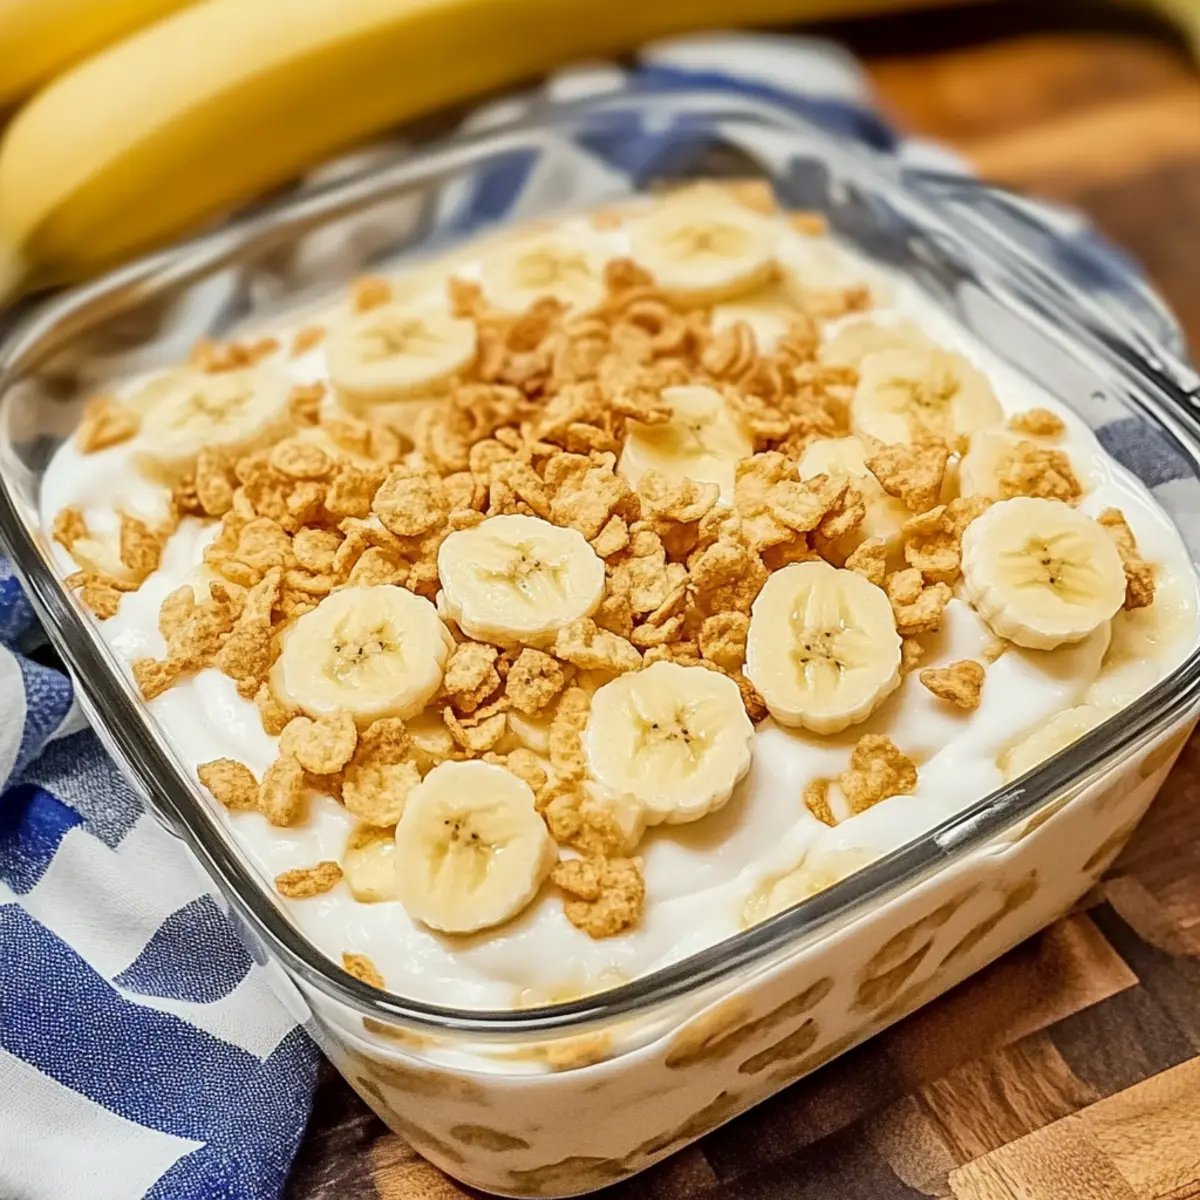
As I stood in my kitchen, the warm scent of vanilla began to swirl around me, instantly transporting me to my grandmother’s dining room. It was there that I first tasted the treasured Classic Homemade Banana Pudding, a comforting Southern delight that feels like coming home. This easy dessert, made without any boxed mixes, is a breeze to whip up and perfect for any gathering. Not only does it satisfy those sweet cravings with its creamy layers of ripe bananas and crunchy vanilla wafers, but it’s also a make-ahead wonder that allows the flavors to meld overnight. Trust me; there’s nothing quite like diving into a chilled bowl of this nostalgic goodness. Ready to recreate a family favorite that’s sure to impress? Let’s get started!
Why is Homemade Banana Pudding Irresistible?
Nostalgic Comfort: The classic combination of creamy pudding, sweet bananas, and crunchy vanilla wafers brings back warm memories of family gatherings.
Quick to Prepare: With simple ingredients and no baking required, this dessert is effortless to make, making it perfect for both beginner cooks and seasoned chefs.
Make-Ahead Magic: This recipe shines as a make-ahead option, allowing the flavors to deepen overnight—ideal for busy schedules!
Versatile Variations: Experiment by swapping vanilla wafers with graham crackers or adding a touch of brown sugar for a unique twist.
Crowd Favorite: Ensure your gatherings are memorable—this rich, creamy dish is always a hit and sure to please everyone!
Give it a try alongside our Banana Bread Chocolate or as a delightful finish to a Southern-themed meal!
Homemade Banana Pudding Ingredients
• Here’s what you need to create the perfect Homemade Banana Pudding:
For the Pudding
- Sugar – Sweetness that balances the creaminess; substitute with brown sugar for a deeper flavor.
- Flour – Essential for thickening; all-purpose flour ensures a smooth texture.
- Salt – Enhances overall flavor without adding any saltiness.
- Milk – The pudding base providing creaminess; feel free to use non-dairy options if needed.
- Eggs – Adds richness and is crucial for thickening; whole eggs are recommended for the best results.
- Vanilla Extract – A flavor enhancer; opt for pure vanilla for that classic homemade taste.
For the Layers
- Vanilla Wafers – Create structure and crunch; about 8 oz is ideal. Can also be swapped with graham crackers for a tasty variation.
- Bananas – Essential for flavor and texture; use 4 fresh, ripe bananas (sliced) for optimal results.
With these ingredients gathered, you’re well on your way to delicious and fluffy Homemade Banana Pudding!
Step‑by‑Step Instructions for Homemade Banana Pudding
Step 1: Combine Dry Ingredients
In a medium saucepan, whisk together 3/4 cup sugar, 1/3 cup flour, and a pinch of salt until well combined and clump-free. This will form the base of your delicious homemade banana pudding. Now, head over to the stovetop and prepare to continue with the next step.
Step 2: Add Milk
Gradually whisk in 3 cups of milk into the dry mixture while keeping the heat on medium. Stir constantly until the mixture thickens and bubbles—this should take about 10 minutes. You’ll know it’s ready when it coats the back of a spoon. Continue to the next step to bring further richness to your pudding.
Step 3: Cook Mixture
Lower the heat to maintain a gentle bubble and let the mixture simmer for an additional 2 minutes, stirring frequently. This brief cooking time allows the flavors to meld beautifully. Once done, remove the saucepan from heat and let the mixture cool slightly for a smoother blend in the next step.
Step 4: Temper Eggs
In a small bowl, whisk 3 eggs until well-beaten. Gradually whisk in 1 cup of the hot pudding mixture to temper the eggs, which prevents them from scrambling. This is a crucial step to ensure your homemade banana pudding maintains a creamy consistency. Get ready to mix this back into the saucepan.
Step 5: Return to Heat
Pour the tempered egg mixture back into the saucepan with the remaining pudding base. Cook on low heat, stirring continuously until the mixture comes to a gentle boil again, which should take about 2 minutes. This step thickens the pudding further, enhancing its luxurious texture.
Step 6: Add Vanilla and Cool
Remove the saucepan from heat and stir in 1 teaspoon of vanilla extract. This step infuses wonderful flavor into your homemade banana pudding. Allow the pudding to cool for about 15 minutes—it will thicken slightly more during this time, setting the stage for the next delicious layer.
Step 7: Layer Ingredients
In an ungreased 8-inch square pan, layer 25 vanilla wafers on the bottom. Follow this with half of the sliced bananas and then pour half of the warm pudding over the top. Repeat these layers once more, ending with the pudding layer to create a beautifully layered homemade banana pudding masterpiece.
Step 8: Chill and Set
Cover the pan tightly with plastic wrap and refrigerate the banana pudding for at least 4 hours, or preferably overnight. This chilling time allows the flavors to deepen and the wafers to soften perfectly, creating that comforting texture we all love.
Step 9: Garnish and Serve
Before serving, crush the remaining vanilla wafers and sprinkle them generously on top of the chilled banana pudding for added crunch. Serve the homemade banana pudding cold, and enjoy each delightful spoonful of this classic Southern dessert!
Variations & Substitutions for Homemade Banana Pudding
Feel free to get creative with this delightful dessert to make it truly your own and cater to your taste buds!
- Brown Sugar: Swap white sugar for brown sugar for a deeper, caramel-like flavor that elevates the pudding experience.
- Graham Crackers: Replace vanilla wafers with graham crackers for a classic twist that complements the creamy pudding beautifully. The slight hint of cinnamon adds warmth to every bite.
- Non-Dairy Milk: Use almond, oat, or coconut milk instead of regular milk for a dairy-free version that everyone can enjoy. This maintains the creamy texture while catering to dietary needs.
- Extra Flavor: Incorporate a splash of rum or bourbon for an adult twist that adds a sophisticated kick. This variation transforms the dessert into a luxurious treat for special occasions.
- Chocolate Lovers: Add chocolate chips or a layer of chocolate pudding between the banana and vanilla layers for a decadent chocolate-banana fusion. You’ll love how the flavors complement each other!
- Nutty Crunch: Sprinkle crushed nuts like pecans or walnuts between layers for added texture and a delightful crunch that enhances the eating experience.
- Spiced Up: Sprinkle in some cinnamon or nutmeg to the pudding for an aromatic warmth that dances on your palate. This subtle enhancement makes each bite even more comforting!
- Fruity Twist: Mix in berries or sliced strawberries along with the bananas for a refreshing fruit medley that brightens up the classic pudding. The vibrant colors create an enticing dish.
Explore these variations, and if you’re feeling adventurous, consider serving your homemade banana pudding alongside our delicious Banana Upside Down Cake for a truly indulgent spread!
What to Serve with Classic Homemade Banana Pudding
Indulging in a bowl of creamy banana pudding pairs beautifully with a range of delightful sides that enhance its comforting sweetness.
- Fresh Berries: The tartness of strawberries and blueberries adds a refreshing contrast, balancing the rich creaminess of the pudding.
- Whipped Cream: A generous dollop of lightly sweetened whipped cream elevates the dessert, making every spoonful even more indulgent.
- Crushed Graham Crackers: The added crunch from crushed graham crackers provides a delightful texture while complementing the pudding’s smooth layers.
- Chocolate Sauce: Drizzle some rich chocolate sauce on top for a heavenly combination that brings out the sweetness of the bananas.
- Coffee: A warm cup of coffee pairs beautifully, offering a contrasting flavor that enhances the sweetness of the banana pudding.
- Caramel Sauce: A drizzle of caramel over the pudding creates an extra layer of sweetness, enriching the overall flavor and making it even more decadent.
- Coconut Macaroons: These chewy treats provide a wonderful textural contrast to the creamy pudding, enhancing the dessert experience.
- Southern Biscuits: Flaky biscuits on the side add a delightful, buttery flavor that complements the pudding perfectly for a true Southern feast.
- Mint Leaves: Garnish with fresh mint leaves for a burst of freshness that brightens the dish and adds a pop of color.
Make Ahead Options
These Classic Homemade Banana Pudding is perfect for meal prep enthusiasts! You can prepare the pudding base up to 24 hours in advance, allowing flavors to meld deliciously together. To do this, make the pudding and layer it with vanilla wafers and sliced bananas, then cover with plastic wrap and refrigerate. For optimal freshness, add banana slices just before serving to prevent browning. Additionally, the assembled pudding will keep well in the refrigerator for up to 3 days without losing its creamy texture. When ready to enjoy, simply garnish with crushed vanilla wafers, and you’ll have a comforting, crowd-pleasing dessert that feels like a warm hug on a busy weeknight!
How to Store and Freeze Homemade Banana Pudding
Fridge: Store your homemade banana pudding tightly covered in the refrigerator for up to 4 days. This ensures that it remains fresh and delicious for the next serving.
Freezer: Freezing is not recommended as it alters the texture of the pudding, causing the creamy layers to separate and the wafers to turn soggy.
Reheating: If you’ve served leftovers, simply enjoy them cold. There’s no need to reheat as the dessert is best served chilled for the ultimate flavor experience.
Serving Freshness: For optimal taste and presentation, consider adding fresh banana slices just before serving. This keeps your homemade banana pudding looking and tasting great!
Expert Tips for Homemade Banana Pudding
- Cool Before Layering: Allow the pudding to cool sufficiently before layering to maintain the crunch of the vanilla wafers, enhancing the overall texture.
- Banana Freshness: Add banana slices right before serving to prevent browning, ensuring a fresh appearance in your homemade banana pudding.
- Egg Tempering Technique: Whisk constantly while tempering the eggs to avoid scrambling; this ensures a smooth, creamy pudding without lumps.
- Thickening Issues: If your pudding isn’t thickening, gently reheat and whisk in a mixture of flour and cold milk. This can help rescue the consistency of your dessert.
- Layering Precision: When layering, aim for even distribution of wafers, bananas, and pudding for a beautiful presentation and balanced flavors.
Homemade Banana Pudding Recipe FAQs
What type of bananas should I use for homemade banana pudding?
Absolutely! For the best flavor and texture, use 4 fresh, ripe bananas that are slightly speckled. Overripe bananas with dark spots are ideal as they release more natural sweetness and enhance the overall taste of your homemade banana pudding.
How long can I store leftover homemade banana pudding?
Very well! You can store your homemade banana pudding in the refrigerator, tightly covered, for up to 4 days. This keeps it fresh while allowing the flavors to meld beautifully. Just a tip: be sure to add banana slices just before serving to ensure they stay looking vibrant and tasty!
Can I freeze homemade banana pudding?
Unfortunately, freezing is not recommended for homemade banana pudding, as it alters the texture significantly. The creamy layers may separate, and the vanilla wafers will lose their delightful crunch, becoming mushy. It’s best enjoyed fresh or kept chilled in the fridge!
What can I do if my pudding doesn’t thicken properly?
No worries! If your pudding isn’t thickening as expected, gently reheat it on low heat while whisking continuously. Prepare a mixture of 2 tablespoons of flour and 2 tablespoons of cold milk in a small bowl, then whisk it into the warm pudding. Cook for an additional 2-3 minutes until it thickens. Keep stirring, and you’ll have a luscious pudding in no time!
How should I serve homemade banana pudding for the best presentation?
I recommend serving your homemade banana pudding chilled for the ultimate flavor experience! Before serving, crush remaining vanilla wafers and sprinkle them on top for a delightful crunch. You can also add fresh banana slices on top right before serving to enhance its appeal and prevent browning. Enjoy your delicious creation!
Is homemade banana pudding suitable for dietary restrictions?
Absolutely! You can make substitutions to accommodate different dietary needs. For a non-dairy option, use almond milk or coconut milk instead of regular milk. If you’re looking to reduce sugar, try substituting white sugar with brown sugar or honey for a deeper flavor while being gentle on the waistline!
Irresistibly Creamy Homemade Banana Pudding for All Occasions
Ingredients
Equipment
Method
- Whisk together the sugar, flour, and salt in a medium saucepan.
- Gradually whisk in the milk while heating on medium until thick and bubbly.
- Lower heat and simmer for 2 minutes, stirring frequently.
- Whisk beaten eggs with a cup of hot pudding mixture to temper the eggs.
- Return the tempered egg mixture to the pudding base, cooking on low until gentle boil.
- Stir in vanilla, then let cool for 15 minutes.
- Layer 25 vanilla wafers, half the bananas, and half the pudding in a square pan.
- Repeat layers and finish with pudding.
- Cover and refrigerate for at least 4 hours or overnight.
- Before serving, crush remaining wafers and sprinkle on top.
Leave a Reply