
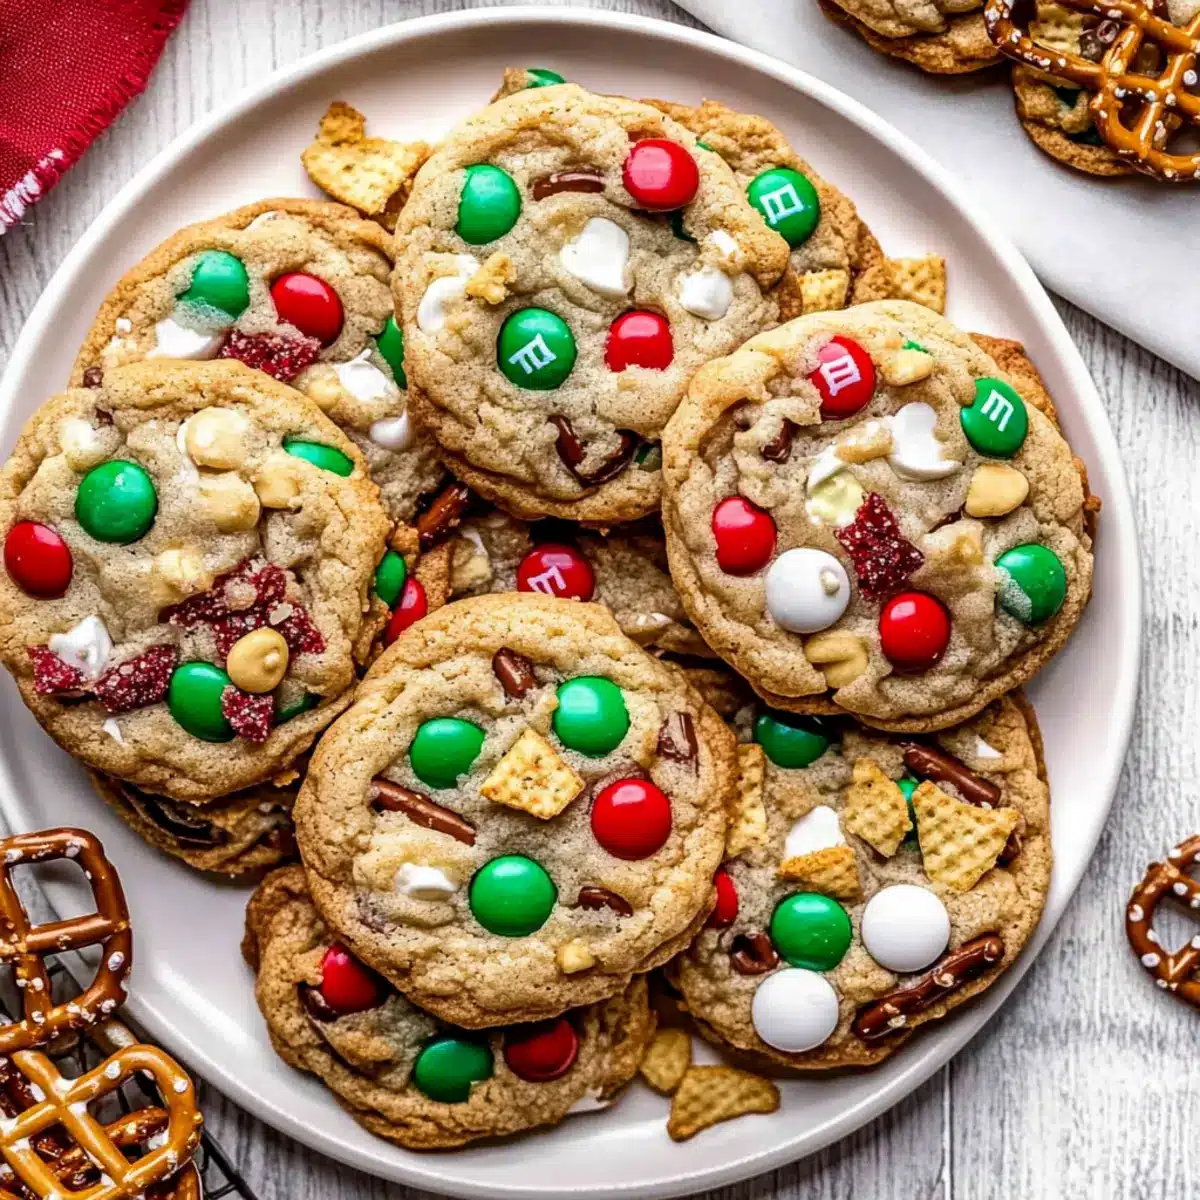
As I watched the first snowflakes fall, I felt that familiar rush of holiday cheer wash over me—a signal it was time to bake! This year, I’m excited to share my Sweet and Salty Christmas Kitchen Sink Cookies, a delightful concoction filled with unexpected crunch from pretzels and potato chips, and a splash of color from festive M&M’s. These cookies are the epitome of holiday fun; not only do they offer a perfect balance of sweet and salty, but they come together in just 30 minutes! They’re ideal for last-minute gatherings or those cozy nights at home. You can easily customize the mix-ins, ensuring they are as unique as your holiday spirit! So, what special twist will you add to your batch?
Why Are These Cookies a Must-Bake?
Sweet, Salty Bliss: The delightful combination of crunchy pretzels and potato chips paired with creamy white chocolate creates a delicious contrast that will leave you wanting more.
Time-Saving Treat: With just 30 minutes from mixing to baking, these cookies are perfect for those last-minute holiday parties or cozy evenings at home.
Customizable Fun: Feel free to get creative with your mix-ins! Whether you prefer peanut butter M&M’s or a sprinkle of butterscotch chips, you can tailor this recipe to match your taste.
Crowd-Pleasing Delight: These cookies are sure to impress at any gathering, making them the ideal choice for cookie exchanges or festive get-togethers.
Easy Cleanup: With just one bowl required for mixing, you’ll enjoy less mess in the kitchen, allowing you to focus on the joy of baking—and sharing! For even more festive inspiration, try pairing these cookies with my delightful Christmas Gooey Butter or serving them alongside festive drinks.
Christmas Kitchen Sink Cookies Ingredients
• Ready to create these joyful treats?
For the Batter
- Salted Butter – Provides richness and moisture; swap for unsalted if preferred.
- Light Brown Sugar – Adds sweetness and a chewy texture; dark brown sugar can deepen flavor.
- Granulated Sugar – Offers sweetness and structure; can be reduced or replaced with a sugar alternative.
- Egg Yolks – Enhance moisture and richness; using whole eggs yields a different texture.
- Vanilla Bean Paste/Extract – Adds flavor depth; consider almond extract for a unique touch.
- All-Purpose Flour – Supplies structure; gluten-free flour works as a substitute for a gluten-free cookie.
- Baking Powder/Baking Soda – Essential leavening agents; do not substitute one for the other directly.
- Salt – Balances sweetness; a critical component, so don’t skip it.
For the Mix-Ins
- M&M’s – These colorful candies add fun and sweetness; any chocolate candy can work instead.
- White Chocolate Chips – Provide creaminess and sweetness; feel free to swap with dark or milk chocolate chips for variety.
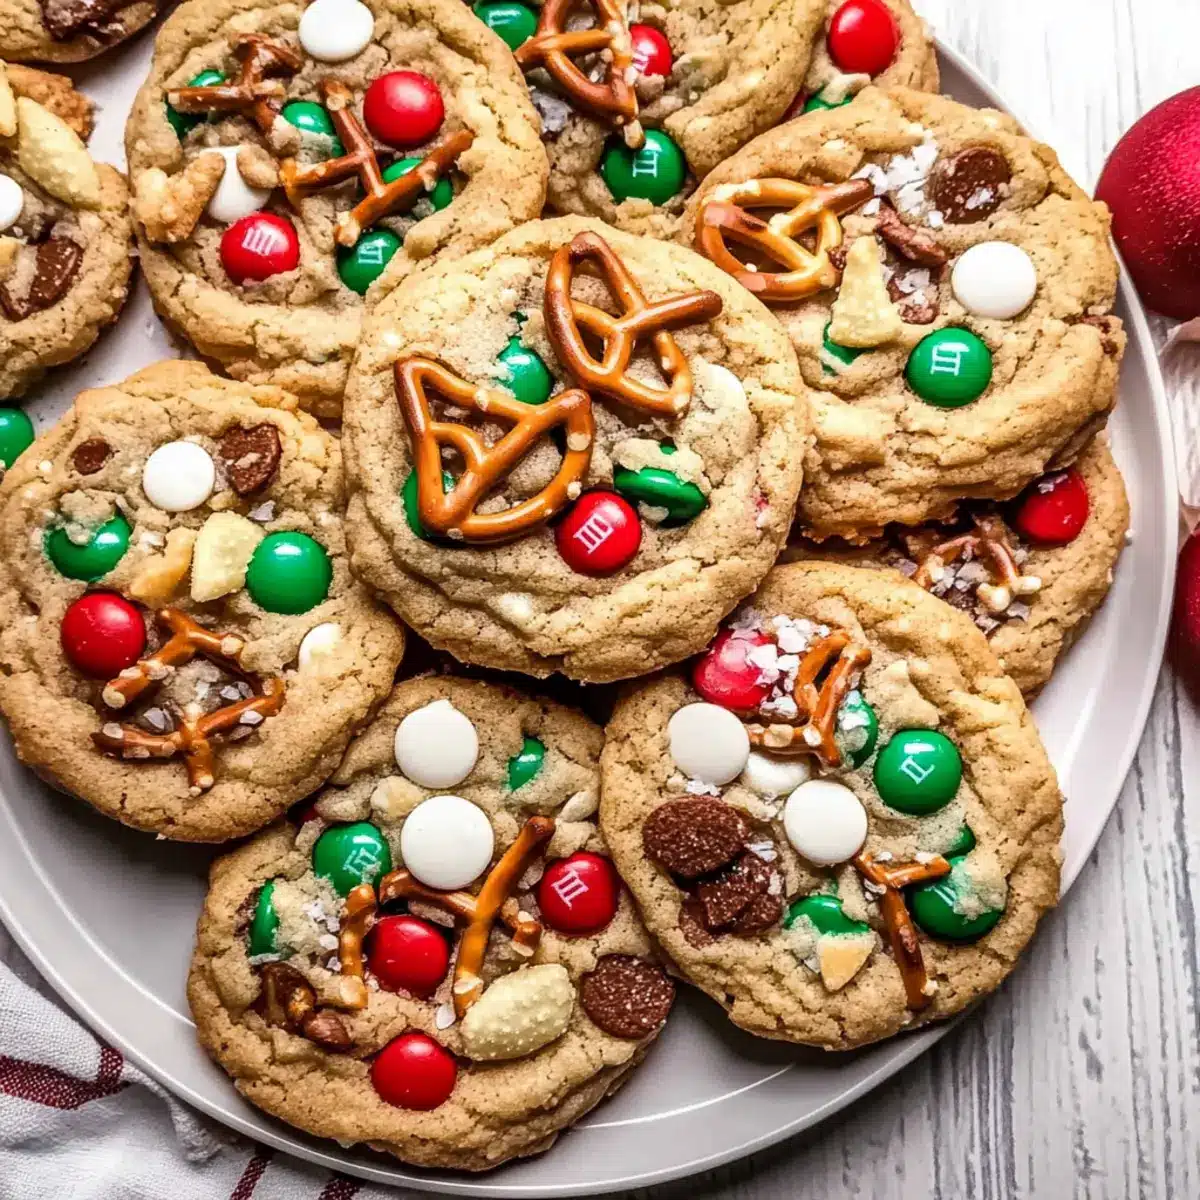
- Pretzel Pieces – Introduce a crunchy, salty contrast; crushed potato chips can be a fun alternative.
- Potato Chip Pieces – Add an extra dimension of crunch; tortilla chips are a suitable substitute.
- Sprinkles (Red and Green Jimmies) – Bring festive decoration; omit or choose nonpareil sprinkles if you like.
Step‑by‑Step Instructions for Christmas Kitchen Sink Cookies
Step 1: Preheat and Prepare
Begin by preheating your oven to 350°F (180°C). While it’s warming up, line two baking sheets with parchment paper to prevent sticking and ensure easy cleanup. This small preparation step will help you stay organized as you whip up your delightful Christmas Kitchen Sink Cookies.
Step 2: Cream Butter and Sugars
In a large mixing bowl, combine your softened salted butter, light brown sugar, and granulated sugar. Using an electric mixer, beat the mixture on medium speed for about 2 minutes until it becomes light and fluffy. This step is key to achieving the rich texture that pairs perfectly with the crunchy mix-ins in your cookies.
Step 3: Add Egg Yolks and Vanilla
Next, mix in the egg yolks and vanilla bean paste or extract, continuing to beat the mixture for another 2 minutes. You’ll notice the batter turning pale and fluffy; this is a sign that you’re creating a wonderful base for your Christmas Kitchen Sink Cookies.
Step 4: Combine Dry Ingredients
Gently add your all-purpose flour, baking powder, baking soda, and salt into the wet mixture. Using a spatula, mix until everything is just combined—be careful not to overmix, as you want to keep your cookies tender and soft.
Step 5: Fold in the Flavor
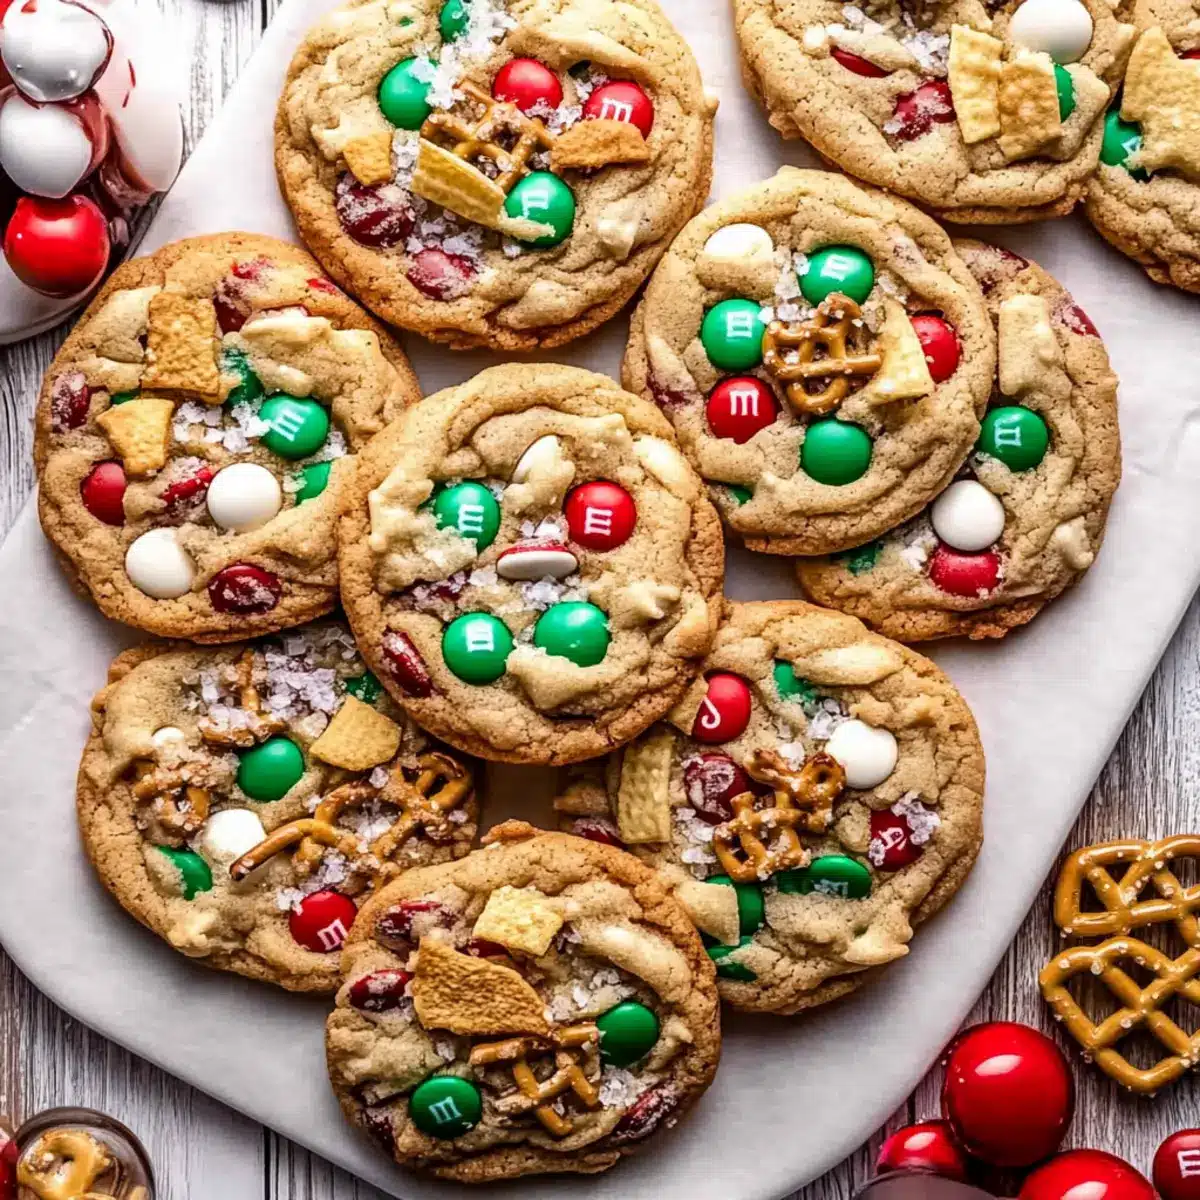
Now it’s time to bring your cookies to life! Fold in the colorful M&M’s, creamy white chocolate chips, pretzel pieces, potato chips, and festive sprinkles with a spatula. Ensure that all the tasty treasures are evenly distributed throughout the dough to create a marvelous medley of flavors and textures in each Christmas Kitchen Sink Cookie.
Step 6: Shape the Cookies
Using a cookie scoop or your hands, scoop out about 1.5 tablespoons of dough and roll them into balls. Place each dough ball 2 inches apart on the prepared baking sheets. This spacing allows your cookies to spread perfectly while baking, ensuring they cook evenly and maintain their delightful shape.
Step 7: Optional Topping
For that extra festive touch, sprinkle a few additional mix-ins on top of each cookie dough ball. This visual enhancement not only makes your cookies more appealing but also gives a hint of the delightful flavors awaiting inside.
Step 8: Bake to Perfection
Place your baking sheets in the preheated oven and bake for 10 to 12 minutes. For chewy centers, aim for 10 minutes, while for crisper edges, go for the full 12 minutes. Keep a close eye on them—the cookies should be golden brown with slightly soft centers upon emerging from the oven.
Step 9: Cooling Time
Once baked, allow the cookies to cool on the sheets for about 5 minutes. This helps them set before you transfer them to a wire cooling rack, where they can cool for an additional 10 minutes. Watching them cool is a wonderful wait as the delicious aroma fills the air!
Expert Tips for the Best Christmas Kitchen Sink Cookies
-
Measure Flour Accurately: Properly measuring flour is crucial to avoid dense cookies. Spoon the flour into your measuring cup and level it off for best results.
-
Customize Your Mix-Ins: Experiment with different mix-ins like nuts or dried fruits to create your own signature twist on Christmas Kitchen Sink Cookies.
-
Don’t Overmix: Be gentle when combining dry ingredients with the wet mixture. Overmixing can lead to tough cookies instead of the soft, chewy texture everyone loves.
-
Watch Baking Time: Keep an eye on your cookies in the oven. Remove them at the right moment for soft and chewy centers; they’re perfect when golden with a slightly soft touch in the middle.
-
Cool on the Baking Sheet: Allow cookies to set on the baking sheets for 5 minutes before transferring to a wire rack. This prevents them from breaking apart while still warm.
Christmas Kitchen Sink Cookies Variations
Feel free to explore these fun ways to customize your cookies and make them truly your own!
- Dairy-Free: Substitute butter with coconut oil and use dairy-free chocolate chips for a deliciously creamy twist.
- Nutty Crunch: Swap potato chips for chopped nuts like pecans or walnuts to add a delightful crunch and flavor.
- Chocolate Lovers: Replace white chocolate chips with dark chocolate or butterscotch for deeper, richer sweetness.
- Spicy Kick: Add a dash of cinnamon or cayenne pepper to the cookie dough for a warm, spicy surprise in every bite.
- Festive Flair: Incorporate seasonal spices like nutmeg and ginger to enhance the holiday spirit in your cookies.
- S’mores Twist: Use graham cracker crumbs instead of flour and add mini marshmallows for a campfire-inspired variation.
- Gluten-Free: Swap all-purpose flour with a gluten-free flour mix to enjoy these cookies without the gluten.
- Mix and Match: Use an assortment of sweet and salty snacks—think trail mix-style with pretzels, crushed popcorn, or caramel bits—to make these cookies uniquely yours!
For more festive ideas, why not check out my Savory Christmas Cranberry or indulge your sweet tooth with Christmas Oreos Festive? There are endless possibilities for joyful baking this holiday season!
What to Serve with Christmas Kitchen Sink Cookies?
These delightful treats are the perfect centerpiece for your festive gatherings and can be accompanied by an array of delightful sides and beverages.
-
Classic Glass of Milk: A timeless pairing that enhances the sweetness of your cookies while balancing the salty crunch.
-
Festive Hot Cocoa: The rich, chocolatey flavor of hot cocoa complements the sweet and salty notes, creating a cozy treat for the holidays.
-
Creamy Vanilla Ice Cream: A scoop of vanilla ice cream on the side adds a creamy texture that pairs beautifully with the chewy cookies.
-
Fruit Platter: A colorful assortment of fresh fruits not only adds a refreshing contrast but also brings a bright splash of color to your dessert table.
-
Hot Apple Cider: The warm spices in apple cider offer a comforting flavor profile that harmonizes perfectly with the festive cookie experience.
-
Peppermint Bark: This minty chocolate treat can serve as a refreshing palate cleanser between bites of your rich, sweet cookies.
-
Nutty Snack Mix: A crunchy snack mix provides an additional salty component that aligns nicely with the cookie’s flavors.
-
Chocolate-Dipped Pretzels: The salty and sweet combination of chocolate-dipped pretzels mirrors the essence of your cookies, creating a delightful duo.
These pairings not only elevate your cookie experience but also create a joyful atmosphere perfect for holiday celebrations. Enjoy every bite!
Storage Tips for Christmas Kitchen Sink Cookies
Airtight Container: Store cookies in an airtight container at room temperature for up to 3 days to maintain their soft texture and delightful crunch.
Fridge: If you want to keep your cookies fresh for longer, store them in the refrigerator for up to a week. Just ensure they’re well wrapped to avoid drying out.
Freezer: For longer storage, these Christmas Kitchen Sink Cookies can be frozen for up to 2 months. Seal them in a freezer-safe bag, removing as much air as possible.
Reheating: To enjoy them warm, simply pop the cookies in the microwave for 10-15 seconds. They’ll feel as fresh as when you first baked them!
Make Ahead Options
These Christmas Kitchen Sink Cookies are perfect for busy home cooks looking to save time during the festive season! You can prepare the cookie dough up to 3 days in advance and store it in the refrigerator. Simply make the dough as instructed, scoop it into balls, and line them on a baking sheet. Cover with plastic wrap and refrigerate. When you’re ready to bake, just preheat your oven, place the chilled dough onto a baking sheet, and bake as directed. For longer storage, the dough can be frozen for up to 2 weeks; just let it thaw in the fridge overnight before baking. This way, you’ll enjoy warm, freshly baked cookies with minimal effort, just as delicious as if you made them on the spot!

Christmas Kitchen Sink Cookies Recipe FAQs
What type of butter should I use?
Absolutely! You can use either salted or unsalted butter in the Christmas Kitchen Sink Cookies. Salted butter adds a nice richness, but if you choose unsalted, just adjust the salt level in the recipe slightly to balance the sweetness.
How should I store leftover cookies?
For optimal freshness, store your cookies in an airtight container at room temperature for up to 3 days. If you’d like to keep them longer, you can refrigerate them for about a week—just make sure they’re well-wrapped to prevent drying out.
Can I freeze the cookie dough?
Yes, you can! To freeze the cookie dough, scoop it into balls and arrange them on a baking sheet lined with parchment paper. Freeze until solid, then transfer the dough balls to a freezer-safe bag. They can be stored for up to 3 months. When you’re ready to bake, simply let the dough balls thaw for a bit before placing them on the baking sheet and proceeding with the baking instructions.
What if the cookies turn out too dense?
If your Christmas Kitchen Sink Cookies are dense, it’s often due to flour measurement. Make sure to spoon the flour into your measuring cup and level it off for accuracy. Avoid packing flour down, as that can lead to excess and, consequently, denser cookies. Additionally, be careful not to overmix the batter once the dry ingredients are added!
Are there any dietary considerations for these cookies?
While these cookies are generally family-friendly, if you’re concerned about allergies, be mindful of common ones like gluten (in flour) and dairy (in butter and chocolate). You can opt for gluten-free flour and dairy-free chocolate chips, making them a delightful treat for a broader range of diets. Do keep an eye on mix-ins like nuts, especially if you’re sharing cookies with guests!
How long do these cookies last if I freeze them?
When you freeze Christmas Kitchen Sink Cookies, they can last up to 3 months! Ensure they are well-sealed in a freezer-safe container or bag to maintain their delicious flavor and texture. When you’re ready for a sweet treat, just let them thaw, and you can even warm them slightly in the microwave for that freshly baked feel!
Irresistible Christmas Kitchen Sink Cookies for Holiday Joy
Ingredients
Equipment
Method
- Preheat your oven to 350°F (180°C) and line two baking sheets with parchment paper.
- In a large mixing bowl, cream the salted butter, light brown sugar, and granulated sugar on medium speed for about 2 minutes until light and fluffy.
- Mix in the egg yolks and vanilla bean paste or extract, beating for another 2 minutes until pale and fluffy.
- Gently add the all-purpose flour, baking powder, baking soda, and salt, mixing until just combined.
- Fold in the M&M's, white chocolate chips, pretzel pieces, potato chips, and sprinkles until evenly distributed.
- Scoop out about 1.5 tablespoons of dough, roll into balls, and place 2 inches apart on the prepared baking sheets.
- Optional: Sprinkle additional mix-ins on top of each cookie dough ball for a festive touch.
- Bake for 10 to 12 minutes until golden brown with slightly soft centers.
- Allow cookies to cool on the baking sheets for about 5 minutes before transferring to a wire rack for an additional 10 minutes.
Leave a Reply