
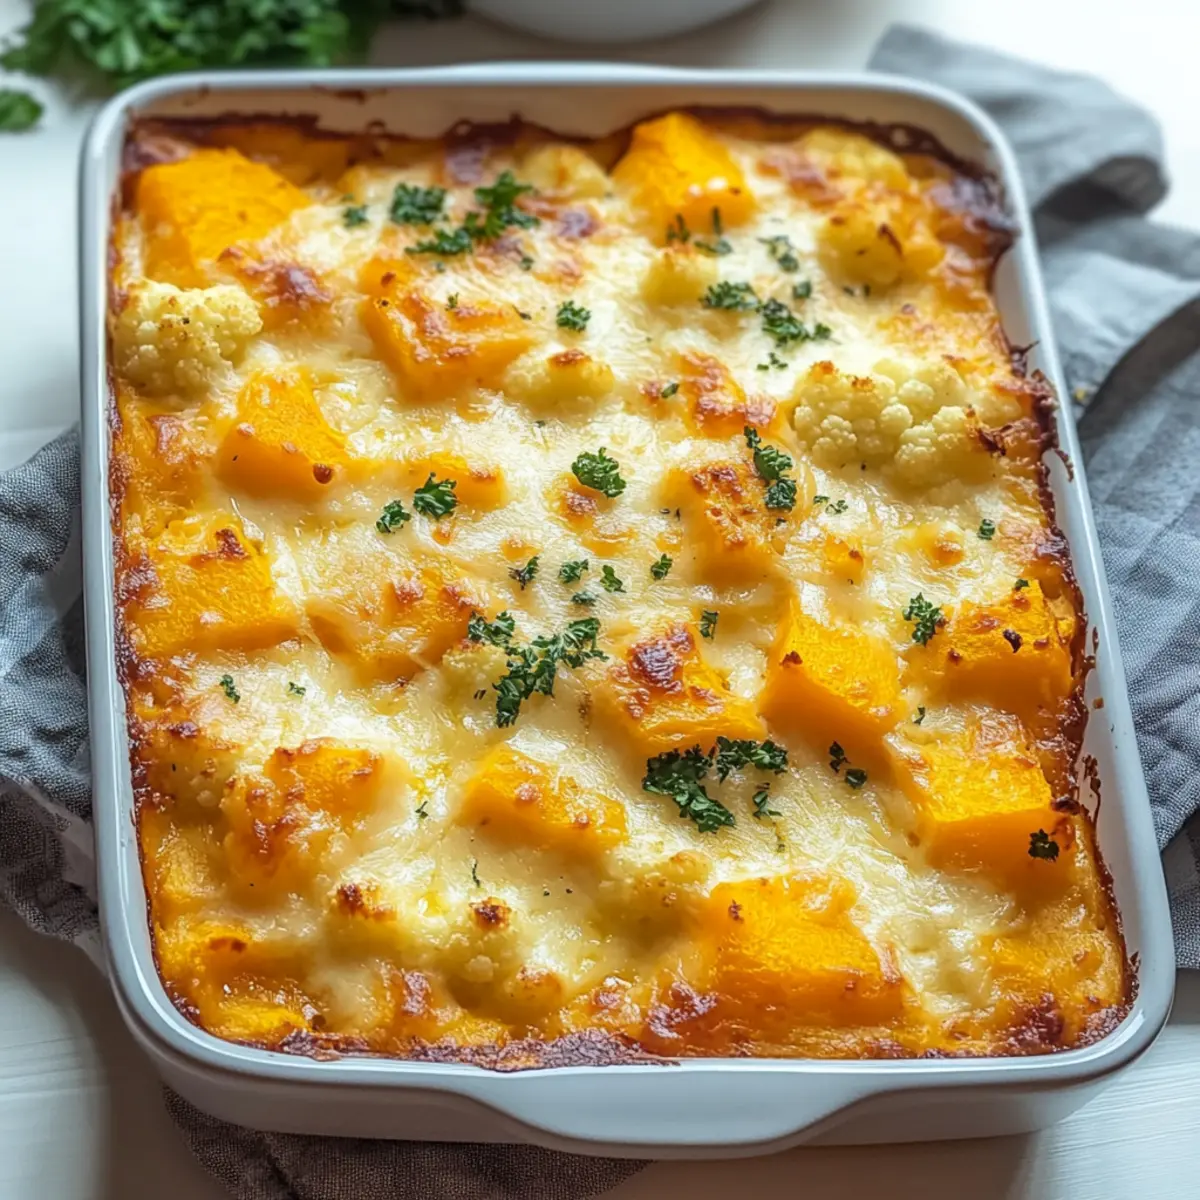
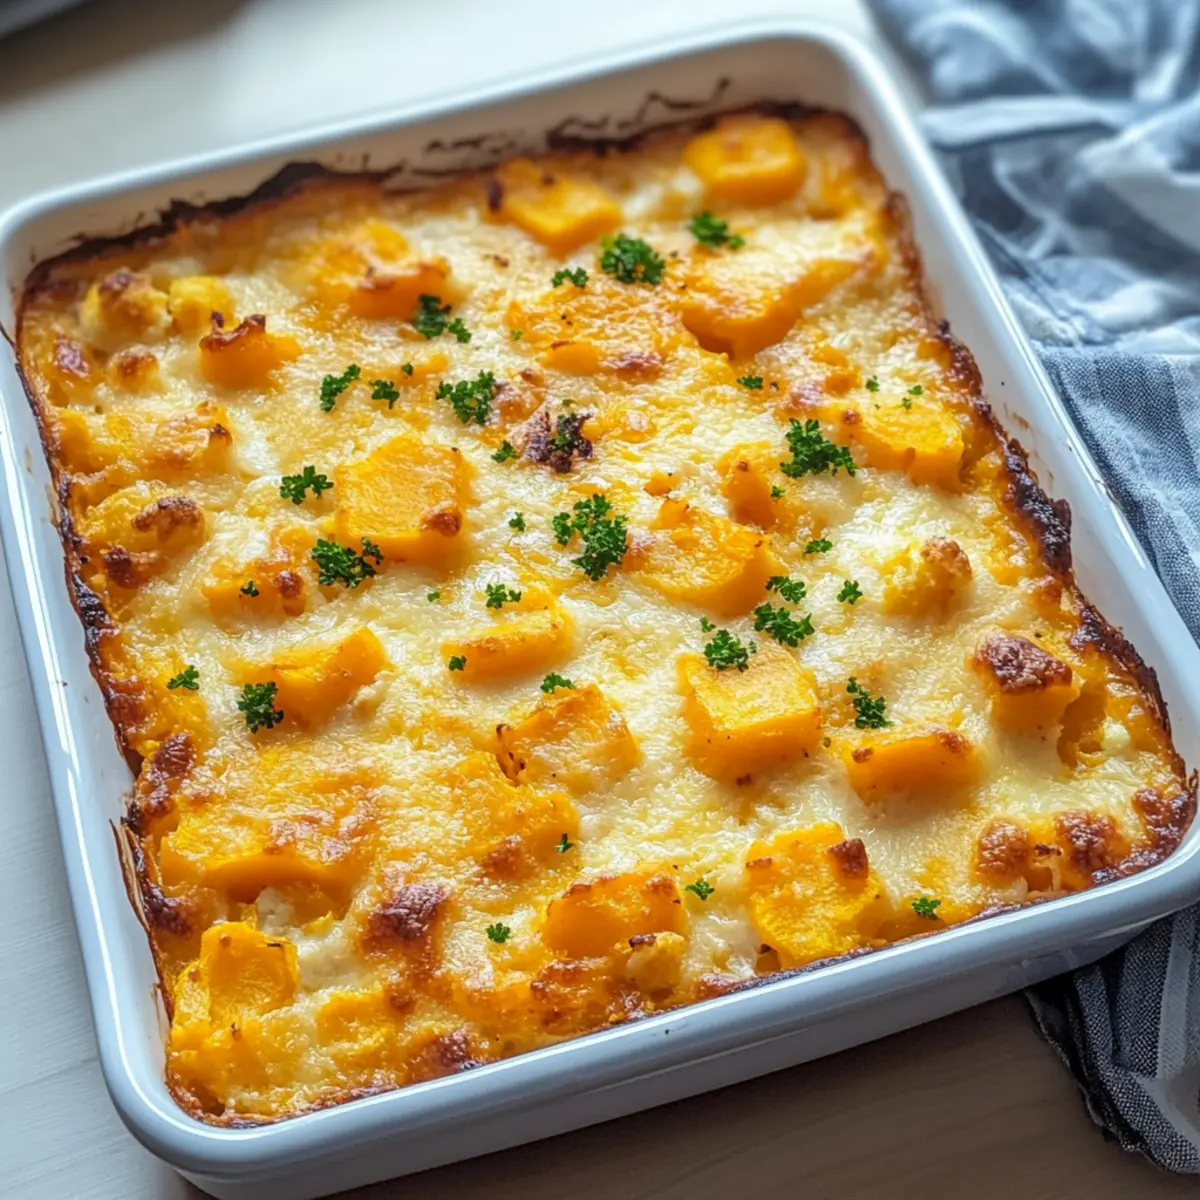
As the leaves turn golden and the air grows crisp, there’s nothing quite like the embrace of a heartfelt dish. This Easy Butternut Squash Casserole is my go-to for fall gatherings or cozy weeknights, where creamy textures and cheesy tops create a warm hug for the soul. Loaded with tender butternut squash and cauliflower, it transforms simple ingredients into a comforting masterpiece that families love. The best part? It’s quick to prepare and makes delightful leftovers that only get better with time. Whether you’re seeking a vegetarian side or a dish to impress at your next holiday meal, this casserole is sure to deliver warmth and satisfaction. Ready to dive into this deliciousness? Let’s get cooking!
Why is this Butternut Squash Casserole special?
Comforting and creamy, this casserole wraps you in warmth with each bite, making it perfect for chilly evenings. Versatile ingredients let you easily swap in favorites like sweet potatoes or even a dairy-free option using nutritional yeast. Effortless to prepare, it takes just minutes to prep and is ideal for both weeknight dinners and festive gatherings. Family-friendly, this dish appeals to both adults and kids, guaranteeing everyone will ask for seconds. And let’s not forget, it’s the ultimate make-ahead meal, ensuring you can enjoy more time with loved ones, just like with a delicious Stuffed Shrimp Casserole or a festive Southern Maple Casserole.
Butternut Squash Casserole Ingredients
• Discover the delightful elements that make this dish shine!
For the Casserole
- Cauliflower florets – Adds texture and nutritional value, enhancing the overall heartiness.
- Butternut squash – Provides natural sweetness; swap for sweet potatoes or pumpkin for variety.
- Diced red onions – Contributes a fragrant base flavor that elevates the dish.
For the Creamy Binder
- Parmesan cheese – Offers umami and creaminess; substitute with nutritional yeast for a dairy-free touch.
- Celery soup – Acts as the perfect creamy binder; can replace with mushroom soup or homemade cashew cream for a wholesome alternative.
For the Cheesy Topping
- Aged cheddar cheese – Enhances the casserole’s delicious cheesy top, adjust to suit your taste!
Step‑by‑Step Instructions for Butternut Squash Casserole
Step 1: Prepare the Vegetables
Begin by preheating your oven to 375°F (190°C) to ensure it’s hot and ready for the casserole. In a large mixing bowl, combine 2 cups of cauliflower florets, 2 cups of cubed butternut squash, and 1/2 cup of diced red onions. Toss the vegetables together until they are well mixed, showcasing vibrant colors and textures that will create a hearty base for your butternut squash casserole.
Step 2: Add the Creamy Elements
Pour in 1 cup of grated Parmesan cheese, followed by 1 teaspoon of sea salt and 1 teaspoon of black pepper. Stir this mixture thoroughly with a spatula, ensuring that the cheese clings to every piece of vegetable, enhancing the overall flavor. The creamy texture will start to develop, creating a deliciously rich base that will complement the sweetness of the butternut squash.
Step 3: Mix in the Binder
Now, add 1 can of celery soup to the vegetable and cheese mixture. Fold it in gently but thoroughly until everything is evenly coated. The celery soup acts as a creamy binder, bringing all the ingredients together wonderfully. You want to see a smooth consistency and a lovely blend of colors as you mix, which is essential for your final casserole’s texture.
Step 4: Transfer to Baking Dish
Carefully transfer the combined mix into a square baking dish, spreading it evenly across the bottom with a spatula or spoon. Ensure all the mixture is level to promote even cooking. The vibrant colors will create an inviting appearance in the dish, ready to transform into a comforting butternut squash casserole.
Step 5: Add the Cheesy Topping
Generously sprinkle a layer of aged cheddar cheese over the top of your casserole mixture. Make sure to cover the entire surface, allowing for a beautifully melted and browned cheese topping that promises an irresistible finish. This will provide a delicious contrast to the creamy veggies beneath it once baked.
Step 6: Bake to Perfection
Slide the baking dish into the preheated oven and bake for 25 minutes. Keep an eye on it as it cooks; you’ll know it’s ready when the cheese is bubbly and golden brown, and the vegetables are tender. Your kitchen will fill with the warm, inviting aroma of the butternut squash casserole, making it hard to resist.
Step 7: Cool and Serve
Once baked, carefully remove the dish from the oven and allow it to cool for a few minutes. This rest time helps the casserole set and makes serving easier. You’ll notice the cheese has melted beautifully and the casserole is creamy yet firm. Slice into portions and serve warm, enjoying the comforting flavors of your homemade butternut squash casserole.

Butternut Squash Casserole Variations
Feel free to personalize this delightful dish to suit your taste buds and dietary needs!
-
Sweet Potato Swap: Substitute butternut squash with sweet potatoes for a deliciously sweet twist that kids will adore.
-
Pumpkin Flavor: Use pumpkin puree instead of butternut squash for a unique fall flavor; it adds a cozy element that’s perfect for autumn gatherings.
-
Dairy-Free Delight: Replace Parmesan cheese with 3/4 cup of nutritional yeast for a creamy, umami flavor that fits a dairy-free diet beautifully.
-
Mushroom Soup Option: For a different creamy binder, swap celery soup with a rich mushroom soup that adds an earthy depth to the casserole.
-
Cashew Cream Base: Blend 1 cup of soaked cashews with 1 cup of vegetable broth to make a homemade cashew cream, resulting in a rich and wholesome alternative.
-
Add Some Heat: Spice things up by mixing in diced jalapeños or crushed red pepper for a bit of kick. This will elevate the comfort food experience to a new level.
-
Flavor Boost: Mix in spices like nutmeg or cinnamon to the vegetable mix for an aromatic warmth that perfectly complements the sweetness of the squash.
-
Cheese Variation: Experiment by mixing in other cheeses like gouda or pepper jack for an extra flavor dimension; it can make your casserole a real standout at any gathering.
For more delightful ideas, you might also love trying this delicious Stuffed Shrimp Casserole or a sweet twist with Southern Maple Casserole!
Make Ahead Options
These Easy Butternut Squash Casseroles are a fantastic choice for meal prep, allowing you to savor more time with loved ones. You can prepare all the vegetable and creamy binder components up to 24 hours in advance. Simply mix 2 cups of cauliflower florets, 2 cups of cubed butternut squash, and 1/2 cup of diced red onions with the cheese and soup ingredients, then transfer to a baking dish and refrigerate. Cover tightly to maintain freshness and prevent browning. When you’re ready to enjoy, just sprinkle aged cheddar cheese on top and bake straight from the fridge, adding an extra 5 minutes to the cooking time for perfect results! With this make-ahead option, you’ll have a delightful, comforting dish ready to serve on busy weeknights.
What to Serve with Easy Butternut Squash Casserole
As the aroma of the Easy Butternut Squash Casserole fills your kitchen, it’s time to think about delightful pairings that will elevate your meal.
- Crispy Roasted Brussels Sprouts: Their earthy flavor and crunchy texture complement the creamy casserole beautifully, adding a wonderful contrast.
- Tangy Green Salad: A fresh, crisp salad with a zesty vinaigrette cuts through the richness of the casserole, keeping your palate refreshed.
- Savory Herb Bread: A warm loaf, filled with herbs, completes the cozy feel, perfect for sopping up the creamy sauce.
- Stuffed Acorn Squash: This dish mirrors the flavors while introducing a different presentation, making your table look beautiful and festive.
- Balsamic Glazed Carrots: Sweet and tangy, these vibrant veggies pair splendidly with the butternut squash, creating a colorful plate of comfort.
- Warm Apple Crisp: End with a sweet note! This dessert’s warm spices echo the flavors of fall, making for a perfect autumn-inspired meal.
- Chardonnay: A glass of chilled Chardonnay brings a fruity freshness, enhancing the sweet notes of the casserole, making each bite even more delightful.
Storage Tips for Butternut Squash Casserole
- Fridge: Store leftovers in an airtight container in the refrigerator for up to 3 days. The flavors will deepen, making it a perfect dish to enjoy again!
- Freezer: If you’d like to save some for later, you can freeze the butternut squash casserole for up to a month. Just wrap tightly to prevent freezer burn.
- Reheating: When ready to enjoy, reheat in the oven at 350°F (175°C) until heated through, usually about 20-25 minutes. This helps maintain the creamy texture and cheesy top!
- Cool Before Storing: Ensure the casserole has cooled completely before storing to prevent condensation, which can affect the texture and flavor.
Expert Tips for Butternut Squash Casserole
- Watch the Cooking Time: Ensure your butternut squash is tender by checking with a fork. Cooking times can vary based on squash size.
- Optimal Browning: Bake uncovered to achieve a beautifully browned and bubbly cheese layer for that perfect finish!
- Make Ahead: Prepare your casserole a day in advance; simply cover and refrigerate overnight to save time on busy evenings.
- Freezing for Future: Portion out leftovers and freeze them for meal prepping; just reheat until piping hot for later enjoyment!
- Experiment with Cheese: Feel free to mix various cheeses for different flavor profiles, making your butternut squash casserole even more delicious!

Easy Butternut Squash Casserole Recipe FAQs
What is the best way to choose ripe butternut squash?
Absolutely! When selecting butternut squash, look for ones that are firm, with a consistent tan color and a slight sheen. Avoid any that have dark spots or blemishes. The squash should feel heavy for its size, indicating it’s ripe and full of sweetness.
How should I store my leftover butternut squash casserole?
You can store your casserole in an airtight container in the refrigerator for up to 3 days. Make sure to let it cool completely before sealing, as this helps maintain optimal texture and flavor. If you’re feeling extra organized, you might consider portioning it out for easy reheating!
Can I freeze butternut squash casserole?
Absolutely! To freeze your butternut squash casserole, let it cool completely, then slice into portions. Wrap each piece tightly in plastic wrap and then in aluminum foil or place them in a freezer-safe container. It can be frozen for up to a month. When ready to enjoy, simply reheat in the oven at 350°F (175°C) until heated through, which usually takes about 20-25 minutes.
What if my butternut squash is still hard after baking?
If your squash remains hard after baking, it might need a bit more time. Cover the casserole loosely with foil, return it to the oven, and continue baking for an additional 10-15 minutes. You can also check the tenderness with a fork; it should easily pierce through the squash.
Are there any dietary considerations for pets or allergies?
Certainly! The ingredients in this butternut squash casserole are generally safe for human consumption, but be cautious as it contains dairy and gluten. If you’re serving it to someone with food allergies, you can make it dairy-free by substituting the cheeses with nutritional yeast or a plant-based alternative. As for pets, onions can be harmful to dogs, so it’s best to avoid giving them any leftovers containing this ingredient.
Creamy Butternut Squash Casserole That’s Perfect for Fall
Ingredients
Equipment
Method
- Preheat your oven to 375°F (190°C).
- In a large mixing bowl, combine 2 cups of cauliflower florets, 2 cups of cubed butternut squash, and 1/2 cup of diced red onions. Toss until well mixed.
- Pour in 1 cup of grated Parmesan cheese, 1 teaspoon of sea salt, and 1 teaspoon of black pepper. Stir thoroughly.
- Add 1 can of celery soup and fold gently until evenly coated.
- Transfer the mixture to a square baking dish, spreading it evenly.
- Sprinkle a layer of aged cheddar cheese over the top.
- Bake for 25 minutes until the cheese is bubbly and golden brown.
- Allow to cool for 5 minutes before slicing and serving warm.
Leave a Reply