
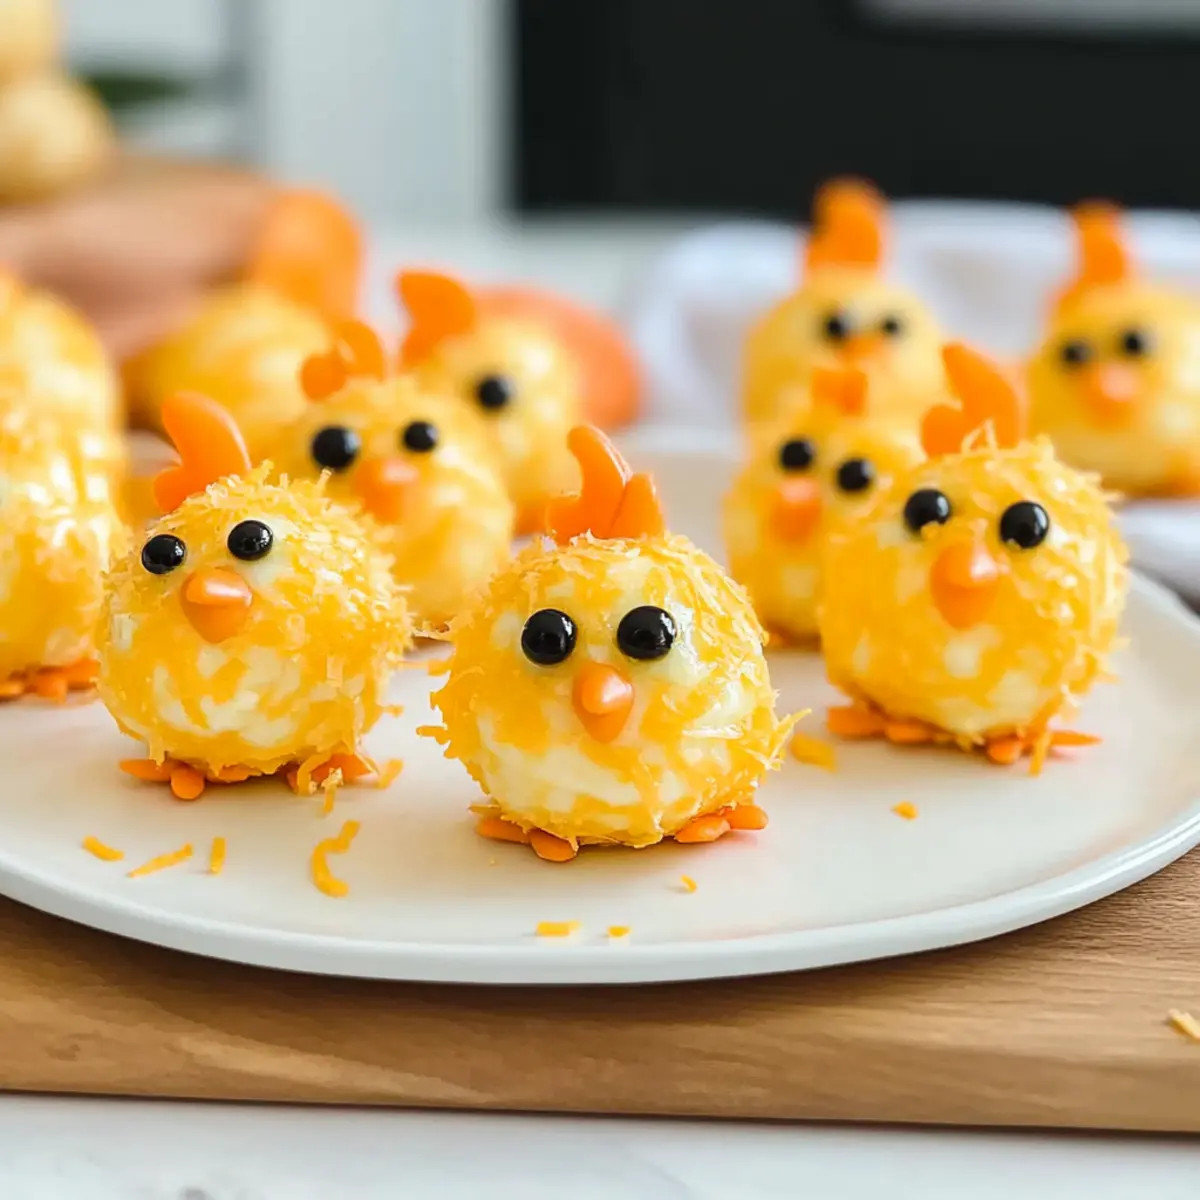
As I carefully prepared for our family’s Easter gathering, I stumbled upon a delightful surprise—Baby Chick Mini Cheese Balls! With their whimsical charm, these little treats not only steal the show but are also incredibly easy to whip up in just 20 minutes. Combining creamy cream cheese and sharp cheddar, these adorable appetizers are customizable to suit every palate, proving to be a hit for both kids and adults alike. Plus, for health-conscious friends, there’s a gluten-free option available, making it a versatile dish for any dietary preference. So, are you ready to add a sprinkle of fun and flavor to your Easter spread with these charming mini delights?
Why Are These Cheese Balls So Adorable?
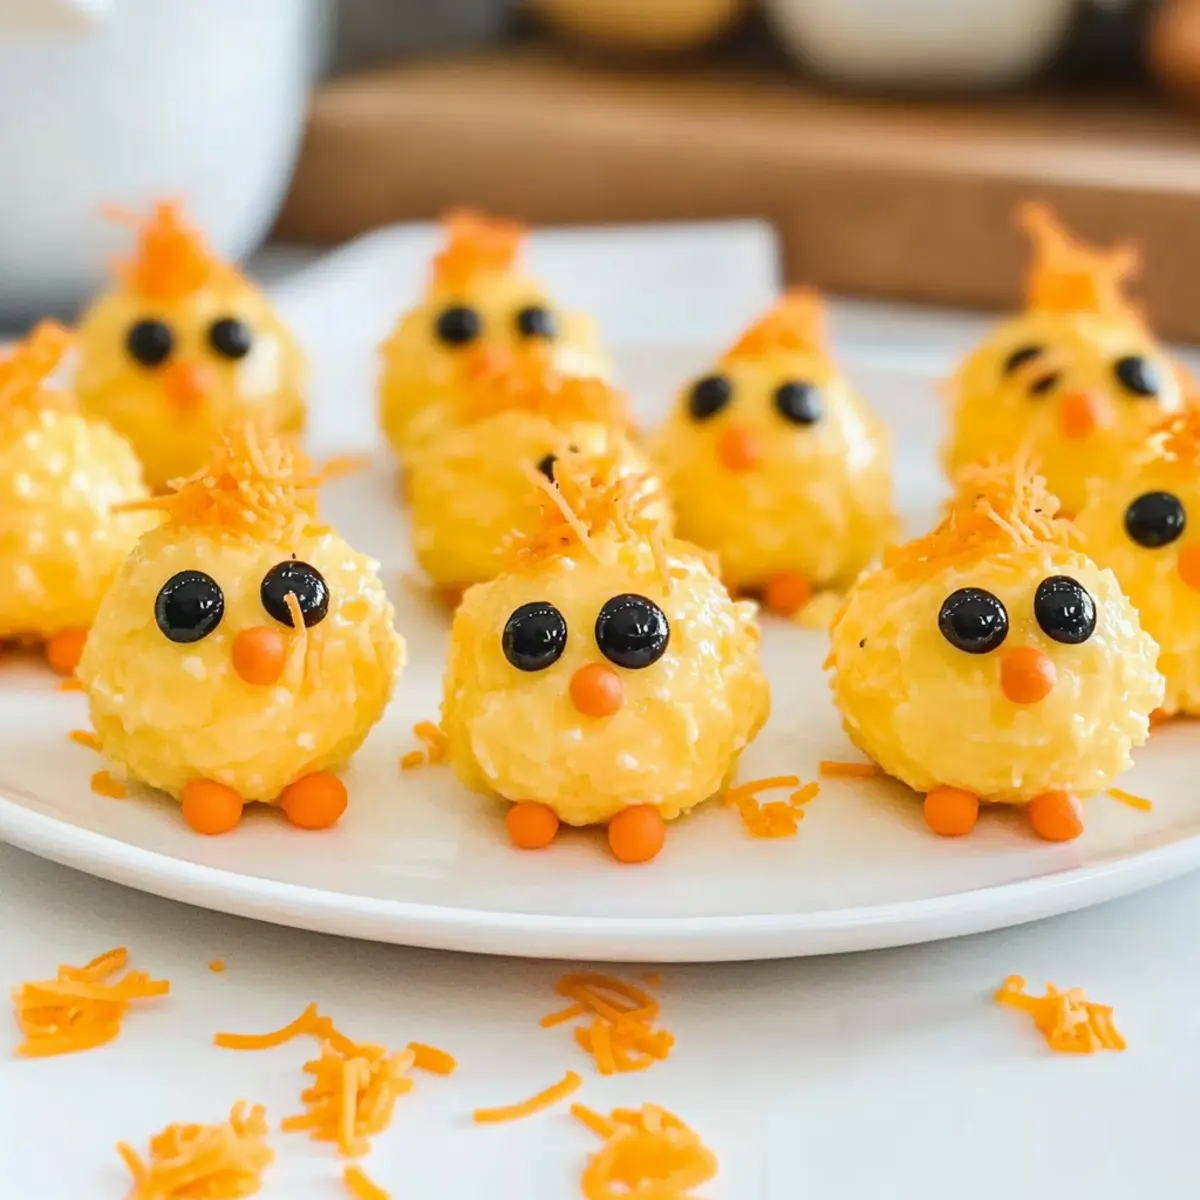
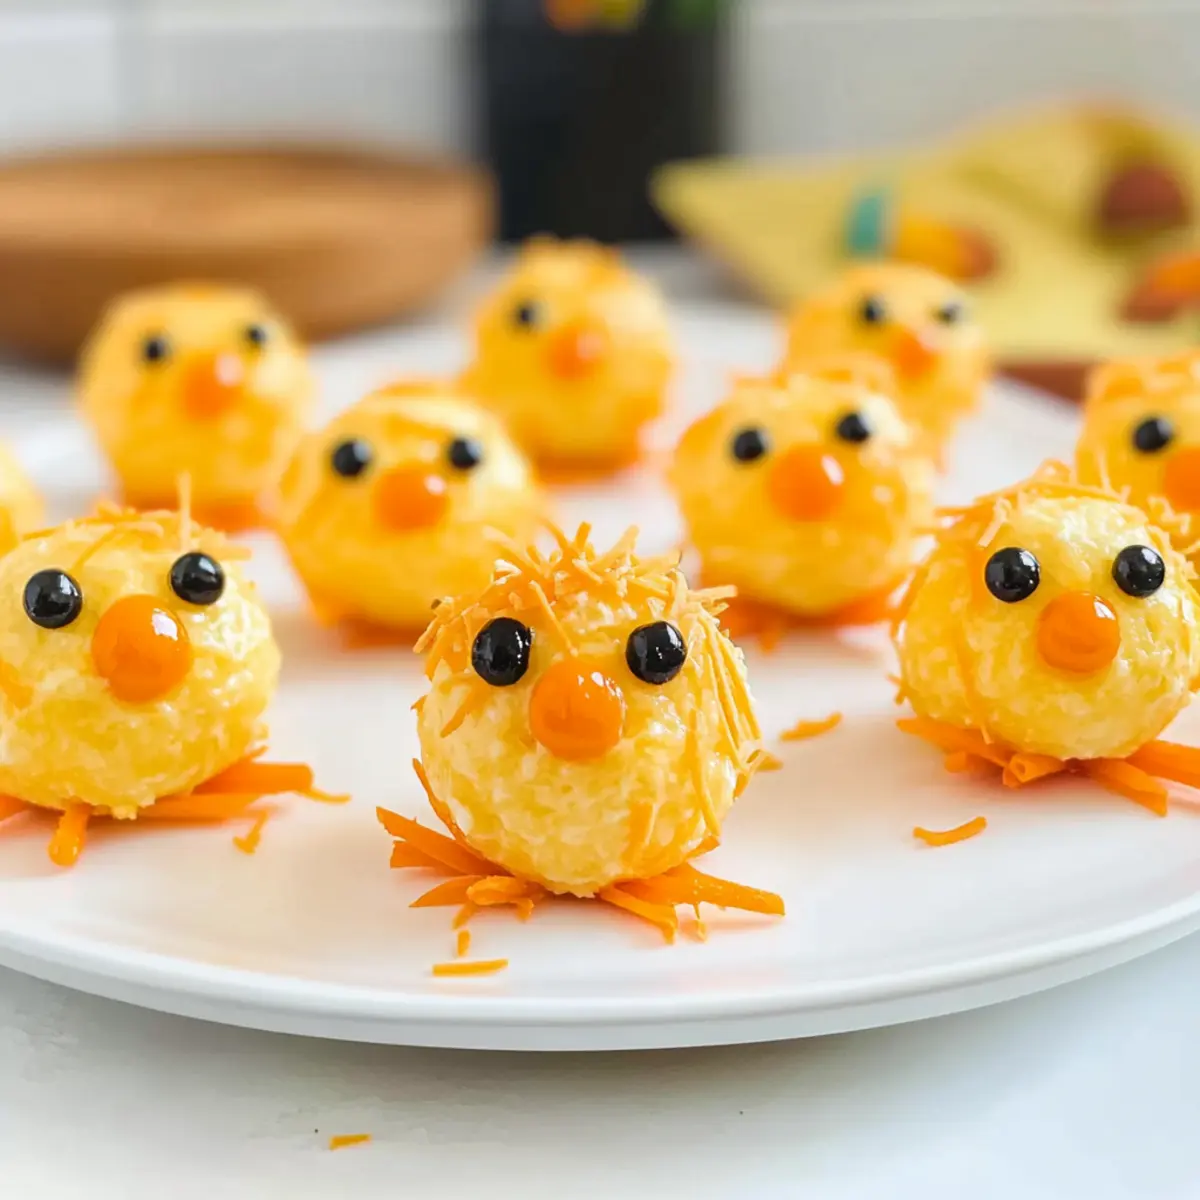
Irresistible Cuteness: Shaped like little chicks, these Baby Chick Mini Cheese Balls bring a playful touch to your Easter table.
Quick Preparation: With just 20 minutes needed, you’ll have a stunning appetizer ready in no time!
Customizable: Feel free to experiment with various cheeses or decorations to suit your taste. Check out our recipes for Mini Christmas Cheesecake or Grinch Mini Cheesecake for more creative twists!
Kid-Friendly: Kids love their fun appearance, making them a sure hit at family gatherings.
Gluten-Free Option: Easily swap out crackers for cucumber slices to cater to gluten-free guests—everyone can join in on the fun!
Crowd Pleaser: They’re not just cute; everyone will love the creamy, savory flavor that keeps them coming back for seconds!
Baby Chick Mini Cheese Balls Ingredients
For the Cheese Mixture
• Cream Cheese – the creamy base providing richness; ensure it’s softened for easy blending.
• Cheddar Cheese – adds a delightful sharpness; use finely shredded for a smoother texture.
• Worcestershire Sauce – an optional flavor enhancer that adds a layer of umami depth.
• Garlic Powder – for a savory kick; feel free to adjust based on your taste preferences.
• Onion Powder – contributes to the overall flavor profile; fresh onion can be substituted if you prefer.
For Decoration
• Carrots – use these for the feet and beak of the chicks; olives can be a fun alternative.
• Black Peppercorns – perfect for the eyes; black olives are a safer option for little ones.
For Serving
• Crackers – the ideal base for your cheese balls; swap with cucumber slices to make it gluten-free.
Enjoy crafting these Baby Chick Mini Cheese Balls for an unforgettable Easter appetizer that everyone will adore!
Step‑by‑Step Instructions for Baby Chick Mini Cheese Balls
Step 1: Prepare Cream Cheese Mixture
In a medium mixing bowl, combine 8 ounces of softened cream cheese, 1.5 cups of finely shredded cheddar cheese, 1 teaspoon of garlic powder, 1 teaspoon of onion powder, and 1 tablespoon of Worcestershire sauce. Use a hand mixer to blend these ingredients together until the mix is smooth and creamy, which should take about 2-3 minutes. This creamy base will be the heart of your Baby Chick Mini Cheese Balls.
Step 2: Shape Cheese Balls
Using a 1-inch cookie scoop, portion out the cream cheese mixture and roll each scoop into a small ball in the palms of your hands. Aim for about 20 equally sized balls to ensure uniform cooking and presentation. As you roll, help your hands lightly coat each ball to prevent sticking; they should feel firm yet soft. Lay them on a parchment-lined tray as you shape the rest.
Step 3: Roll in Cheese
Take the remaining half cup of shredded cheddar cheese and place it in a shallow dish. Gently roll each cheese ball in the cheddar, ensuring they are evenly coated for added texture and flavor. This step not only enhances the outer crunch but also adds an enticing cheesy appearance to your Baby Chick Mini Cheese Balls, making them more appealing.
Step 4: Assemble Decorations
Now it’s time to bring your adorable chicks to life! Place each cheese ball on a cracker or cucumber slice for a gluten-free option. Cut carrot slices into small shapes to create feet and beaks, and gently press black peppercorns into the cheese balls for eyes. This decorating phase should take about 10 minutes and adds the fun, whimsical touch that makes these cheese balls perfect for Easter gatherings.
Step 5: Serve
Once you’ve arranged all the Baby Chick Mini Cheese Balls, transfer them onto a large serving platter. You may choose to garnish with extra carrots or a sprinkle of fresh herbs for visual appeal. Serve immediately, allowing everyone to enjoy the tasty and playful appetizer while it’s still fresh, creamy, and delightful. These little treats are bound to be a highlight of your Easter celebration!
Baby Chick Mini Cheese Balls Variations
Get ready to elevate your Baby Chick Mini Cheese Balls with these delightful twists that will tickle your taste buds!
-
Cheese Blend: Swap cheddar for Swiss or pepper jack for a different flavor profile and added spice. You can mix and match for even more fun!
-
Spicy Kick: Add a teaspoon of hot sauce or red pepper flakes to the mixture for a zesty burst. This twist will excite those who love a bit of fire in their appetizers.
-
Nutty Texture: For extra crunch, roll your cheese balls in crushed nuts or panko breadcrumbs instead of shredded cheese. This will lend a delightful texture to each bite!
-
Veggie Decorations: Get creative with decorations using radishes or bell peppers instead of carrots. They add lovely color and different flavors to your adorable chicks!
-
Herbed Flavor: Incorporate fresh herbs like chives or parsley into the cheese mixture for a burst of freshness. This will enhance both flavor and visual appeal!
-
Gluten-Free Base: Use cucumber slices instead of crackers for a refreshing gluten-free option. They’re light, crisp, and make a perfect platter for your cheese balls.
-
Sweet Surprise: Add tiny pieces of dried fruits such as cranberries or apricots for a sweet twist. The contrast between savory and sweet will surely surprise your guests.
You can also check out our recipes for Mini Dutch Baby and Mini Creme Brulee Cheesecakes for more fun variations! Enjoy playing with these ideas to create your own unique version of these delightful appetizers!
What to Serve with Adorable Baby Chick Mini Cheese Balls?
Elevate your Easter celebration with delightful sides that harmonize beautifully with these charming appetizers.
-
Fresh Veggie Platter: A colorful array of vegetables adds a refreshing crunch. Pair with hummus or your favorite dip for a balanced bite.
-
Crispy Baked Spring Rolls: These light, flaky rolls introduce a delightful contrast to the creamy cheese balls, enhancing the overall textures on your plate.
-
Herbed Couscous Salad: Light and fluffy couscous, mixed with fresh herbs and lemon juice, provides a zesty complement to the savory cheese balls.
-
Mini Quiches: Their fluffy texture and rich flavor pair perfectly with the playful cheese chicks, creating a hearty option for your guests.
-
Light Fruit Salad: Sweet summer fruits bring a refreshing sweetness that balances the richness of the cheese balls, keeping the palate satisfied.
-
Sparkling Lemonade: This bubbly drink offers a zesty and refreshing contrast, making it perfect for family gatherings and seasonal celebrations.
-
Chocolate-Covered Strawberries: End your meal on a sweet note with these delightful treats, offering a playful dessert that everyone will adore.
These delicious sides and refreshments work together to create a festive atmosphere, ensuring your guests leave with smiles on their faces!
How to Store and Freeze Baby Chick Mini Cheese Balls
-
Fridge: Store your Baby Chick Mini Cheese Balls in an airtight container for up to 3 days. Keep them away from moisture to maintain their creamy texture.
-
Freezer: These cheese balls can be frozen for up to 2 months without the decorations. Wrap each ball tightly in plastic wrap, then place them in a freezer-safe bag.
-
Thawing: When ready to enjoy, remove the desired number of cheese balls from the freezer and place them in the fridge to thaw overnight. Decorate just before serving for the best presentation.
-
Reheating: These cheese balls are best served cold or at room temperature. If you prefer them warm, gently microwave for about 10-15 seconds, ensuring they don’t get too soft.
Make Ahead Options
These Baby Chick Mini Cheese Balls are perfect for meal prep enthusiasts! You can prepare the cheese mixture up to 24 hours in advance. Simply combine the softened cream cheese, shredded cheddar, and seasonings, then refrigerate it in an airtight container. Shape the cheese balls just before serving (to maintain their form), and roll them in cheese for that delightful crunch. Decorate with carrot feet and peppercorn eyes right before placing them on crackers, ensuring they look fresh and vibrant. This way, you’ll save time on busy mornings or last-minute party preparations while still enjoying these adorable and delicious appetizers!
Expert Tips for Baby Chick Mini Cheese Balls
-
Soften Cream Cheese: Ensure your cream cheese is softened to room temperature for easy blending and smooth texture. Cold cream cheese will be difficult to mix.
-
Cheese Coating: Roll the cheese balls in finely shredded cheddar for a tasty crunch. Avoid large shreds, as they may not stick well or provide even coverage.
-
Chill If Necessary: If the mixture is too soft to shape, refrigerate the cream cheese mixture for up to 30 minutes. This will make it easier to form neat balls.
-
Creative Decorations: Use a variety of vegetables, such as cucumbers or bell peppers, for a colorful presentation. This enhances the visual appeal and makes your Baby Chick Mini Cheese Balls even more fun.
-
Kid-Safe Options: If serving kids, substitute peppercorns for sliced black olives for eyes. This keeps it safe and still so cute!
-
Make Ahead: Prepare your cheese balls ahead of time and store them in the refrigerator for a few hours. Just wait to add decorations until you’re ready to serve for the best presentation.
Baby Chick Mini Cheese Balls Recipe FAQs
What type of cream cheese should I use?
Absolutely! Use full-fat cream cheese for the best taste and texture in your Baby Chick Mini Cheese Balls. I recommend letting it soften at room temperature for about 30 minutes before mixing; this ensures a smooth and creamy mixture.
How should I store the Baby Chick Mini Cheese Balls?
To keep your cheese balls fresh, store them in an airtight container in the refrigerator. They’ll stay delicious for up to 3 days. Just make sure to keep them sealed to prevent moisture from affecting their creamy texture.
Can I freeze Baby Chick Mini Cheese Balls?
Yes, you can! To freeze, wrap each cheese ball tightly in plastic wrap and place them in a freezer-safe bag. They can be kept frozen for up to 2 months. When you’re ready to enjoy, thaw them in the fridge overnight, and add your decorations just before serving.
What if the cream cheese mixture is too soft to work with?
No worries! If your mixture is soft and difficult to shape, simply refrigerate it for about 30 minutes. This will help firm it up, making it much easier to form into balls. Remember, a little chill goes a long way in achieving that perfect shape!
Can I make these cheese balls gluten-free?
Very much! Just swap out the crackers for cucumber slices for a refreshing gluten-free option. This not only makes them suitable for your gluten-sensitive guests but also adds a lovely crunch that pairs beautifully with the creamy cheese.
Are there any allergy considerations with these ingredients?
Yes, be cautious with ingredients. While cream cheese and cheddar are widely enjoyed, verify allergies to dairy or any supplementary ingredients like Worcestershire sauce. If you’re serving these to kids, consider using black olives instead of peppercorns for eyes to make them a safer snack option.

Delightful Baby Chick Mini Cheese Balls for Easter Fun
Ingredients
Equipment
Method
- In a medium mixing bowl, combine 8 ounces of softened cream cheese, 1.5 cups of finely shredded cheddar cheese, 1 teaspoon of garlic powder, 1 teaspoon of onion powder, and 1 tablespoon of Worcestershire sauce. Use a hand mixer to blend these ingredients together until smooth and creamy, about 2-3 minutes.
- Using a 1-inch cookie scoop, portion out the cream cheese mixture and roll each scoop into a small ball. Aim for about 20 balls for uniformity. Lay them on a parchment-lined tray.
- Roll each cheese ball in the remaining half cup of shredded cheddar cheese until evenly coated.
- Place each cheese ball on a cracker or cucumber slice. Cut carrot slices into small shapes for feet and beaks, and press black peppercorns into the cheese balls for eyes.
- Transfer the assembled cheese balls onto a serving platter and serve immediately.
Leave a Reply