
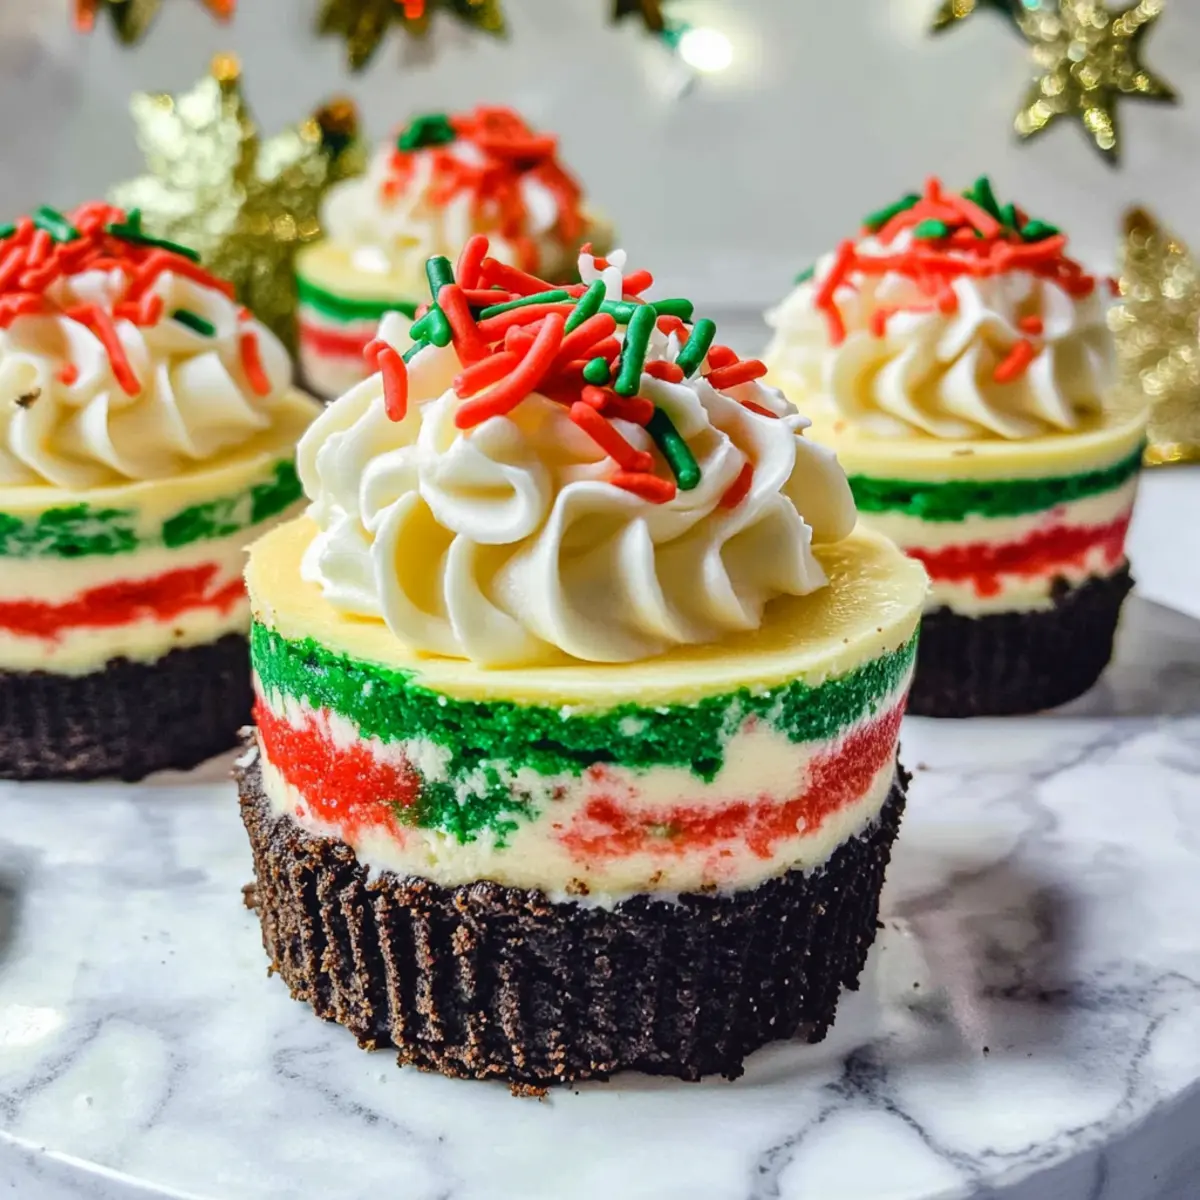
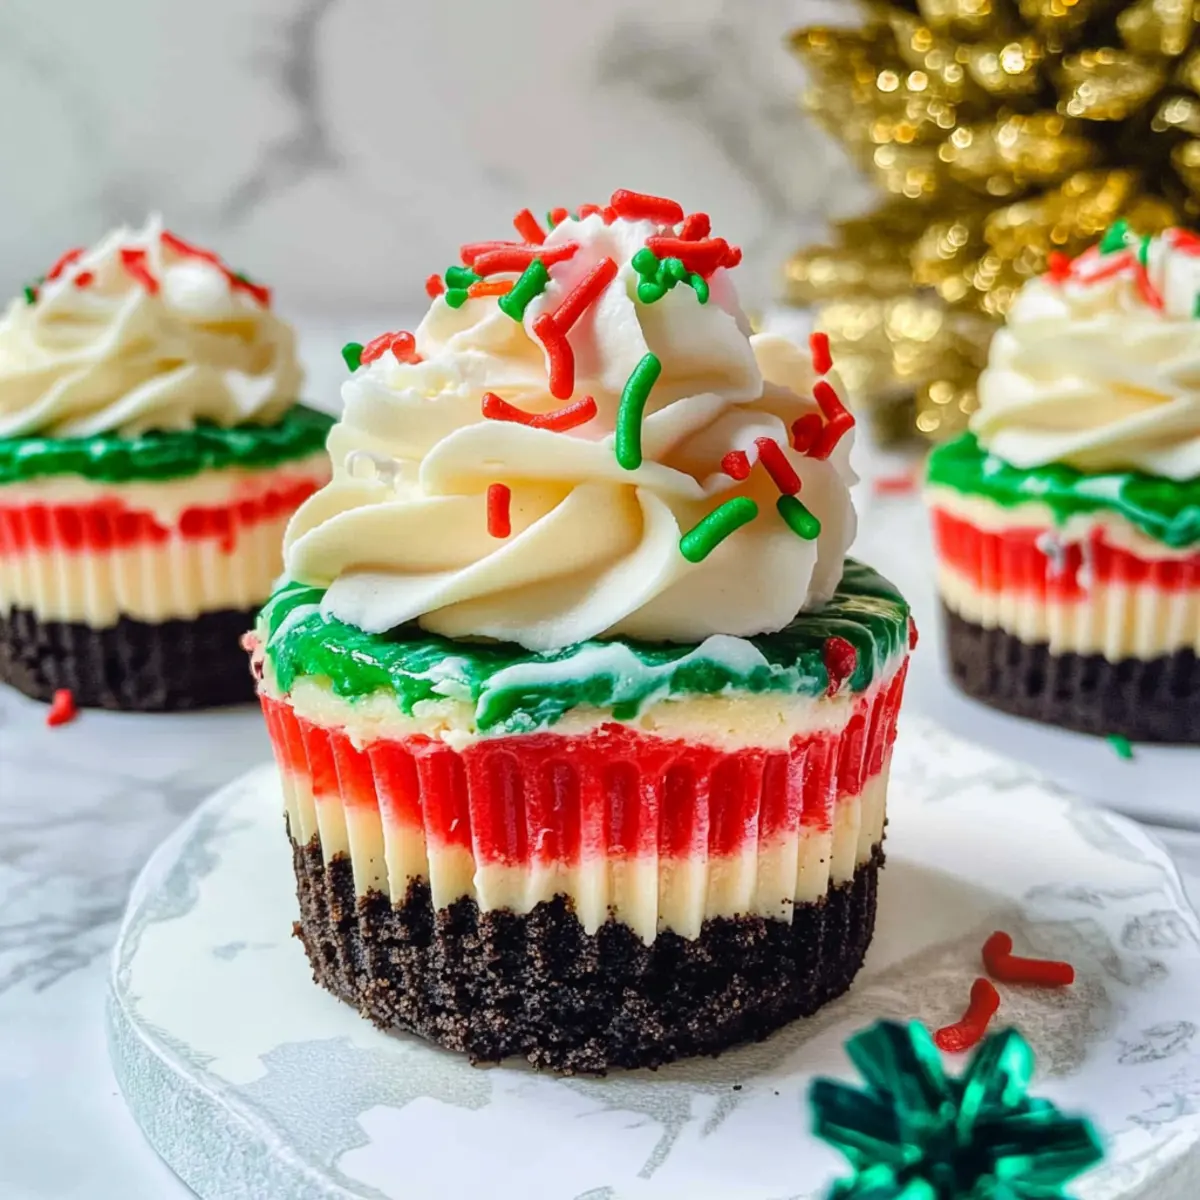
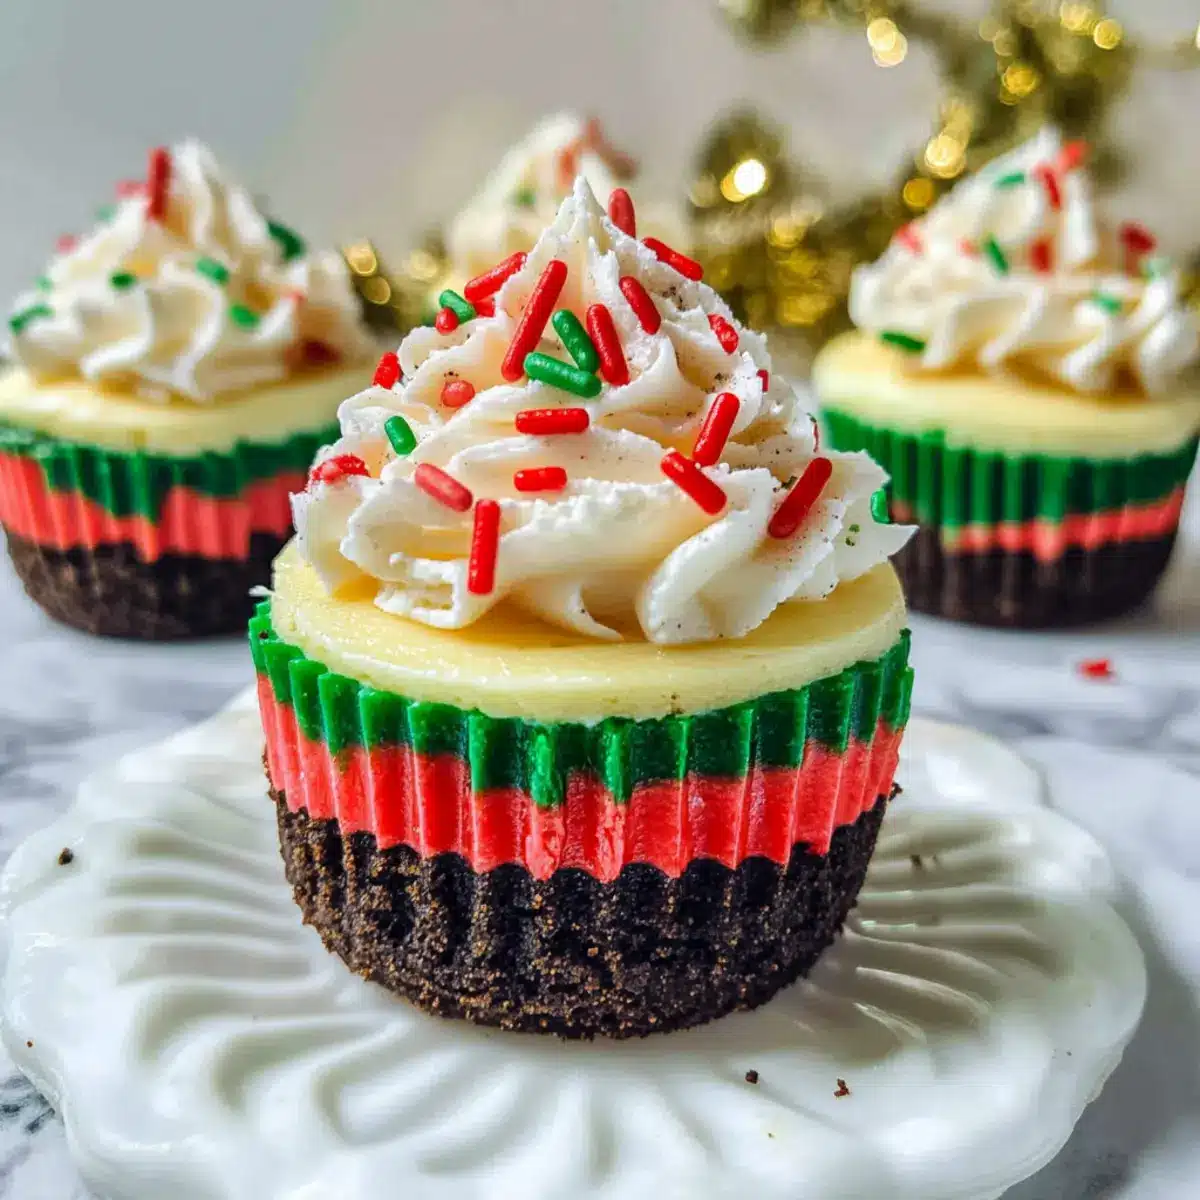
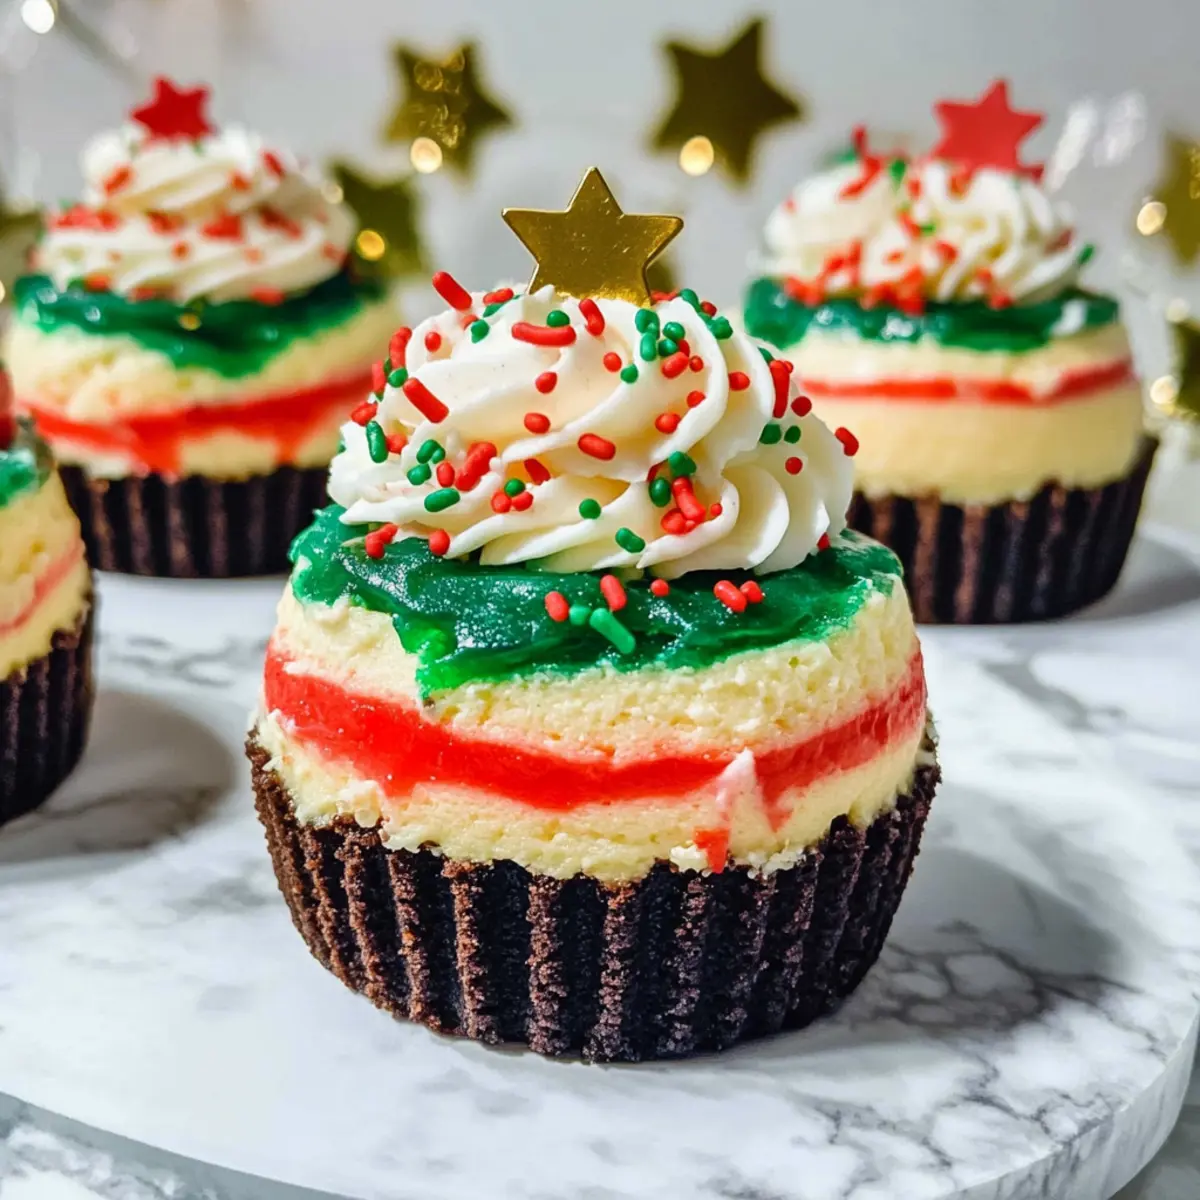
As I sift through holiday recipes, I can’t help but recall the joy of watching family members’ eyes light up at dessert time. These Mini Christmas Cheesecakes with Oreo Crust bring that same excitement to the table, offering creamy marbled filling nestled in a rich cookie base. Perfect for those busy days, this recipe is not only a delightful treat but also a quick prep solution that leaves room for more holiday fun. The individual servings promise to keep things tidy at gatherings, making them a hit with both young and young-at-heart. Plus, with each bite topped with whipped cream and festive sprinkles, they’re sure to steal the show! Are you ready to impress your loved ones with these little beauties?
Why Are Mini Christmas Cheesecakes Irresistible?
Decadent Indulgence: Each mini cheesecake is a little slice of heaven, featuring a luscious Oreo crust and rich cream cheese filling that’ll make your taste buds dance with delight.
Quick to Make: With an easy preparation process, you’ll have these festive treats ready in no time, allowing you to focus on enjoying the holiday season with loved ones.
Perfect Presentation: Their individual servings not only look stunning on your dessert table but also make serving a breeze—ideal for both parties and cozy family gatherings.
Versatile Flavor: The marbled red and green color scheme adds a fun twist to classic cheesecake. You can even modify the flavor by experimenting with different cookie crusts or flavorings.
Guaranteed Smiles: Topped with fluffy whipped cream and colorful sprinkles, these cheesecakes are a surefire way to bring joy to your holiday festivities. Want to try more delightful desserts? Check out these Cherry Cheesecake Swirl variations for a real treat!
Mini Christmas Cheesecake Ingredients
• To create these festive treats, gather your ingredients for a delightful journey into flavor!
For the Crust
- Oreo Cookies – Crushed for the crust; ensure cookies are crushed finely for a cohesive base.
- Butter – Melted to bind cookie crumbs; substitute coconut oil for a dairy-free option.
For the Cheesecake Filling
- Cream Cheese – The main filling for creaminess; allow to soften at room temperature for easier mixing.
- Granulated Sugar – Adds sweetness; consider using a sugar alternative for a lighter version.
- All-Purpose Flour – Provides structure; note the recipe hasn’t been tested with gluten-free flour.
- Vanilla Extract – Enhances flavor depth; use pure vanilla for the best results.
- Lemon Zest – Brightens the flavor profile; swap with lemon juice if zest is unavailable.
- Heavy Cream – Used for whipped cream topping; coconut cream serves as a dairy-free substitute.
- Eggs – Essential for binding the filling; do not omit for optimal texture.
- Food Coloring (Red & Green) – Adds festive marbling; use gel food coloring for vibrant results.
For the Topping
- Whipped Cream – Provides texture and decoration; can be homemade or store-bought.
- Sprinkles – Decorative topping for an extra festive flair; choose colorful varieties to match your theme.
These Mini Christmas Cheesecake ingredients will set the stage for a delightful dessert that everyone will love!
Step‑by‑Step Instructions for Mini Christmas Cheesecake
Step 1: Prepare the Crust
Preheat your oven to 150°C (300°F) to create the perfect environment for baking. Take Oreo cookies and crush them finely, then mix with melted butter until fully combined. Line cupcake tins with paper liners, and firmly pack the cookie mixture into each cup, ensuring an even layer that forms the base for your Mini Christmas Cheesecake.
Step 2: Make the Cheesecake Filling
In a large mixing bowl, beat the softened cream cheese with an electric mixer on medium speed until it’s smooth and creamy, taking about 2-3 minutes. Gradually add in granulated sugar while continuing to mix. Incorporate the eggs one at a time, along with the vanilla extract, mixing just until combined to prevent overbeating. This will ensure your filling is rich and luscious.
Step 3: Color the Batter
Divide the cheesecake mixture evenly into three separate bowls. In one bowl, add red food coloring and stir until you achieve a vibrant hue; in another, add green food coloring. Leave the third bowl plain for a beautiful marbled effect in your Mini Christmas Cheesecake. This festive coloring will add a delightful touch to each serving.
Step 4: Layer the Batter
Spoon alternating layers of the colored batters into the prepared Oreo crusts. Start with a scoop of one color, followed by the other, and use a toothpick to swirl them gently for a marbled look. Aim for a beautiful balance between the red, green, and white mixtures, creating a visually stunning dessert that’s perfect for the holiday season.
Step 5: Bake
Carefully place a baking dish filled with water on the bottom rack of the oven to create steam. This will help prevent cracking. Bake your Mini Christmas Cheesecakes in the preheated oven for about 20 minutes until the edges are firm but the centers remain slightly wobbly. The time ensures they’re perfectly set, leaving a soft, creamy center.
Step 6: Cool & Top
Once baked, remove the cheesecakes from the oven and allow them to cool in the pan for 10 minutes. Then, transfer them to a wire rack to cool completely. Once cooled, refrigerate for at least 4 hours. Before serving, top each Mini Christmas Cheesecake with a generous dollop of whipped cream and a sprinkle of festive sprinkles for that final holiday flair!
Expert Tips for Mini Christmas Cheesecake
-
Crust Consistency: Ensure Oreo cookies are crushed finely for a cohesive base. Larger chunks can lead to an uneven crust that crumbles apart.
-
Mixing Technique: Be gentle when mixing the cheesecake filling to avoid incorporating too much air, which can cause cracks in your mini cheesecakes during baking.
-
Baking Water Bath: Always place a baking dish with water in the oven while baking to create steam. This helps maintain moisture and prevents cracks in your Mini Christmas Cheesecake.
-
Cooling Time: Allow the cheesecakes to cool completely before chilling in the refrigerator. This step is vital for preserving their delightful texture and avoiding a soggy crust.
-
Chilling Duration: Don’t skip the chilling time! Refrigerating for at least 4 hours (or overnight if possible) helps the flavors develop and firms up the filling to the ideal creamy consistency.
Make Ahead Options
These Mini Christmas Cheesecakes are perfect for busy cooks looking to save time during the hectic holiday season! You can prepare the Oreo crust up to 48 hours in advance by mixing and pressing the crushed cookies into the cupcake liners, then storing them in the refrigerator. As for the cheesecake filling, it can be made a day ahead, allowing the flavors to meld beautifully—just cover and refrigerate the batter. When you’re ready to bake, layer the colored batters over the prepared crusts, pop them in the oven, and watch as the magic unfolds! Rest assured, with these make-ahead tips, you’ll still be rewarded with delicious, creamy cheesecakes that wow your guests!
What to Serve with Mini Christmas Cheesecake?
As you gather around the table for festivities, think about the perfect accompaniments to enhance your dessert experience.
- Spiced Apple Cider: This warm, fragrant drink resonates with holiday spices, balancing the richness of the cheesecake while warming your soul.
- Gingerbread Cookies: The spicy-sweet flavors of gingerbread are a classic pairing, offering a crunchy contrast to the creamy texture of the cheesecake.
- Chocolate Mousse: A light and airy dessert that complements the cheesecake’s richness while adding a touch of chocolate decadence to your spread.
- Festive Fruit Salad: A colorful mix of seasonal fruits like pomegranates, apples, and oranges adds freshness, brightness, and a delightful crunch to your meal.
- Peppermint Hot Chocolate: This indulgent drink wraps you in warmth and nostalgia, with peppermint perfectly harmonizing with the cheesecake’s festive flair.
- Vanilla Ice Cream: A scoop of creamy vanilla ice cream melts beautifully on top, providing a soothing contrast to the tangy, creamy cheesecake.
- Crumbly Biscotti: A delightful crunch with notes of almonds or chocolate gives a wonderful texture contrast, perfect for dipping and savoring with each bite of cheesecake.
- Nutty Biscuit Crust: Serve extra mini cheesecakes with a biscuit or tart crust version to create an exciting twist on the traditional cheesecake experience.
- Chestnut Purée: Embrace fall flavors by serving a dollop of chestnut purée on the side, inviting a new layer of taste that pairs beautifully with your cheesecake.
With these delightful pairings, your Mini Christmas Cheesecake will surely shine on your festive table!
Mini Christmas Cheesecake Variations
Feel free to let your creativity shine by customizing these delightful mini cheesecakes to suit your taste!
-
Gluten-Free: Substitute regular Oreos with gluten-free cookies for a fully gluten-free treat. Just remember to check labels and enjoy guilt-free!
-
Nutty Flavor: Swap the Oreo crust for a crushed almond or pecan crust to bring a nutty twist that pairs beautifully with the cheesecake filling.
-
Sugar-Free: Use a sugar substitute like erythritol or monk fruit sweetener in place of granulated sugar for a low-calorie option that still tastes amazing.
-
Dairy-Free: Replace cream cheese with a cashew-based cream or dairy-free cream cheese alternative to keep it creamy without the dairy.
-
Minty Freshness: Incorporate a few drops of peppermint extract into your cheesecake filling for a refreshing holiday twist that’ll invigorate your taste buds.
For more flavor inspiration, consider adding in warm spices like cinnamon or nutmeg; they harmonize beautifully with the festive spirit and pairs fabulously with a slice of Peach Cobbler Cheesecake.
-
Fruity Delight: Top with a layer of your favorite fruit preserves like raspberry or strawberry to elevate flavors and add a fruity layer that complements the richness.
-
Caramel Drizzle: Drizzle some caramel sauce over your whipped cream topping for an indulgent touch that brings all the flavors together beautifully!
With these variations, you can adapt your mini cheesecakes to cater to any palate or dietary need. Happy baking!
How to Store and Freeze Mini Christmas Cheesecakes
Fridge: Store mini Christmas cheesecakes covered in the refrigerator for up to 3 days. Ensure they’re in an airtight container to maintain their creaminess and prevent drying out.
Freezer: For longer storage, freeze cheesecakes without toppings for up to 1 month. Wrap each cheesecake tightly in plastic wrap, then place them in a freezer-safe bag.
Thawing: To enjoy, simply thaw the mini cheesecakes in the refrigerator overnight. This gentle thawing preserves their texture and flavor.
Reheating: Cheesecakes are best served chilled, so avoid reheating. Instead, enjoy them straight from the fridge for a refreshing dessert experience!
Mini Christmas Cheesecake Recipe FAQs
How do I select ripe ingredients for this mini Christmas cheesecake?
Absolutely! For the best flavor, choose cream cheese that’s fully softened at room temperature—this makes mixing easier and ensures a creamy texture. When it comes to eggs, make sure they’re fresh; the shells should be clean, with no cracks. For the lemon zest, look for bright, unwaxed lemons to get the most vibrant flavor.
How should I store mini Christmas cheesecakes, and how long do they last?
Very! Store your mini Christmas cheesecakes in an airtight container in the refrigerator for up to 3 days. Ensure they are covered to keep their moisture intact and intact to prevent them from drying out. If you have extras, don’t worry—you can freeze them!
Can I freeze mini Christmas cheesecakes?
Absolutely! You can freeze cheesecakes without toppings for up to 1 month. First, allow them to cool completely, then wrap each one tightly in plastic wrap and place them in a freezer-safe bag. This prevents freezer burn and keeps them delicious! When you’re ready to enjoy, simply thaw them in the refrigerator overnight.
What should I do if my cheesecake cracks during baking?
Ah, the dreaded cheesecake crack! If this happens, don’t fret—it’s often due to overmixing or too high a temperature. To troubleshoot, be gentle while mixing the ingredients, and ensure not to overbeat after adding eggs. Additionally, using a water bath while baking can help maintain moisture and prevent those pesky cracks.
Are there any dietary considerations I should be aware of when making mini Christmas cheesecakes?
Absolutely! For those with dairy allergies or lactose intolerance, consider substituting cream cheese and heavy cream with dairy-free alternatives like cashew cream or coconut cream. Always check labels for hidden allergens, especially if you’re using prepared ingredients like whipped cream or cookie crusts.
Can I use gluten-free ingredients for this mini cheesecake recipe?
Absolutely! While the original recipe hasn’t been tested with gluten-free flour, you can certainly experiment with a gluten-free alternative for the filling. Opt for gluten-free Oreos for the crust, or use almond flour mixed with melted butter as a great alternative for a nutty flavor. The more the merrier—make it yours!
Mini Christmas Cheesecake Bliss: Festive Flavor in Every Bite
Ingredients
Equipment
Method
- Preheat oven to 150°C (300°F). Crush Oreo cookies and mix with melted butter. Line cupcake tins with paper liners and pack the mixture into each cup.
- In a mixing bowl, beat cream cheese until smooth. Gradually add sugar, then incorporate eggs and vanilla until combined.
- Divide the mixture into three bowls. Add red food coloring to one, green to another, and leave the third plain.
- Layer the colored batters into the crusts, swirling with a toothpick for a marbled effect.
- Place a baking dish with water in the oven and bake for 20 minutes, allowing the centers to remain slightly wobbly.
- Cool in the pan for 10 minutes, then transfer to a wire rack to cool completely. Refrigerate for at least 4 hours before topping with whipped cream and sprinkles.
Leave a Reply