
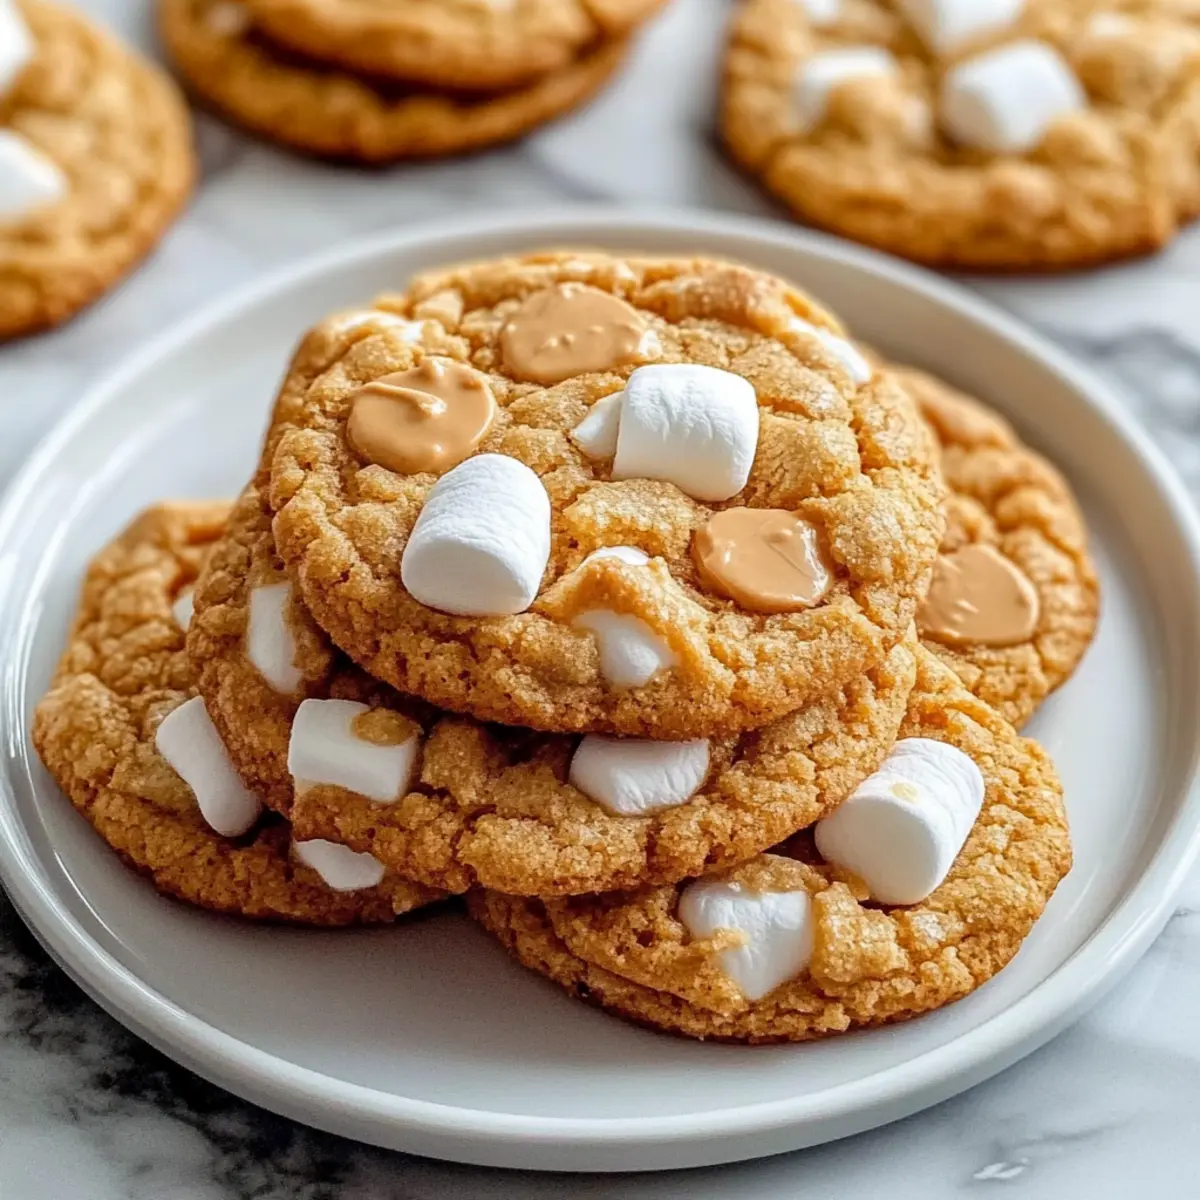
There’s something magical about biting into a Soft and Chewy Fluffernutter Cookie and instantly being transported back to carefree childhood days. With the luscious combination of creamy peanut butter and fluffy marshmallows, these cookies boast golden edges and soft centers that practically melt in your mouth. This easy recipe is not only a guaranteed crowd-pleaser at potlucks and gatherings, but it also makes for a satisfying late-night snack when cravings hit. Each bite offers delicious nostalgia wrapped in comfort, making it a perfect treat for anyone looking to indulge in a bit of sweetness. Are you ready to experience a delightful twist on the classic? Let’s get baking!
Why Are Fluffernutter Cookies So Irresistible?
Nostalgic Flavors: Each bite of these cookies brings back warm memories of childhood favorites, creating a comforting experience that delights both kids and adults alike.
Easy to Make: With minimal fuss, this straightforward recipe allows you to whip up a batch quickly, perfect for any time you’re craving something sweet.
Chewy Texture: The soft, pillowy centers combined with slightly crisp edges provide an irresistible texture that keeps you coming back for more.
Versatile Options: Customize your Fluffernutter Cookies by adding chocolate drizzles or experimenting with different nut butters for a unique twist. What about pairing these delightful cookies with a glass of milk or even some vanilla ice cream? Don’t forget to check out my amazing Gooey Butter Cookies for another great treat!
Perfect for Sharing: Whether at a potluck, picnic, or just for a family treat, these cookies are bound to impress your friends and loved ones.
Fluffernutter Cookies Ingredients
• Bring these magical treats to life with simple pantry staples!
For the Dough
- Creamy Peanut Butter – Adds rich, nutty flavor and structure; avoid natural peanut butters that separate for the best results.
- Brown Sugar – Provides moisture and deep sweetness, giving the cookies their chewy texture.
- Granulated Sugar – Contributes to overall sweetness and helps create those delightful crispy edges.
- Unsalted Butter (softened) – Adds richness to the dough and creates a smooth texture.
- Large Eggs – These bind the ingredients together, ensuring the perfect cookie structure.
- Vanilla Extract – Enhances flavor with warmth and depth, making each cookie irresistible.
For the Dry Mix
- All-Purpose Flour – Forms the cookie base; the main structure for those soft and chewy centers.
- Baking Soda – Helps the cookies rise and spread, giving them their perfect texture.
- Baking Powder – Adds additional leavening for that fluffy cookie experience.
- Salt – Balances sweetness and enhances the flavors, making the cookies pop.
For the Mix-Ins
- Mini Marshmallows – Provide a gooey texture and a sweet burst in every delightful bite.
- Peanut Butter Chips – Intensify the peanut butter flavor and add richness, making these cookies truly indulgent.
Step‑by‑Step Instructions for Fluffernutter Cookies
Step 1: Prepare the Dough
In a large mixing bowl, beat together 1/2 cup of softened unsalted butter, 1/2 cup of brown sugar, and 1/2 cup of granulated sugar until the mixture is light and fluffy, about 3-5 minutes. Use a hand mixer or stand mixer to achieve a creamy consistency that should stick to the sides of the bowl slightly.
Step 2: Mix Wet Ingredients
Next, add in 1 cup of creamy peanut butter, 1 large egg, and 1 teaspoon of vanilla extract to the buttery mixture. Mix on medium speed until all wet ingredients are fully combined and the batter appears smooth, resembling a deliciously creamy texture that promises indulgence in every bite.
Step 3: Combine Dry Ingredients
In a separate bowl, whisk together 1 1/2 cups of all-purpose flour, 1 teaspoon of baking soda, 1/2 teaspoon of baking powder, and 1/4 teaspoon of salt. Gradually add this dry mixture to the wet ingredients, mixing gently on low speed until just combined to avoid overworking the dough, which could result in less chewy Fluffernutter Cookies.
Step 4: Fold in Mix-ins
Carefully fold in 1 cup of mini marshmallows and 1/2 cup of peanut butter chips into the dough using a spatula or wooden spoon. Be gentle during this process to keep the mix-ins intact, ensuring that every cookie will have delightful bursts of chewy marshmallow and rich peanut butter flavor in each bite.
Step 5: Chill Dough
Scoop the cookie dough onto a parchment-lined baking sheet, spacing them about 2 inches apart. Cover the sheet with plastic wrap and chill in the refrigerator for 30 minutes; this step helps prevent the cookies from spreading too much while baking, ensuring they remain thick and chewy.
Step 6: Bake
Preheat your oven to 350°F (175°C). Once the dough has chilled, bake the cookies for 10-12 minutes until the edges are golden brown and the centers look slightly underbaked. This visual cue ensures a soft, chewy texture that is characteristic of classic Fluffernutter Cookies.
Step 7: Cool
After baking, let the cookies cool on the baking sheet for about 5 minutes before transferring them to a wire rack. This resting time allows the cookies to firm up slightly while retaining that delightful softness, so they can be enjoyed warm and gooey or at room temperature.
Make Ahead Options
These Soft and Chewy Fluffernutter Cookies are perfect for meal prep enthusiasts! You can prepare the cookie dough up to 24 hours in advance by mixing all the ingredients and storing it in an airtight container in the refrigerator. To maintain the cookie’s delightful texture, make sure to chill the dough before scooping it onto a baking sheet or wrap individual portions and keep them in the fridge. When you’re ready to bake, simply scoop the chilled dough onto a baking sheet and pop it in the oven for 10-12 minutes. This way, you’ll have freshly baked Fluffernutter Cookies anytime you need a quick, comforting treat!
Fluffernutter Cookies Variations & Substitutions
Get creative and make these Fluffernutter Cookies your own with some fun modifications!
-
Chocolate Drizzle: Drizzle melted chocolate on top for an extra layer of deliciousness that complements the peanut butter perfectly.
Elevate your cookie experience with this indulgent addition. It’s a simple way to transform a classic into a decadent treat that satisfies any sweet tooth. -
Sea Salt Sprinkle: Sprinkle a pinch of sea salt on your cookies before baking to enhance their sweetness and create a delightful contrast.
This touch of salt can bring out the flavors, providing a gourmet twist on your Fluffernutter cookies. Trust me, you’ll be reaching for another bite! -
Nut Butter Swap: Swap out the creamy peanut butter for almond butter or cashew butter for a delightful twist on flavor.
Experimenting with different nut butters can introduce exciting textures and tastes, making your cookies unique every time you bake! -
Gluten-Free Version: Substitute all-purpose flour with a gluten-free flour blend to enjoy the same fluffy texture without gluten.
This way, everyone can join in on the deliciousness! Consider pairing these gluten-free Fluffernutter Cookies with a cold glass of milk for a nostalgic treat. -
Add Chocolate Chips: Incorporate semi-sweet or dark chocolate chips into the dough for an extra touch of richness and flavor.
This twist on the classic flavor profile is bound to create a cookie that melts in your heart and satisfies your chocolate cravings. -
Spicy Kick: Add a pinch of cinnamon or a splash of cayenne pepper to the dough for a surprising and delightful kick.
The warmth of the spices works beautifully with the sweetness, creating a harmonious balance that’s sure to impress! -
Coconut Flakes: Fold in some sweetened shredded coconut for added texture and a tropical twist.
Coconut gives a delightful chewiness that blends wonderfully with the marshmallows, sending your taste buds on a mini vacation! -
Extra Mix-Ins: Toss in chopped nuts or crispy rice cereal for an added crunch that contrasts beautifully with the chewy marshmallows.
This textural element will have everyone reaching for more while enjoying a deliciously unique take on the original Fluffernutter theme!
Feel free to explore these variations, and don’t hesitate to share your delicious creations with family and friends! If you’re looking for more sweet inspirations, check out my Banana Bread Cookies or my delightful Gooey Butter Cookies. Happy baking!
Tips for the Best Fluffernutter Cookies
-
Chill Time Matters: Ensure you chill the dough for at least 30 minutes. This prevents excess spreading, keeping your Fluffernutter Cookies thick and chewy.
-
Watch for Doneness: Look for golden edges with slightly underbaked centers. This visual cue gives the cookies their signature soft interior while still ensuring perfectly baked edges.
-
Don’t Overmix: When combining the flour and wet ingredients, mix until just combined. Overmixing can lead to tough cookies instead of the desired soft and chewy texture.
-
Perfect Storing: Keep your cookies in an airtight container for up to 4 days. To maintain freshness longer, consider freezing baked cookies, and microwave them to refresh before serving.
-
Customize with Ease: Feel free to add a drizzle of chocolate on top or a sprinkle of sea salt to elevate the flavor profile of your Fluffernutter Cookies!
Storage Tips for Fluffernutter Cookies
- Room Temperature: Store your Fluffernutter Cookies in an airtight container at room temperature for up to 4 days to maintain their softness and chewy texture.
- Freezer: For long-term storage, freeze the baked cookies in a single layer on a baking sheet. Once solid, transfer them to a freezer bag or container for up to 3 months.
- Reheating: To refresh your cookies after freezing, simply microwave them for about 10-15 seconds. This will bring back their delightful gooeyness and flavor.
- Avoid Staleness: Keep cookies away from direct sunlight and moisture, as exposure can cause them to become stale or lose their delightful texture.
What to Serve with Soft and Chewy Fluffernutter Cookies
Nothing pairs better with these delightful treats than options that complement their sweet, nostalgic essence.
- Creamy Milkshake: A rich, creamy milkshake adds a retro feel while balancing the sweetness of the cookies and creating a delightful contrast in textures.
- Ice Cream Sandwiches: Create a dreamy dessert by sandwiching the cookies with your favorite ice cream flavor, like vanilla or chocolate chip – a perfect summer treat!
- Fresh Fruit Salad: A refreshing fruit salad introduces vibrant flavors and a burst of freshness that lightens the rich, chewy cookie experience. Mix in berries, apples, and citrus for a colorful side.
- Decadent Hot Chocolate: A warm mug of hot chocolate envelops you in comfort, accentuating the peanut butter flavor and bringing nostalgic warmth to your dessert.
- Caramel Sauce Drizzle: Serving with a warm caramel sauce takes your Fluffernutter Cookies to the next level, adding a luscious, gooey element that enhances each bite.
- Cup of Vanilla Coffee: For a more adult pairing, a cup of smooth vanilla coffee offers a warm hug of warmth and richness, perfectly complementing the soft, sweet cookies.
With these delightful pairings, your Fluffernutter Cookies transform into a delightful spread that will leave everyone asking for seconds!
Fluffernutter Cookies Recipe FAQs
How do I select the perfect peanut butter for my Fluffernutter Cookies?
Absolutely! I recommend using a smooth, creamy peanut butter that doesn’t separate. This helps ensure your cookies have a consistent texture and rich flavor. Look for brands labeled as “creamy” or “spreadable”; natural varieties can sometimes make the cookies too oily or crumbly.
What is the best way to store Fluffernutter Cookies?
To keep your Fluffernutter Cookies soft and chewy, store them in an airtight container at room temperature for up to 4 days. For longer storage, you can freeze the cookies by laying them flat in a single layer on a baking sheet. Once they are frozen solid (about 1-2 hours), transfer them to a freezer bag, and they will stay fresh for up to 3 months!
Can I freeze Fluffernutter Cookies? How do I do it?
Absolutely! Freezing Fluffernutter Cookies is a great way to enjoy them later. Here’s how:
- Allow the baked cookies to cool completely.
- Arrange them in a single layer on a baking sheet and freeze until solid, about 1-2 hours.
- Transfer the cookies to a freezer-safe bag or container, layering parchment paper between each cookie to prevent sticking.
- Label and date the bag; they will last up to 3 months! When ready to eat, microwave for 10-15 seconds to regain that gooey texture.
What should I do if my cookies spread too much while baking?
If your Fluffernutter Cookies spread too much, it could be due to warm dough. Ensure you chill the dough for at least 30 minutes before baking, as this helps them maintain their shape. Additionally, be careful not to overmix the cookie batter once you add the flour, as this can alter the cookie’s structure and lead to excess spreading.
Are Fluffernutter Cookies suitable for people with nut allergies?
Unfortunately, Fluffernutter Cookies contain peanut butter, so they may not be suitable for individuals with nut allergies. However, if you’d like to make a nut-free version, consider using sun butter or a seed butter, which can provide a similar texture while being allergy-friendly. Always ensure the substitutes are safe for those you are serving!
Fluffernutter Cookies for a Sweet Trip Down Memory Lane
Ingredients
Equipment
Method
- In a large mixing bowl, beat together the softened unsalted butter, brown sugar, and granulated sugar until light and fluffy, about 3-5 minutes.
- Add creamy peanut butter, large egg, and vanilla extract to the mixture and mix until all wet ingredients are fully combined.
- In a separate bowl, whisk together all-purpose flour, baking soda, baking powder, and salt.
- Gradually add the dry mixture to the wet ingredients, mixing gently until just combined.
- Fold in mini marshmallows and peanut butter chips carefully.
- Scoop the dough onto a parchment-lined baking sheet, cover with plastic wrap, and chill in the refrigerator for 30 minutes.
- Preheat oven to 350°F (175°C) and bake cookies for 10-12 minutes until edges are golden brown.
- Let cookies cool on the baking sheet for about 5 minutes before transferring to a wire rack.
Leave a Reply