
“Crunch! That’s the sound of my favorite guilt-free indulgence coming to life: 4-Ingredient Crispy Chocolate Oat Cookies. With just a handful of pantry staples, I can whip up these delectable gluten-free treats in no time. What really gets me excited about this recipe is the perfect balance of a satisfying crunch combined with the rich, melt-in-your-mouth chocolatey goodness that makes these cookies irresistible. Whether you’re in need of a quick dessert after dinner or a delicious snack to fuel your day, these cookies deliver comfort without any of the fuss. Plus, you can customize them with your own twists! Curious about the best ways to make these simple cookies even more delightful?”
What makes these cookies stand out?
Simplicity: With just four ingredients, these cookies offer a quick and easy way to satisfy your sweet tooth without the hassle of complicated steps.
Crispy Texture: Enjoy the perfect crunch on the outside and a chewy center that feels like a decadent treat.
Gluten-Free: Ideal for those who are gluten intolerant, these scrumptious delights allow everyone to indulge without worry.
Versatility: Feel free to customize with your favorite add-ins—whether it’s nuts, dried fruits, or a sprinkle of cinnamon for a personal touch! These cookies pair beautifully with a glass of milk or even alongside a slice of delicious Lemon Oreo Dessert.
Crowd-Pleaser: Perfect for sharing; they are sure to impress friends and family, making them an excellent addition to any gathering.
Chocolate Oat Cookie Ingredients
• Discover the simple ingredients that make these cookies a delightful treat!
For the Cookies
- Oats – Essential for structure and texture; rolled or quick oats work best for these crispy cookies.
- Peanut Butter – Adds a rich creaminess and binds everything together; almond butter is a great nut-free substitute.
- Honey – Sweetens the mix and adds moisture; swap it out for maple syrup for a vegan-friendly alternative.
- Chocolate Chips – Add a burst of chocolate flavor; try dark chocolate chunks for an even richer taste.
Feel free to get creative with these simple ingredients to make your 4-ingredient crispy chocolate oat cookies unforgettable!
Step-by-Step Instructions for 4-Ingredient Crispy Chocolate Oat Cookies
Step 1: Preheat the Oven
Start by preheating your oven to 350°F (175°C). This is crucial for achieving the perfect texture in your 4-ingredient crispy chocolate oat cookies. While the oven is warming up, you can prepare your baking sheet by lining it with parchment paper, ensuring your cookies won’t stick and come out beautifully.
Step 2: Combine the Base Ingredients
In a large mixing bowl, add your oats, peanut butter, and honey. Using a spoon or spatula, mix these ingredients together until they are fully incorporated and form a thick, sticky dough. This should take about 2-3 minutes, and you’ll know it’s ready when there are no dry oats left, forming a cohesive mixture that looks deliciously inviting.
Step 3: Add the Chocolate Chips
Once your dough is well-mixed, gently fold in the chocolate chips. Make sure to distribute them evenly throughout the mixture so that every cookie gets a delightful burst of chocolate flavor. This step takes about a minute, and you’ll want to see the little chocolate pieces peeking out amidst the oat mixture, signifying a well-prepared cookie batter.
Step 4: Scoop the Cookie Dough
Using a tablespoon or cookie scoop, portion out the dough onto your prepared baking sheet, leaving some space between each scoop as the cookies will spread while baking. Aim for roughly tablespoon-sized portions; this will give you perfectly-sized cookies that are easy to handle and delightful to bite into.
Step 5: Flatten the Cookies
With the back of a spoon or your fingers, gently flatten each cookie mound to about half an inch thick. This step is essential for even baking and helps create that crispy texture you’re after in your 4-ingredient crispy chocolate oat cookies. You’ll want the cookies to look slightly flattened, ensuring they bake through nicely.
Step 6: Bake the Cookies
Slide the baking sheet into your preheated oven and bake the cookies for 10-12 minutes. Keep a close eye on them, and look for the edges to turn a lovely golden brown. This visual cue is key to ensuring that your cookies develop that delightful crispy exterior while maintaining a chewy inner texture.
Step 7: Cool and Enjoy
Once the cookies are baked to perfection, remove them from the oven and let them cool on the baking sheet for 5 minutes. This allows them to firm up slightly before transferring them to a wire rack. After they’ve cooled, indulge in your delicious 4-ingredient crispy chocolate oat cookies; you deserve it!
What to Serve with 4-Ingredient Crispy Chocolate Oat Cookies
Imagine the joyful crunch of these delicious cookies paired with delightful accompaniments that complete your snack experience!
-
Fresh Fruit Salad: A vibrant mix of seasonal fruits adds a refreshing contrast to the rich flavors of the cookies, balancing sweetness with natural acidity.
-
Creamy Yogurt: A dollop of Greek yogurt or coconut yogurt enhances the cookies’ indulgence while adding a creamy texture—a superb dip for each bite.
-
Warm Milk or Plant-Based Alternatives: The warmth of milk, whether dairy or almond, complements the crispy chocolate oat cookies beautifully, creating a cozy moment to savor.
-
Nutty Granola: Sprinkle some crunchy granola over yogurt for a delightful texture contrast. The nutty flavors will pair well, creating a wholesome snack that feels complete.
-
Chocolate-Covered Strawberries: For a decadent twist, serve cookies alongside chocolate-covered strawberries, marrying two favorite treats for a delightful dessert experience.
-
Homemade Chai Latte: The spiced warmth of a chai latte lends exotic vibes to your cookie experience, bringing a comforting beverage that enriches the cookie’s chocolatey punch.
Dive into this delectable treat with each pairing, making your afternoon snack or dessert a heartwarming delight!
Expert Tips for 4-Ingredient Chocolate Oat Cookies
-
Ingredient Quality: Use natural peanut butter that’s well-stirred for even consistency. It makes all the difference in the cookie’s texture!
-
Watch the Bake: Keep an eye on the cookies while they bake. Overbaking can make them hard; you want edges to be golden, not brown.
-
Chill the Dough: If time allows, chill the dough for 15-30 minutes before baking. This can help the cookies hold their shape better while baking.
-
Customize Wisely: Feel free to mix in nuts or dried fruits, but don’t add too much; excess ingredients can lead to flat cookies.
-
Proper Storage: Store your cookies in an airtight container at room temperature to maintain their crispy texture for up to a week.
Chocolate Oat Cookies Variations
Want to take your chocolate oat cookies on a delicious journey? Here are some fun and easy variations that will elevate your treats to the next level!
- Nut-Free: Substitute peanut butter with sunflower seed butter for a deliciously nut-free option that everyone can enjoy.
- Vegan Delight: Swap honey for maple syrup to create a fully vegan cookie, perfect for plant-based diets while keeping them sweet and scrumptious.
- Extra Crunch: Add chopped nuts like walnuts or pecans for an extra layer of texture and crunch in every bite.
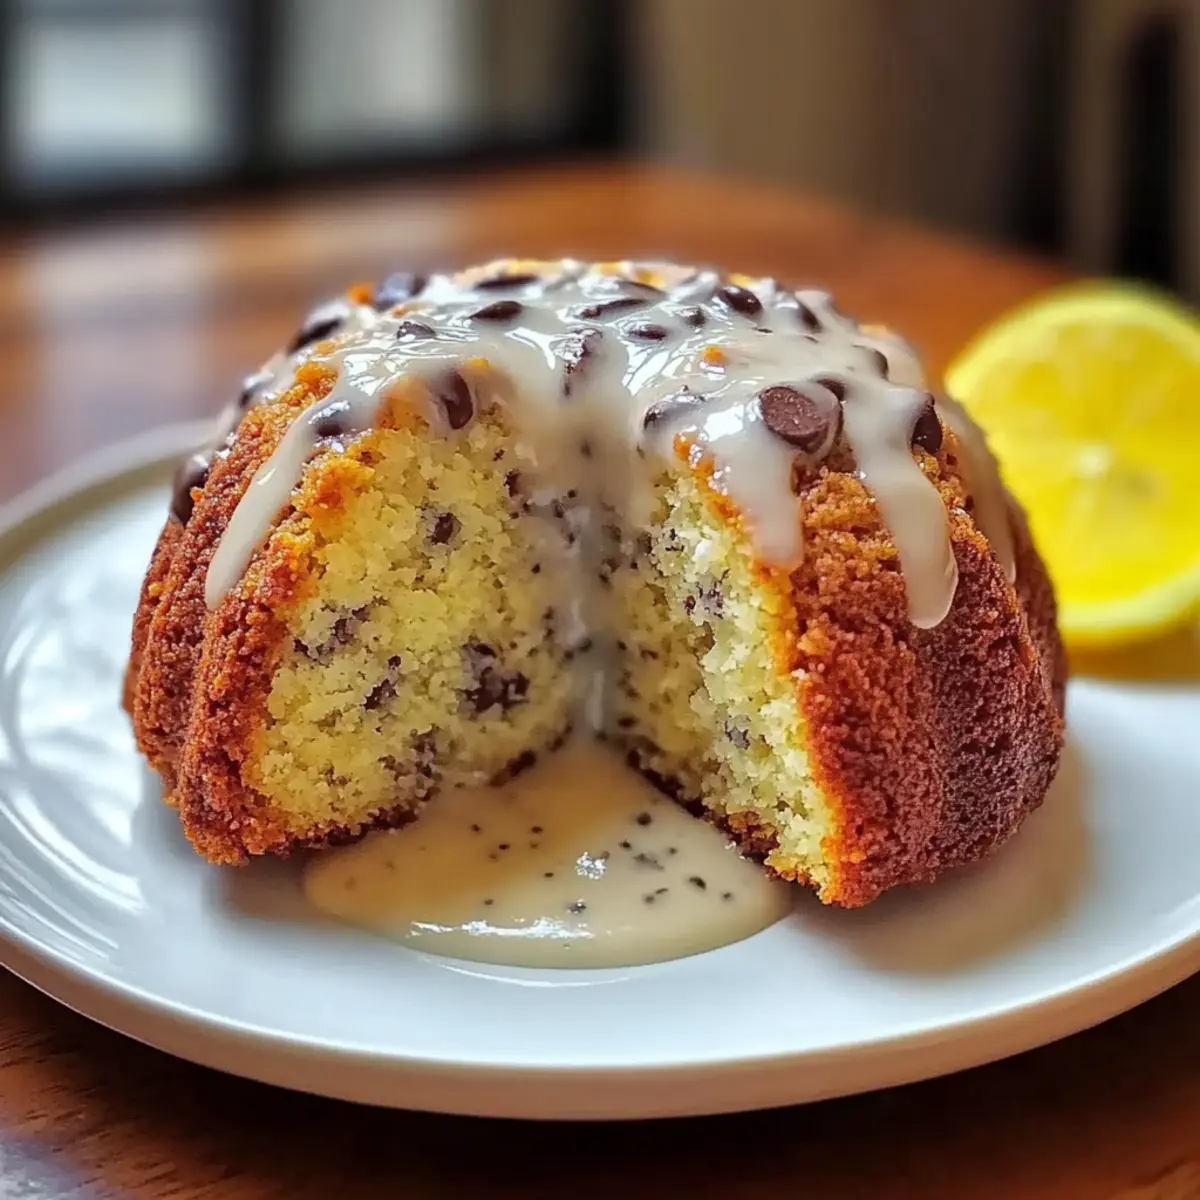
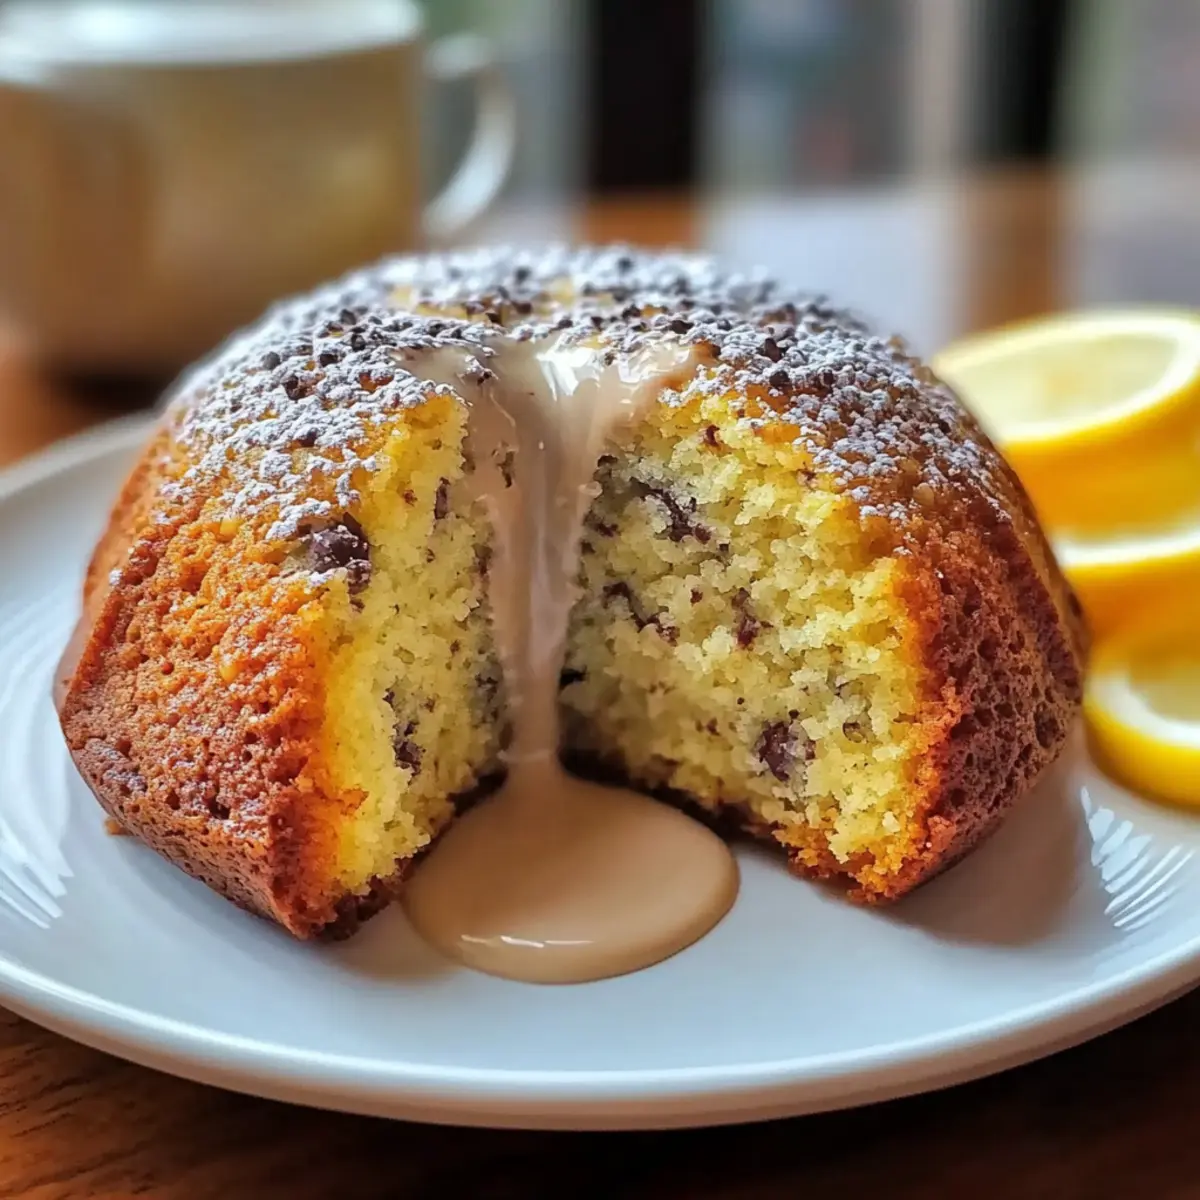
- Zesty Twist: Mix in the zest of one orange or lemon to introduce a bright, citrusy flavor that contrasts beautifully with the chocolate.
- Spicy Treat: Give your cookies a kick by sprinkling in a pinch of cinnamon or cayenne pepper; it adds warmth and a subtle heat.
- Dried Fruit: Fold in raisins or dried cranberries for a chewy surprise that balances the rich chocolate with fruity sweetness.
- Chunky Style: Instead of chocolate chips, use dark chocolate chunks for a more rustic, bakery-style cookie that feels indulgent every time.
- Decadent Indulgence: Drizzle melted dark chocolate on top for a rich presentation that turns these cookies into an elegant dessert, perfect for any gathering.
Feel free to experiment boldly! And if you’re craving more sweet ideas, why not try these delightful treats: the light and fluffy Snowball Cake Light or the surprisingly refreshing Lemon Oreo Dessert?
Storage Tips for Chocolate Oat Cookies
Room Temperature: Store cookies in an airtight container at room temperature to keep them fresh for up to 1 week. This prevents them from becoming stale and preserves their delightful crunch.
Freezer: For longer storage, freeze the cookies in a single layer on a baking sheet before transferring them to a freezer-safe bag. They can last up to 3 months in the freezer, ensuring you have a quick treat on hand whenever the chocolate craving strikes.
Reheating: When you’re ready to enjoy a cookie from the freezer, simply thaw them in the fridge overnight, or pop them in the microwave for 10-15 seconds for a warm, gooey treat that revives their chewy goodness.
Packaging for Storage: If freezing, layer the cookies between sheets of parchment paper in a zip-top bag to prevent sticking, allowing you to enjoy a few at a time without losing the freshness of your chocolate oat cookies.
Make Ahead Options
These 4-Ingredient Crispy Chocolate Oat Cookies are an absolute delight for meal prep enthusiasts! You can mix the oats, peanut butter, and honey up to 24 hours in advance and refrigerate the dough for optimal freshness. Simply fold in the chocolate chips just before baking to ensure they retain that melt-in-your-mouth goodness. If you prefer, you can also scoop and flatten the cookies and freeze them for up to 3 months—simply bake straight from the freezer, adding a couple of extra minutes to the bake time. This way, you can have these delicious cookies ready at a moment’s notice, making busy weeknights feel just a tad sweeter!

Chocolate Oat Cookies Recipe FAQs
What type of oats should I use for the cookies?
I recommend using rolled or quick oats for the best texture. Rolled oats provide a hearty chew, while quick oats offer a slightly finer texture. Just make sure they’re gluten-free if you have dietary restrictions!
How should I store the cookies, and how long do they last?
Store your cookies in an airtight container at room temperature for up to 1 week. This ensures they stay fresh and retain their delightful crunch. If you’re looking to keep them longer, freezing is a great option!
Can I freeze the cookies for later?
Absolutely! To freeze your chocolate oat cookies, place them in a single layer on a baking sheet and freeze until solid. Then, transfer them to a freezer-safe bag or container. They’ll keep well for up to 3 months. When you want to enjoy one, simply thaw in the fridge overnight or microwave for 10-15 seconds for a warm treat!
What should I do if the cookie dough is too dry?
If your dough seems dry, don’t worry! Just add a little more honey or a splash of water to bring it together. If it’s too wet, you can add a few more oats to help balance the consistency. It should be thick but scoopable!
Are these cookies safe for those with nut allergies?
If you have nut allergies, you can substitute peanut butter with sunflower seed butter or a similar nut-free spread. This keeps the cookies safe for everyone while still keeping them delicious!
Can I make these cookies vegan?
Yes! You can easily make these cookies vegan by swapping honey for maple syrup and ensuring that your chocolate chips are dairy-free. With just a few minor adjustments, you’ll have a delightful vegan treat that everyone will love!
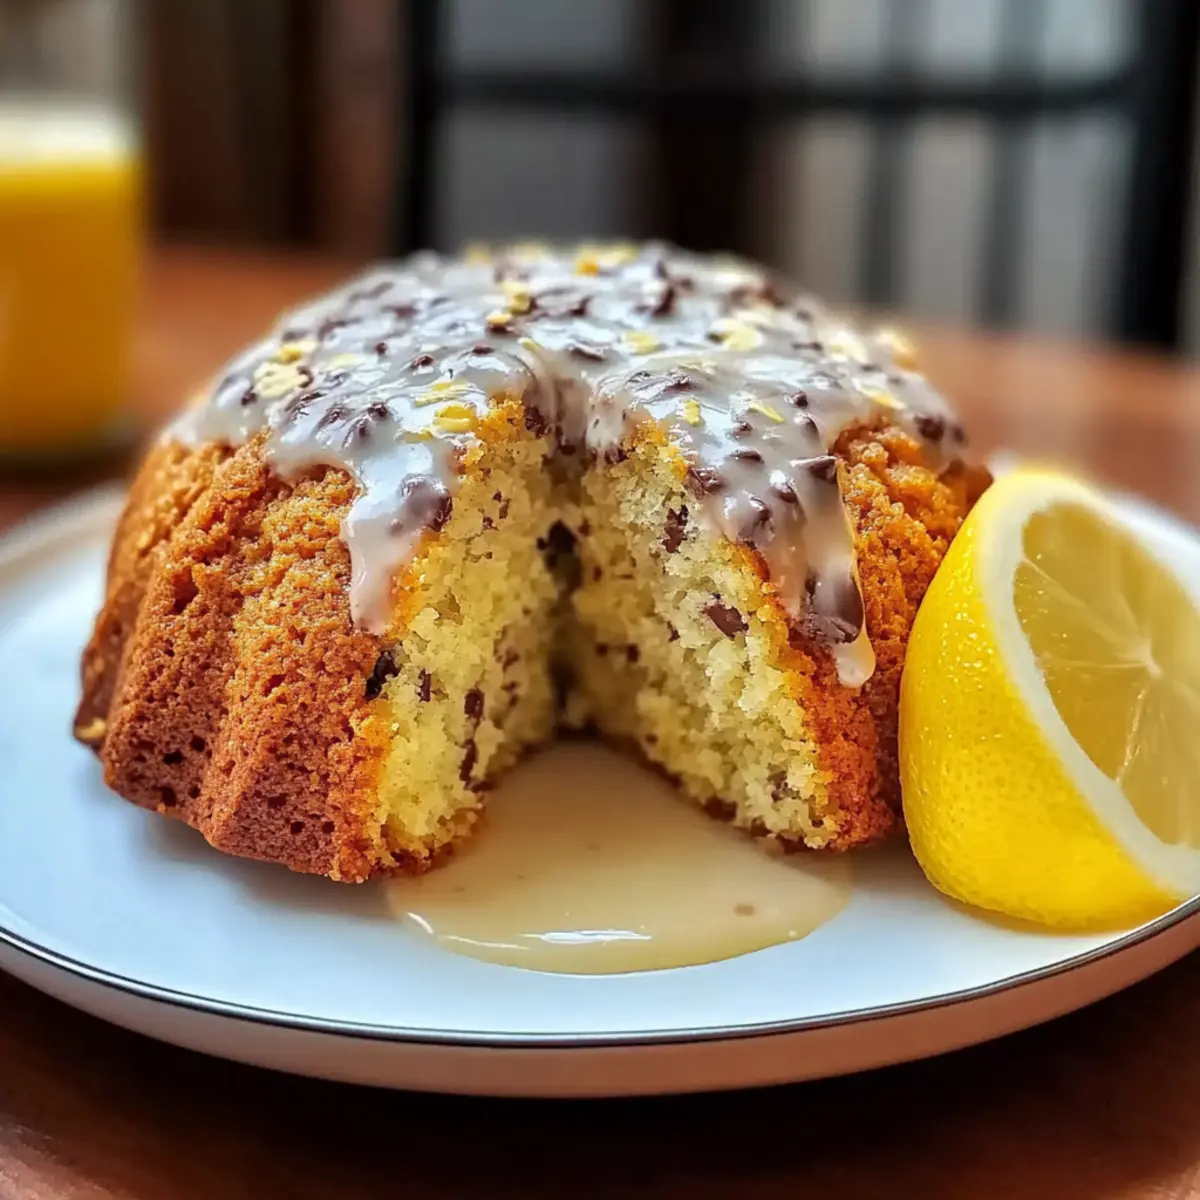
Sweet and Zesty Lemon Poppy Seed Cake for Bright Days
Ingredients
Equipment
Method
- Preheat your oven to 350°F (175°C) and prepare your baking sheet with parchment paper.
- In a large mixing bowl, combine oats, peanut butter, and honey. Mix until no dry oats remain.
- Gently fold in the chocolate chips until evenly distributed.
- Scoop tablespoon-sized portions of the dough onto the prepared baking sheet.
- Flatten each cookie mound to about half an inch thick to ensure even baking.
- Bake for 10-12 minutes, or until edges turn golden brown.
- Cool on the baking sheet for 5 minutes before transferring to a wire rack.
Leave a Reply