
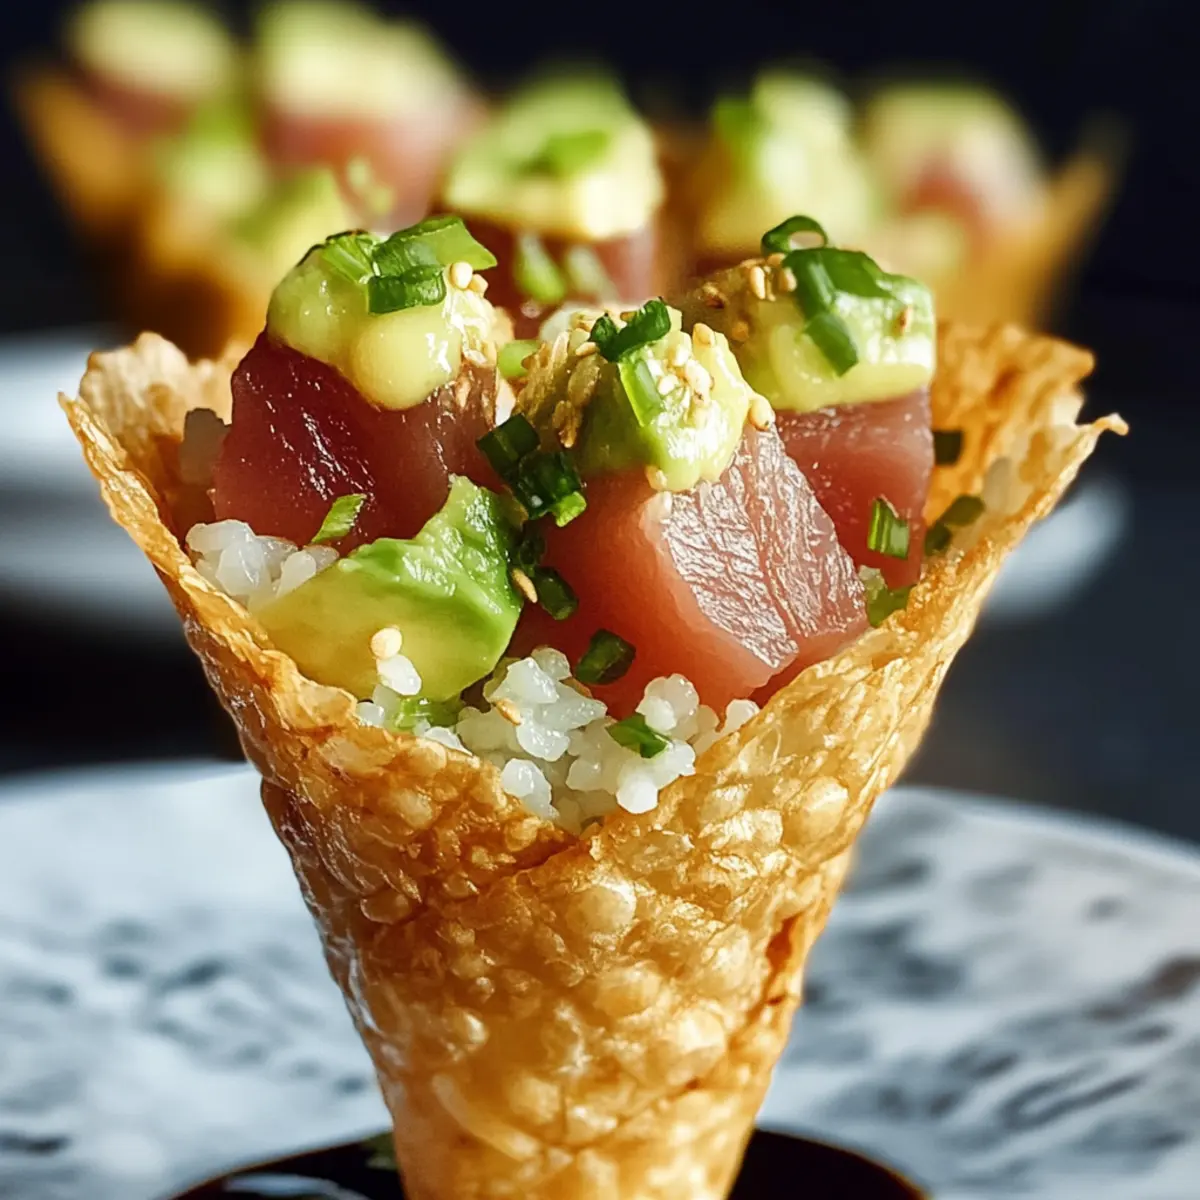
As I sat at my favorite sushi spot, I noticed a couple nearby devouring these intriguing little cones that turned sushi into a fun, handheld experience. That inspired me to create my own version: Sushi Wonton Cones! These delightful treats are not only a whimsical twist on traditional sushi, but they also offer a playful opportunity for customization. With a crispy wonton shell cradling perfectly seasoned sushi rice, creamy avocado, and savory sushi-grade tuna, these handheld appetizers are guaranteed to impress at your next gathering. They’re quick to prepare and make for a fantastic crowd-pleaser. Ready to roll up some fun in your kitchen? Let’s dive into how to make these Sushi Wonton Cones!
Why are Sushi Wonton Cones a Must-Try?
Handheld Fun: These Sushi Wonton Cones transform sushi into an interactive dining experience, perfect for parties or casual snacking.
Crispy & Creamy: The contrast between the crunchy wonton shell and creamy avocado creates a textured delight that’s hard to resist.
Customizable Fillings: Easily adapt the recipe to suit your taste with choices like spicy shrimp or veggie options, ensuring there’s something for everyone.
Quick Preparation: They come together in a flash, making them an excellent choice for unexpected guests or last-minute gatherings.
Visual Appeal: The bright colors and unique presentation of these cones will certainly impress, making them the star of your next table setting!
Sushi Wonton Cone Ingredients
For the Wonton Cones
• Wonton wrappers – Serve as the crispy base for the cones, but you can use rice paper as a lighter alternative.
• Coconut oil – Perfect for frying to achieve that golden, crunchy texture; vegetable oil is a good substitute if needed.
For the Sushi Rice
• Sushi rice (short-grain, sticky) – Provides the essential sticky texture and flavor; jasmine rice can be used for a different taste, though the texture will vary.
• Rice vinegar – Essential for seasoning the rice; apple cider vinegar can be a close substitute if you’re in a pinch.
• Sugar – Balances the acidity of the vinegar; reducing the amount will give a less sweet flavor if preferred.
• Salt – Enhances overall flavor; feel free to swap with sea salt for a different touch.
For the Filling
• Avocado – Adds creaminess and healthy fats; substitute with hummus or tofu for a delicious vegan option.
• Tuna steak (sushi-grade) – The primary protein; cooked shrimp, salmon, or jackfruit serve as great substitutes for variety.
• Kewpie mayonnaise – Gives a creamy richness; standard mayo works, but will lack the unique umami flavor.
• Tomato ketchup or sauce – Contributes sweetness and depth of flavor; hoisin sauce is a tasty alternative.
• Sriracha (optional) – Adds some heat; omit it for a milder flavor or replace with your favorite hot sauce.
• Lime zest – Brightens up the dish with freshness; you can substitute lemon zest if limes are out of reach.
• Furikake or black sesame seeds – Ideal for garnishing, enhancing flavor and appearance; use chopped scallions if you can’t find furikake.
These delightful Sushi Wonton Cones are a fantastic way to indulge in the sushi experience while adding your unique twist! Enjoy the preparation and the delicious results!
Step‑by‑Step Instructions for Sushi Wonton Cones
Step 1: Prepare Wonton Cones
Begin by preheating your oven to 175 °C (350 °F). Take a wonton wrapper and wrap it around a cream horn mold or a cone-shaped object, ensuring it’s tightly sealed to create a sturdy shape. Brush each wrapped wonton with a touch of coconut oil to promote a golden-brown crisp when frying.
Step 2: Fry Cones
In a deep skillet, heat coconut oil to 175 °C (350 °F). Carefully place the wrapped cones in the hot oil, frying them for about 2-3 minutes or until they achieve a beautiful golden brown and are crisp to the touch. Rotate as necessary for even cooking, then drain the fried cones on paper towels until they cool slightly and become crunchy.
Step 3: Make Sushi Rice
While the cones are frying, cook your sushi rice according to package directions, usually about 15–20 minutes. Once cooked, transfer the rice to a large bowl and season it with rice vinegar, sugar, and salt while it’s still warm. Gently mix to combine, then allow the rice to cool to room temperature for optimal flavor and stickiness suitable for filling your Sushi Wonton Cones.
Step 4: Prepare Tuna Mixture
Take your sushi-grade tuna and cut it into small cubes or flake it apart, depending on your preferred texture. In a mixing bowl, combine the tuna with Kewpie mayonnaise, a splash of tomato sauce, and sriracha if you like some heat. Add lime zest for freshness, and mix until all the ingredients are well incorporated; chill the mixture until you are ready to assemble the cones.
Step 5: Assemble Cones
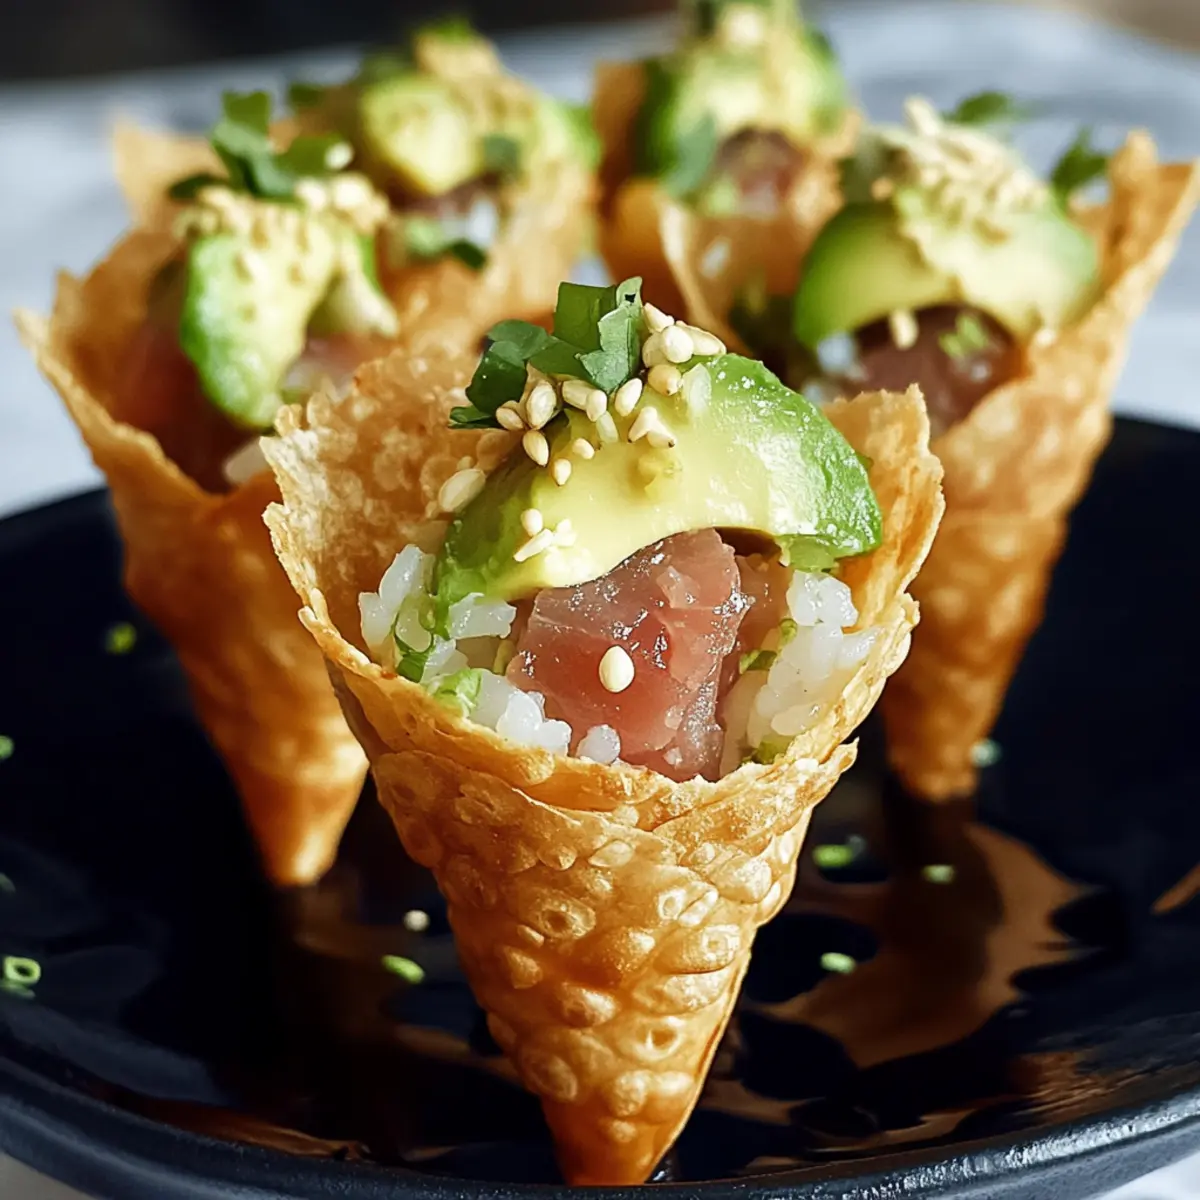
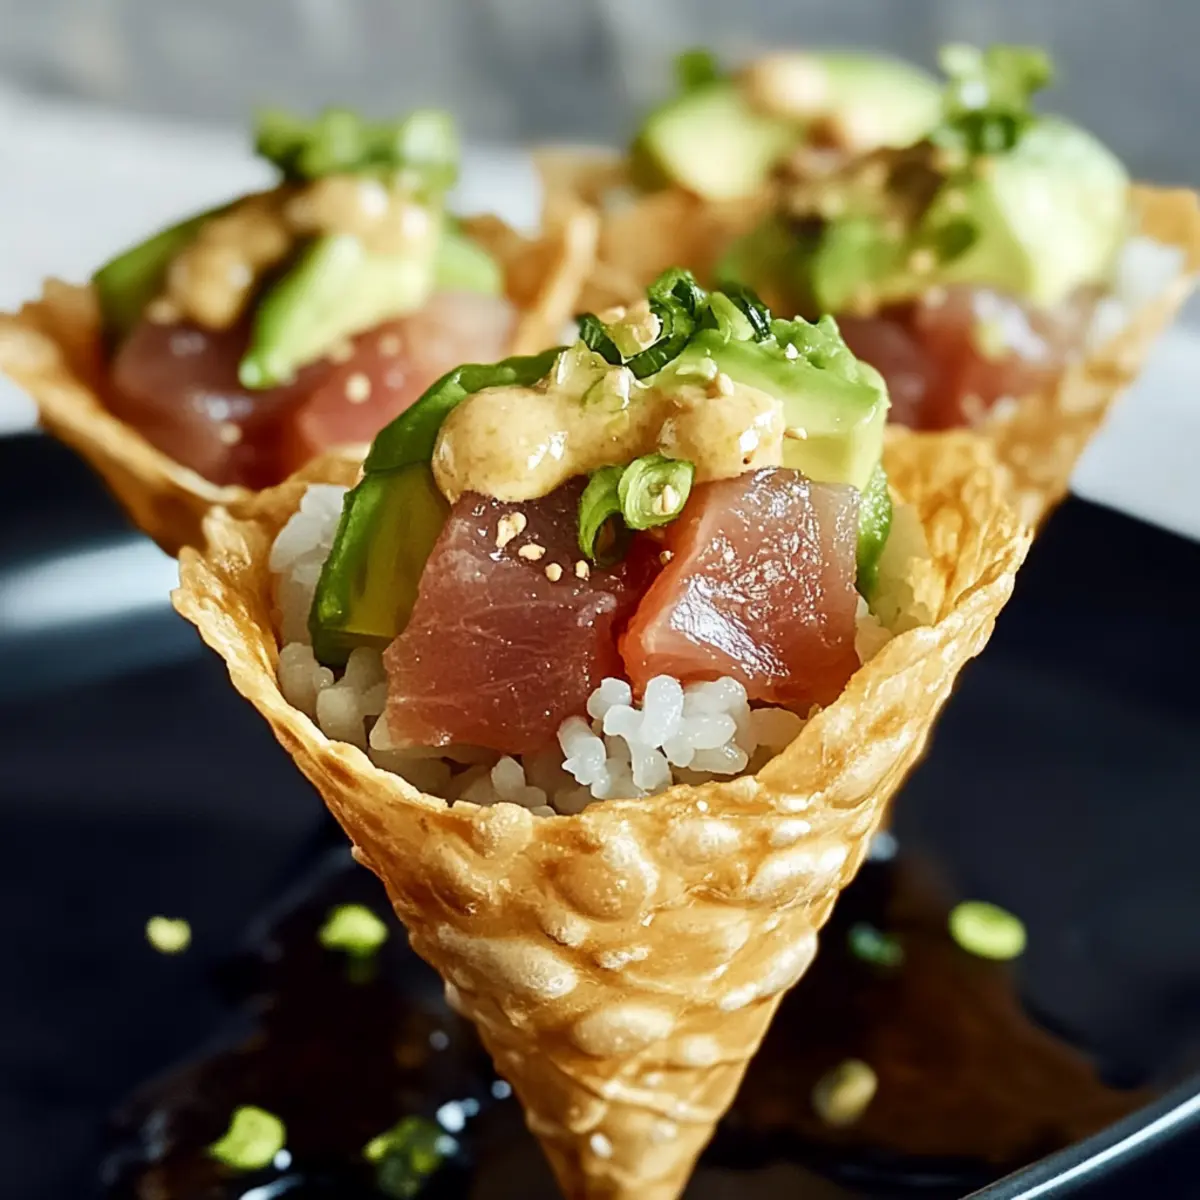
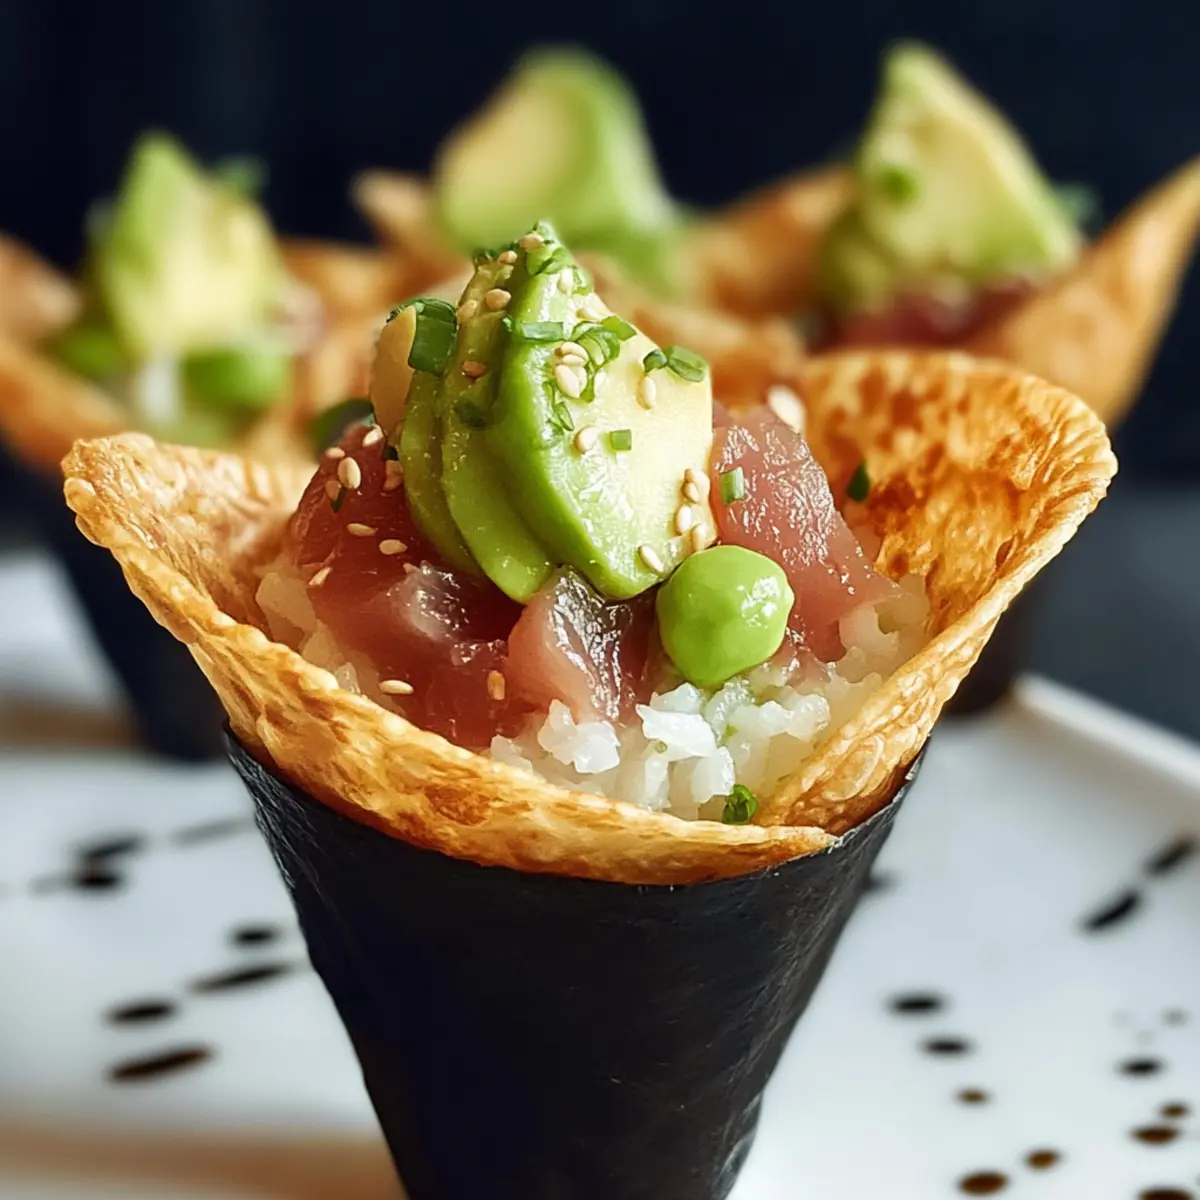
Once the wonton cones have cooled, it’s time to fill them! Start by adding a layer of sushi rice to the base of each cone, pressing it gently to hold in place. Next, add a slice or two of creamy avocado, followed by a generous scoop of your tuna mixture on top. Be careful not to overfill to maintain the lickability of these delightful Sushi Wonton Cones.
Step 6: Garnish
Before serving, take a moment to elevate your presentation by garnishing the cones. Sprinkle furikake or black sesame seeds over the top for added flavor and visual appeal. You can also include chopped scallions for a fresh touch. These garnishes will enhance the experience of enjoying your beautifully assembled Sushi Wonton Cones!
Expert Tips for Sushi Wonton Cones
-
Fry Temperature Check: Use a thermometer to ensure the coconut oil is at 175 °C (350 °F) for perfectly crispy cones.
-
Avoid Overfilling: Keep the filling to a manageable amount to prevent cone breakage and make for easier eating.
-
Crispiness Matters: Assemble your Sushi Wonton Cones just before serving to maintain that delightful crunch from the wonton wrappers.
-
Chill for Best Flavor: Refrigerate the tuna mixture until you’re ready to fill the cones; cooler filling enhances texture and taste.
-
Garnishing Bonus: Don’t skip the garnishes! They add both flavor and a beautiful aesthetic to your Sushi Wonton Cones, making them more appealing.
Sushi Wonton Cones Variations & Substitutions
Feel free to let your creativity run wild as you customize these delightful Sushi Wonton Cones!
- Seafood Swap: Use cooked shrimp or salmon instead of tuna for a different flavor twist. Each seafood option brings its unique taste and texture, inviting all seafood lovers to the table.
- Vegan Delight: Replace tuna with tofu or hummus for a delicious vegan version, ensuring every bite is packed with flavor and nutrients. This swap not only caters to plant-based diets but offers a satisfying creaminess too!
- Spicy Kick: Add more Sriracha or a splash of your favorite hot sauce to amp up the heat! If you’re feeling adventurous, try jalapeños or sliced chili peppers for an extra spicy note.
- Different Rice: Experiment by substituting sushi rice with quinoa or brown rice for a healthier twist. You’ll retain the nutritious benefits while introducing new textures and flavors.
- Vegetarian Filling: Mix in some tasty edamame or spicy veggie mixtures instead of tuna for a colorful and flavorful filling everyone can enjoy. It’s a fantastic way to include more veggies in your appetizers!
- Sweet Experiment: Swap traditional garnishes for chili sauce or hoisin sauce for an interesting sweet-savory kick that’ll surprise your taste buds. The combination of sweet and savory is always a winner!
- Herb Infusion: Add fresh cilantro or basil to your filling mix for bursts of freshness that will elevate your cones. The addition of fresh herbs brings brightness and a lovely aroma to each bite.
- Crispy Toppings: Top with fried onions or crushed nuts for a crunchy texture variation that adds layers of flavor and an elevated dining experience. These unexpected toppings can make each bite even more exciting!
If you’re seeking more inspiration, consider pairing your cones with a refreshing cucumber-mint lemonade or a light iced green tea for an effortless yet delightful experience. Enjoy making these unique Sushi Wonton Cones!
How to Store and Freeze Sushi Wonton Cones
Room Temperature: It’s best to enjoy your Sushi Wonton Cones fresh. If left out, they can stay at room temperature for up to 2 hours, but be mindful of food safety.
Fridge: Store leftover assembled cones wrapped in plastic wrap or an airtight container in the fridge for up to 1 day. However, the wonton shells may lose their crispness.
Freezer: For longer storage, freeze the unassembled wonton cones. Simply wrap them tightly and store for up to 2 months. Fry them straight from the freezer for the best results.
Reheating: If you’ve stored filled cones, the best way to reheat is in an oven set to 175°C (350°F) for about 5-10 minutes to revive that crunch.
What to Serve with Sushi Wonton Cones
Elevate your Sushi Wonton Cones experience by pairing them with delightful sides and beverages that complement their playful, savory flavors.
-
Crispy Seaweed Salad: This light and crunchy salad offers a refreshing contrast to the creamy cones, enhancing the sushi experience.
-
Soy Sauce Dipping Bowl: A classic accompaniment, this adds a savory depth that perfectly balances the flavors of the tuna filling.
-
Miso Soup: This warm, umami-rich soup is a comforting starter that harmonizes beautifully with the sushi-inspired dish.
-
Sushi-Inspired Pickles: Tangy, quick-pickled vegetables provide a zesty crunch that cuts through the richness of the avocado and tuna.
-
Cucumber-Mint Lemonade: A refreshing drink that amplifies the freshness of the cones, combining citrus and herb flavors in every sip.
-
Wasabi Peas: These crunchy, spicy snacks offer a fun pop of heat, adding an exciting kick that pairs well with the savory cones.
-
Fresh Fruit Platter: A colorful assortment of fruits like mango, pineapple, and strawberries brings a sweet and juicy contrast to the meal.
-
Green Tea: A soothing beverage choice that complements the flavors of the sushi while aiding in digestion, creating a well-rounded dining experience.
-
Chocolate Mochi: End the meal on a sweet note with these chewy treats, which add a fun twist to the dessert course and echo the playful vibe of the meal.
Make Ahead Options
These Sushi Wonton Cones are a fantastic choice for meal prep, saving you precious time during busy weeknights! You can prepare the sushi rice and the tuna mixture up to 3 days in advance; simply store each in separate airtight containers in the refrigerator to maintain their freshness and texture. For the best results, wait to assemble the cones until just before serving to keep the wontons crispy. When you’re ready to enjoy, fill the cooled cones with the rice, slices of avocado, and the chilled tuna mixture. This way, you’ll have delightful, restaurant-quality Sushi Wonton Cones ready to impress your family and friends with minimal last-minute effort!
Sushi Wonton Cones Recipe FAQs
How do I choose ripe avocados for my Sushi Wonton Cones?
Absolutely! When selecting avocados, look for ones that yield slightly to gentle pressure; this indicates they’re ripe and creamy. Avoid avocados with dark spots all over, as they may be overripe. If you can’t find ripe avocados, I recommend buying them a few days in advance to ripen at room temperature.
How should I store leftover Sushi Wonton Cones?
After assembling, it’s best to eat your Sushi Wonton Cones fresh. However, if you have leftovers, wrap them tightly in plastic wrap or place them in an airtight container in the fridge for up to 1 day. Keep in mind that the wonton shells may lose their delightful crunch, so enjoy them as soon as you can.
Can I freeze the filling for my Sushi Wonton Cones?
Yes! To freeze the filling, store the tuna mixture in an airtight container or freezer bag for up to 3 months. Just make sure to chill it first. When you’re ready to use it, thaw the mixture in the fridge overnight, then fill the cones just before serving for the best results.
What should I do if my wonton cones break while wrapping them?
Very! If your wonton wrappers break, don’t fret! You can try reinforcing them by overlapping the torn edges slightly or using a piece of another wrapper to patch it up. Alternatively, you might create a different shape—such as bite-size squares or triangles—and serve them in a small dish as a variation of sushi.
Can pets eat the ingredients in Sushi Wonton Cones?
While the ingredients seem fine, it’s essential to keep pets away from certain elements, particularly the tuna and avocado. Tuna can be served in moderation, but avoid giving your pet anything with spices or sauces. If you’re unsure, it’s best to consult your vet or stick to pet-safe treats.
How long can I keep unassembled wonton cones in the freezer?
Unassembled Sushi Wonton Cones can be frozen for up to 2 months. To freeze, simply wrap the cones tightly in plastic wrap and place them in a freezer bag. When you’re ready to fry them, there’s no need to thaw—just fry them straight from the freezer at 175°C (350°F) for that perfect crunch!
Crispy Sushi Wonton Cones Beyond Your Takeout Dreams
Ingredients
Equipment
Method
- Prepare the oven by preheating it to 175 °C (350 °F). Wrap each wonton wrapper around a cream horn mold tightly and brush with coconut oil.
- Heat coconut oil in a deep skillet to 175 °C (350 °F). Fry the wrapped cones for 2-3 minutes until golden brown and crisp. Drain on paper towels.
- Cook sushi rice according to package instructions, usually about 15-20 minutes. Mix warm rice with rice vinegar, sugar, and salt, and let it cool.
- Cut sushi-grade tuna into cubes or flakes. Mix with Kewpie mayonnaise, tomato sauce, sriracha (if using), and lime zest. Chill the mixture.
- Fill the cooled wonton cones with sushi rice, avocado slices, and a scoop of the tuna mixture. Avoid overfilling.
- Garnish with furikake or black sesame seeds and serve.
Leave a Reply