
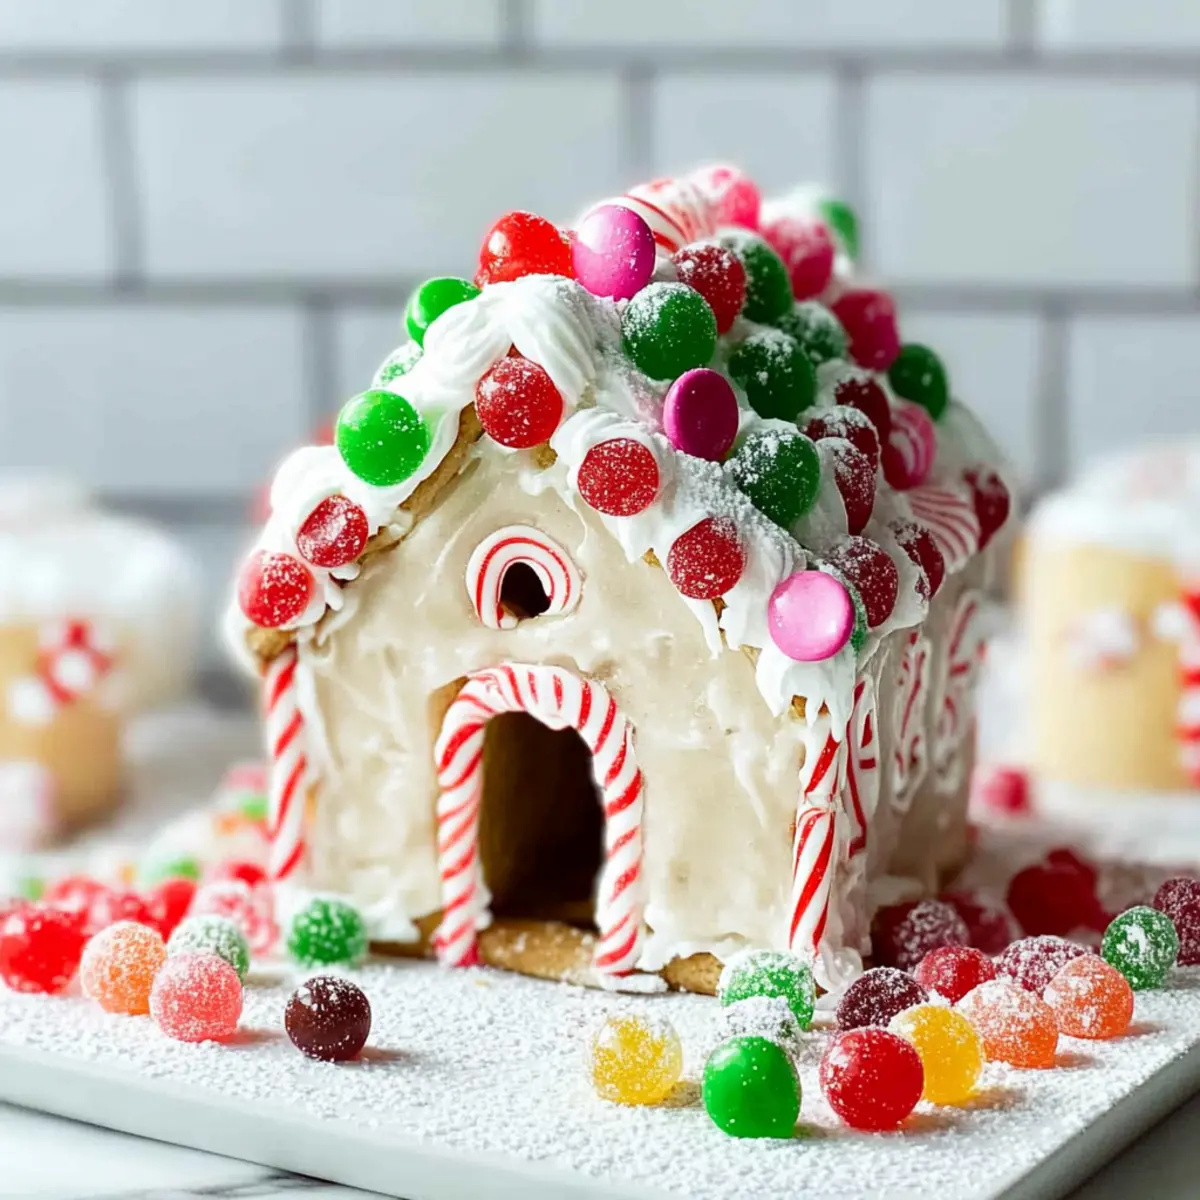
Amid the hustle and bustle of the holiday season, there’s a special kind of joy in creating something unique, especially with loved ones. The Christmas Pop Tart Gingerbread House combines the whimsy of traditional gingerbread houses with the ease of no-bake fun, making it an absolute must-try this year. Imagine the laughter as everyone gathers around, decorating this delightful project with colorful candies and icing. Not only is this festive treat a fantastic way to engage children and adults alike, but it’s also a quick and simple recipe that allows you to unleash your creativity without the hassle. With each bite revealing the sweet, flaky goodness of Strawberry Pop Tarts, this house isn’t just for show; it’s a delicious way to celebrate the season. Ready to make your holiday memorable? Let’s dive into the festive fun of crafting your own Pop Tart Gingerbread House!
Why Make a Pop Tart Gingerbread House?
Endless Fun: This no-bake project promises laughter and creativity, perfect for family bonding.
Quick & Easy: With just a few ingredients and no baking required, you can whip up this festive treat in no time.
Deliciously Sweet: Enjoy the flaky goodness of Strawberry Pop Tarts paired with colorful candies that add a delightful crunch.
Creative Customization: Personalize your house by swapping flavors or candies, making it a unique representation of your holiday spirit.
Perfect Holiday Centerpiece: Display your masterpiece during gatherings, creating a warm and inviting atmosphere.
Celebrate with this delightful activity, and if you’re in the mood for more holiday cheer, try out our Gingerbread Brownies Cozy for a sweet treat!
Pop Tart Gingerbread House Ingredients
• Gather everything you need for a deliciously fun bake!
For the House Structure
- 6 Strawberry Pop Tarts – The main ingredients that form the walls and roof of your charming house; feel free to experiment with different flavors!
- 1 Tube Decorating Icing – Serves as the ‘glue’ to stick your pieces together and attach decorations; consider using festive colors for extra cheer.
For the Decorations
- Christmas Candy – Choose an assortment of your favorite candies for a delightful and colorful finishing touch; traditional favorites like gumdrops and candy canes work wonderfully!
Gather these ingredients to bring your Pop Tart Gingerbread House to life, making sure each element contributes to the fun and flavor of this no-bake festivity!
Step‑by‑Step Instructions for Christmas Pop Tart Gingerbread House
Step 1: Prepare Your Workspace
Start by laying down a large piece of parchment paper on your counter or table. This will make clean-up easier and provide a non-stick surface for your Pop Tart Gingerbread House assembly. Gather your Strawberry Pop Tarts, decorating icing, and Christmas candy to have everything in reach.
Step 2: Assemble the Base
Take one Pop Tart and place it vertically in the center of your prepared surface. Then, place one additional Pop Tart to the left and one to the right of the central piece, creating the walls of your house. Ensure that these Pop Tarts are aligned evenly next to the central piece to create a sturdy structure.
Step 3: Create the Roofline
Using a clean knife or scissors, carefully cut the top center point of the vertical Pop Tart downward to match the angles of the left and right pieces. This will create a peaked roof effect for your house. After cutting, lay the triangular piece on top to serve as the roof’s apex and trim as necessary to keep the shape cohesive.
Step 4: Position Everything Together
Reposition the Pop Tarts into a house shape, ensuring the pointed ends of the vertical piece are at either side, forming a charming roof. Make adjustments to ensure that all pieces are standing upright and stable, firmly aligning the edges to create a seamless appearance for your Pop Tart Gingerbread House.
Step 5: Secure the Structure with Icing
Now, take the tube of decorating icing and carefully ‘glue’ the walls together by piping icing along the seams where the Pop Tarts touch. Allow a few minutes for the icing to set before attaching the roof. This step is essential for creating a stable Pop Tart Gingerbread House, so be patient!
Step 6: Attach the Roof
Once the walls feel secure, gently place the trimmed top piece back onto the house to serve as the roof. Make sure the angles of the roof fit snugly against the walls. Use the decorating icing to spread a generous amount on the edges of the roof and adhere it firmly to the walls of your Pop Tart Gingerbread House, allowing it to dry completely.
Step 7: Get Creative with Decorations
After the structure has dried for about 10-15 minutes, it’s time to decorate! Use the decorating icing to add details and ‘glue’ your favorite Christmas candy onto the roof and walls. Think about colors and textures, layering gumdrops, candy canes, or any festive treats to make your Pop Tart Gingerbread House truly unique and delightful.
Expert Tips for a Perfect Pop Tart Gingerbread House
-
Icing Stability: Allow the icing to dry completely between each step. This is crucial for keeping your Pop Tart Gingerbread House sturdy and intact.
-
Candy Selection: Use a variety of candies like gumdrops, chocolate, and candy canes to enhance visual appeal. Don’t forget to consider textures for added interest!
-
Assembly Calm: Take your time when positioning the Pop Tarts. A steady hand will help achieve a polished look and ensure the house stands tall.
-
Flavor Swaps: Feel free to experiment with different Pop Tart flavors. Chocolate or cinnamon can add a new twist to your Pop Tart Gingerbread House!
-
Decoration Contests: Engage family and friends in a decorating contest. It makes the experience even more fun and encourages everyone to unleash their creativity!
Pop Tart Gingerbread House Variations
Feel free to get creative and customize your Pop Tart Gingerbread House to suit your taste and style!
-
Flavor Twist: Swap Strawberry Pop Tarts for Chocolate Fudge or Brown Sugar Cinnamon for a delightful change.
-
Icing Upgrade: Use royal icing instead of decorating icing for a classic look; it sets firmer for added stability.
-
Candy Diversity: Select seasonal candies like spiced gumdrops or peppermint for a holiday-inspired twist that captures the spirit of the season.
-
Nutty Addition: Crushed nut toppings can add a delicious crunch and a new texture, perfect for enhancing your house’s flavor profile.
-
Fruit Medley: Instead of solely candy, incorporate dried fruits like cranberries or apricots to introduce a chewy and flavorful element that contrasts beautifully with the Pop Tarts.
-
Spicy Kick: Add a hint of warmth by sprinkling ginger or cinnamon on your candy or icing; it’ll bring a cozy flavor that resonates with the holiday spirit.
-
Exterior Design: Opt for sprinkled edible glitter over the icing for a sparkling, festive look, making your Gingerbread House even more eye-catching.
-
Interactive Fun: Create a decorating station with various toppings for every family member to pick and decorate, making it a fun activity for all ages!
As you explore these variations, you might also want to try our Chocolate Biscoff Tart for another delightful dessert option! Each twist allows you to tailor the house to reflect your family’s tastes and makes decorating even more enjoyable. Happy building!
What to Serve with Christmas Pop Tart Gingerbread House
The holiday season is all about creating joyful memories with loved ones, and what better way to celebrate than with tasty treats to accompany your festive centerpiece?
-
Hot Cocoa: A warm cup of rich chocolatey goodness pairs perfectly, enhancing the sweetness of your Pop Tart Gingerbread House.
-
Festive Sugar Cookies: Soft, frosted cookies bring a delightful texture and festive flair, creating a sweet contrast to the crispy Pop Tarts.
-
Spiced Apple Cider: This warm, spiced drink evokes cozy feelings, making it a perfect match for the holiday vibe of your Pop Tart Gingerbread House.
-
Fruit Platter: Fresh fruits add a refreshing crunch and brighten up the table, balancing the sweetness of your festive treat beautifully.
-
Gingerbread Lattes: The warm, spiced flavor mirrors the gingerbread theme, elevating your holiday celebration and warming your spirit.
-
Chocolates: A selection of festive chocolates offers a rich, indulgent treat that complements the sweetness of the pop tarts and candies beautifully.
-
Peppermint Bark: This crunchy, minty favorite enhances the festive mood while providing a refreshing contrast to the rich flavors of the Pop Tart house.
-
Eggnog: Creamy and spiced, the classic holiday drink adds a rich, indulgent element that pairs well with your treats, making every bite feel extra special.
How to Store and Freeze Pop Tart Gingerbread House
Airtight Container: Keep your Pop Tart Gingerbread House in an airtight container at room temperature for up to 3 days to maintain its delicious crunch and freshness.
Avoid Refrigeration: Do not refrigerate, as this can lead to sogginess and affect the texture of the Pop Tarts.
Freezing Tips: For longer storage, you can freeze decorations separately for up to 2 months. Assemble the house fresh when you’re ready to enjoy it.
Reheating: If needed, gently warm up any leftover sections in the microwave for a few seconds, but be mindful not to melt the icing!
Make Ahead Options
These Christmas Pop Tart Gingerbread Houses are a fantastic option for meal prep enthusiasts! You can prepare the house structure by assembling the Pop Tarts and icing them together up to 24 hours in advance, ensuring they stay stable and ready for decoration. Once assembled, store them in an airtight container in a cool, dry place to maintain their crispness and prevent sogginess. Just before serving, add your colorful Christmas candy decorations for a fresh and vibrant touch! This way, you can enjoy a stress-free decorating session, making the entire process easier for busy holiday schedules while creating delightful memories with your loved ones.
Pop Tart Gingerbread House Recipe FAQs
How do I choose the right Pop Tarts for my gingerbread house?
Absolutely! While Strawberry Pop Tarts are the traditional choice, you can experiment with any flavor that makes your mouth water. Chocolate Fudge or Brown Sugar Cinnamon are also great options. Just keep in mind that the flavor of the Pop Tarts will influence the overall taste of your gingerbread house!
How should I store my Pop Tart Gingerbread House?
Store your Pop Tart Gingerbread House in an airtight container at room temperature for up to 3 days. This helps maintain its fresh crunch. Just be careful—don’t refrigerate it, as that can make the Pop Tarts soggy, diminishing the joy of each bite!
Can I freeze my Pop Tart Gingerbread House or its decorations?
Very! If you want to freeze your creations, it’s best to keep the decorations separate. You can freeze them for up to 2 months. Just assemble the house fresh when you’re ready to enjoy it. When you take them out, let them thaw at room temperature, and you’ll be ready to go!
What should I do if my icing isn’t holding the Pop Tarts together?
No worries! If your icing isn’t sticking well, consider using a thicker layer and allowing it to dry completely before moving on to the next step. Patience is key! Also, check that the surface is clean and dry; moisture can prevent it from setting properly.
Is this recipe safe for pets or those with dietary restrictions?
Always a good question! This Pop Tart Gingerbread House uses ingredients that are generally safe for human consumption, but keep in mind that Pop Tarts and many candies are not suitable for pets. Additionally, if you’re catering to allergies, check for any specific ingredients that may cause reactions in your family or friends, especially with candy.
Can I customize the decorations on my Pop Tart Gingerbread House?
The more the merrier! Feel free to personalize your gingerbread house further by using a variety of candies. You can also substitute with allergy-friendly options or seasonal candies. Get creative; your unique touch will make it even more special!
Fun and Festive Pop Tart Gingerbread House to Create Together
Ingredients
Equipment
Method
- Prepare Your Workspace: Lay down a large piece of parchment paper on your counter or table for a non-stick surface.
- Assemble the Base: Place one Pop Tart vertically in the center and two Pop Tarts on either side for walls.
- Create the Roofline: Cut the top of the vertical Pop Tart to create a peaked roof and position the triangular piece accordingly.
- Position Everything Together: Adjust all pieces to ensure they are standing upright and stable.
- Secure the Structure with Icing: Pipe icing along the seams where the Pop Tarts touch to ‘glue’ them together.
- Attach the Roof: Place the top piece onto the walls and use icing to secure it snugly.
- Get Creative with Decorations: Use icing to attach candies and decorate as desired.
Leave a Reply