
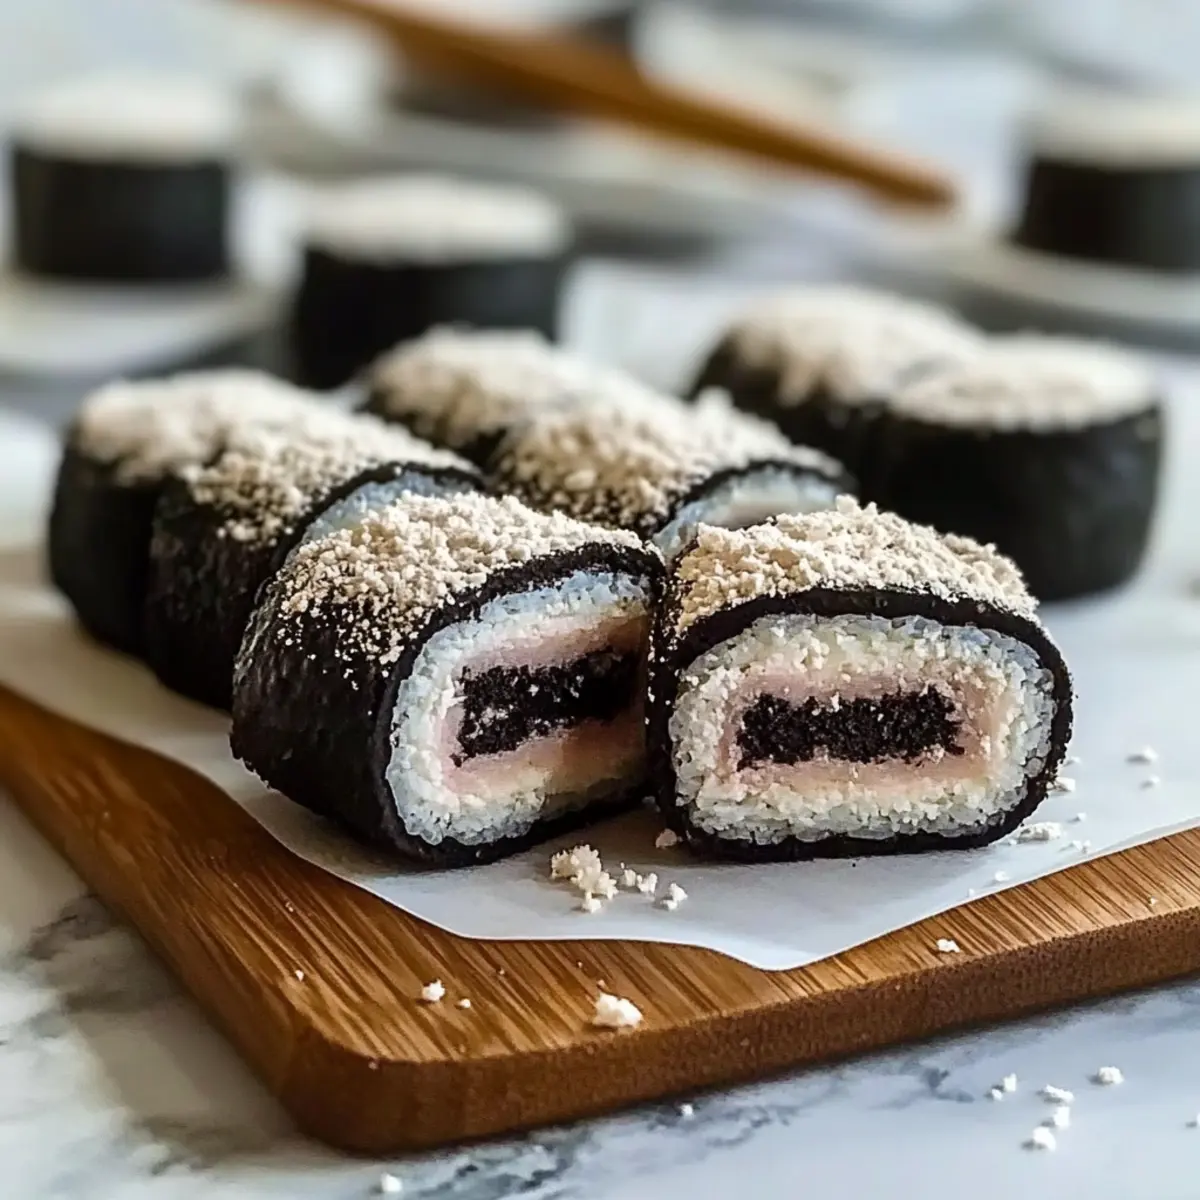
“Have you ever found yourself pondering the limitless possibilities of Oreo cookies? What if I told you that with just two simple ingredients, you could transform these beloved treats into something completely unexpected—Oreo Sushi! This playful recipe not only reinvents the classic cookie but also delivers a fun and easy way to impress guests, engage kids in the kitchen, or simply indulge in a sweet evening snack. With its quick prep time and endless customization options, Oreo Sushi is not just a dessert; it becomes a delightful culinary adventure. Ready to roll up some smiles in the kitchen? Let’s dive in!”
Why is Oreo Sushi the ultimate treat?
Simplicity at Its Best: With just two ingredients, this recipe is a breeze to whip up, making it perfect for both novice and seasoned bakers.
Endless Customization: From colorful sprinkles to fresh fruit, feel free to add your twist and make this dessert truly your own!
Kid-Friendly Fun: Engage your little ones in the kitchen for an enjoyable bonding experience, allowing them to create their own sushi rolls.
Perfect for Any Occasion: Whether it’s a birthday party or a cozy movie night, Oreo Sushi is sure to spark joy and intrigue among your guests.
Quick and Easy: You can make this indulgent treat in mere minutes, giving you more time to savor the delicious results. For similar delightful ideas, try making a Lemon Oreo Dessert or enjoy some Vegan Oreo Brownies.
Oreo Sushi Ingredients
• Create a delicious treat with these simple ingredients!
For the Base
- Oreo Cookies – These provide the delightful foundation for your sushi rolls; feel free to try different Oreo flavors for an exciting twist!
- Milk – This binds the Oreo crumbs together; any milk variety will work wonderfully in this Oreo Sushi recipe!
Optional Toppings
- Fresh Fruit – Adding slices of strawberries or bananas introduces a refreshing contrast to the sweetness of the Oreos.
- Sprinkles – Colorful sprinkles not only enhance the visual appeal but also add a fun crunch!
- Melted Chocolate – Drizzling some melted chocolate on top creates a rich, decadent finish.
- Whipped Cream – A dollop of whipped cream makes for an indulgent dipping option!
Step‑by‑Step Instructions for Oreo Sushi
Step 1: Separate the Oreos
Begin by twisting each Oreo cookie to gently separate the cookies from the creamy filling. Place the creamy centers in one bowl and the cookie halves in a zip-top bag. This step is crucial as it sets up the foundation for your Oreo Sushi, ensuring the flavors meld beautifully in later stages.
Step 2: Prepare the Cookie Base
Using a rolling pin or your hands, crush the cookie halves in the bag until fine crumbs form—approximately 2-3 minutes should do. Once you have a consistent texture, gradually mix in milk, a couple of tablespoons at a time, until a thick, dough-like paste develops. Aim for a consistency that holds together well without being too sticky.
Step 3: Assemble the Roll
Lay a sheet of plastic wrap on a flat surface. Spread the cookie paste evenly over the plastic wrap, creating a rectangle about ¼ inch thick. Then, take the creamy filling you set aside and layer it evenly over the cookie paste. This creates that delightful sweet center in your Oreo Sushi rolls, ensuring every bite is flavorful.
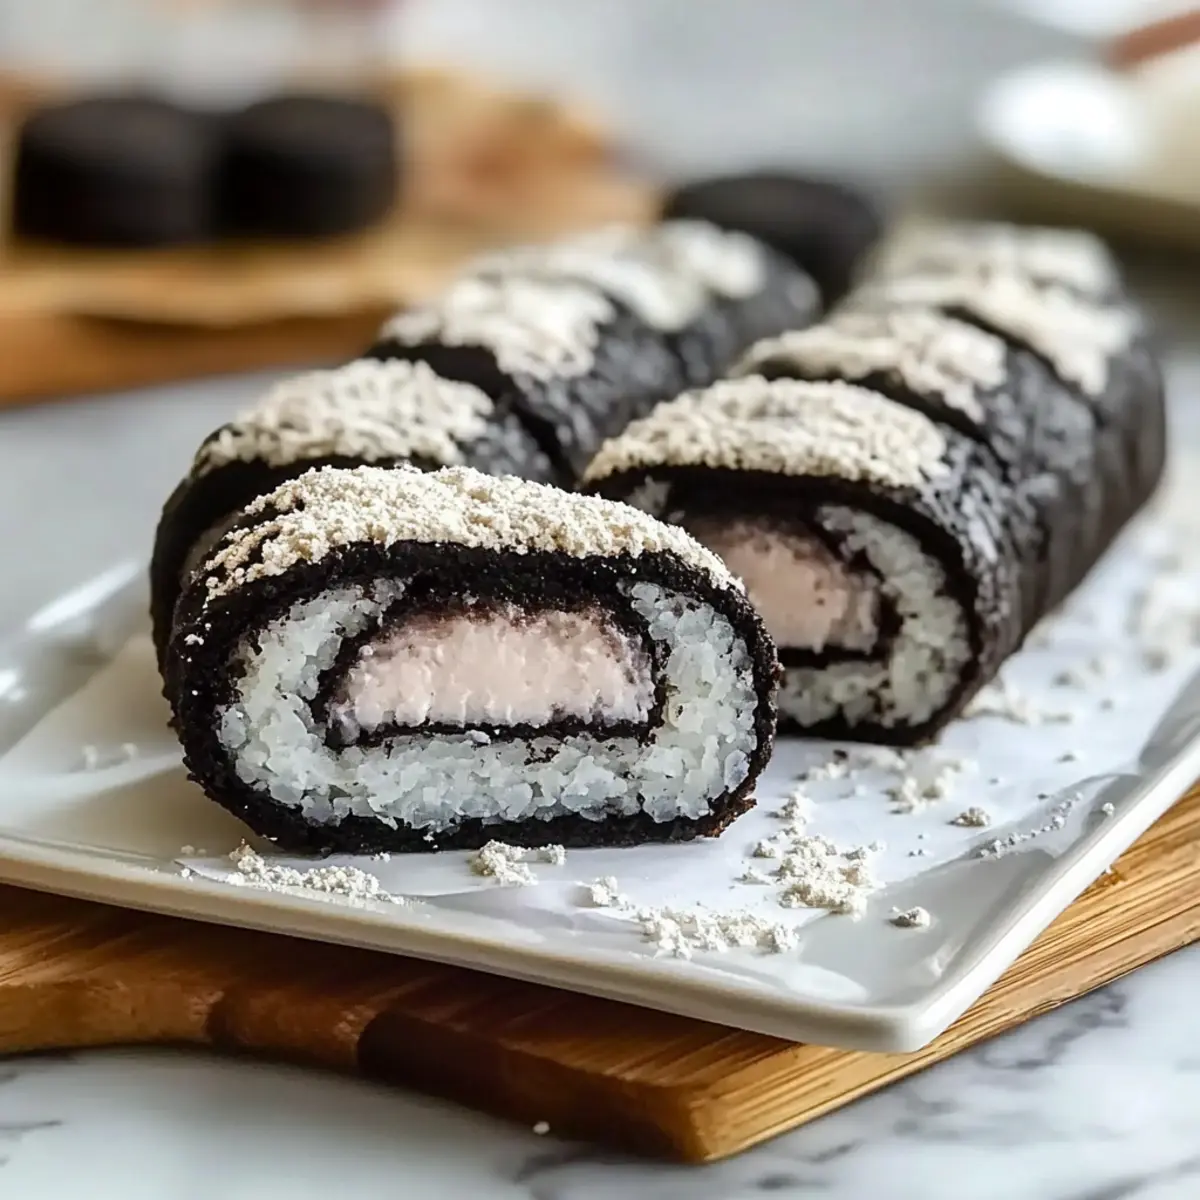
Step 4: Roll and Slice
Using the edges of the plastic wrap, carefully lift and roll the mixture into a tight log, ensuring the filling is enclosed. Once rolled, twist the ends of the plastic wrap to secure it tightly, then refrigerate for about 15 minutes. This will help the Oreo Sushi firm up, making it easier to slice into perfect bite-sized pieces.
Step 5: Serve
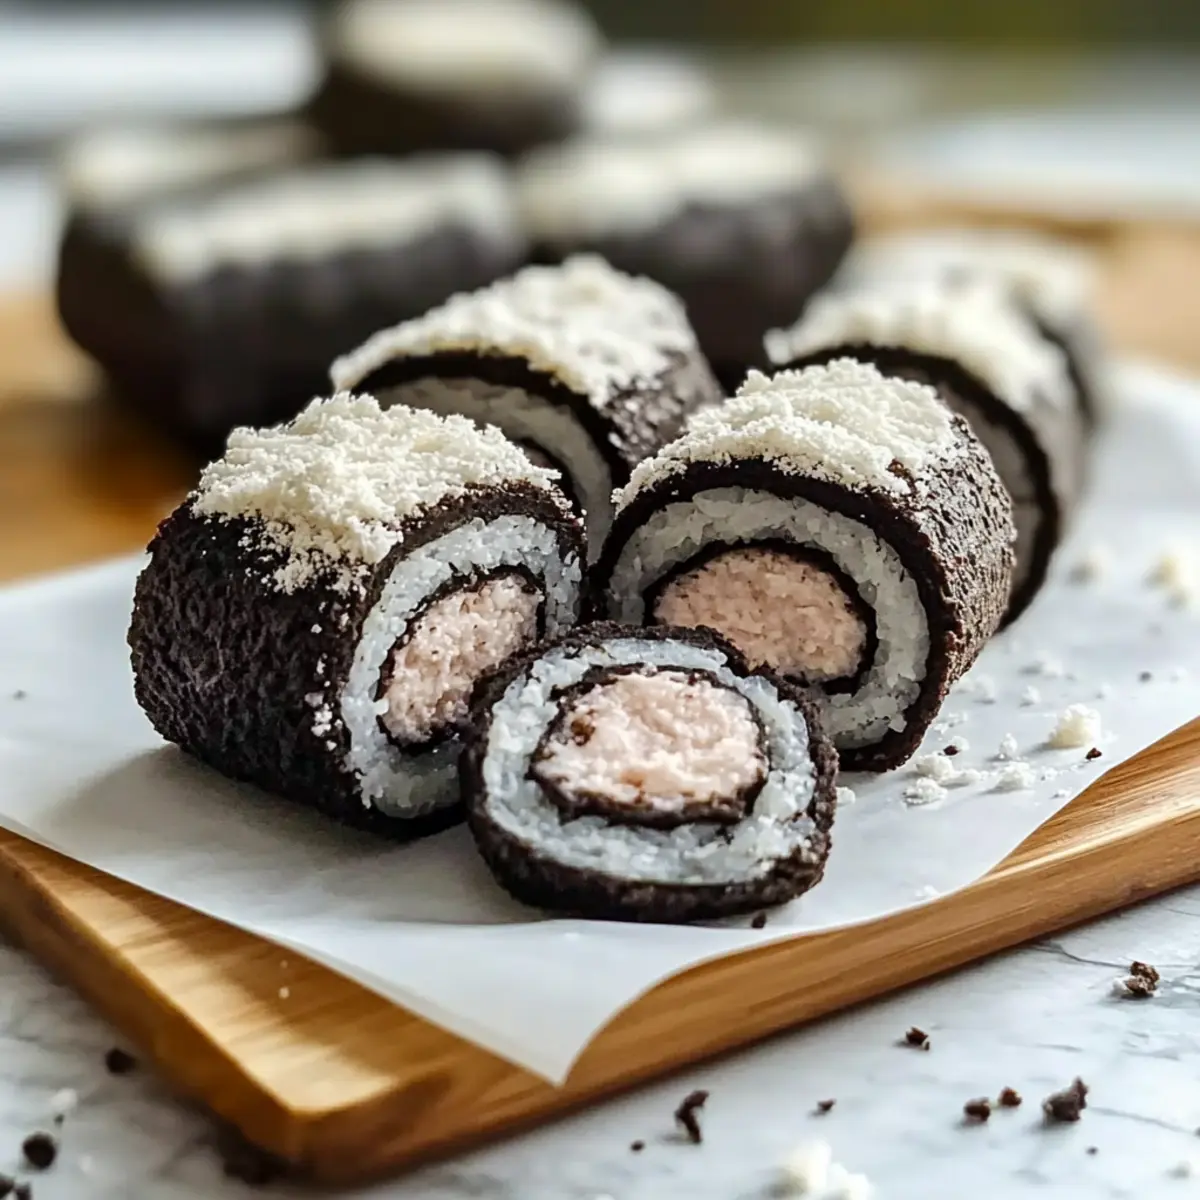
After chilling, unwrap the log and place it on a cutting board. Using a sharp knife, slice the log into bite-sized pieces that mimic sushi rolls, about 1-inch thick. Arrange these pieces on a plate, and feel free to serve them with optional toppings like chocolate sauce or a dollop of whipped cream for an extra indulgent touch.
How to Store and Freeze Oreo Sushi
Fridge: Keep leftovers in an airtight container for up to 2 days to maintain freshness and texture.
Freezer: For longer storage, wrap slices individually in plastic wrap and place them in a freezer-safe bag. They can be frozen for up to 1 month.
Reheating: Thaw in the fridge overnight before serving. If desired, enjoy them chilled or at room temperature, but note that freezing may slightly alter the texture of your Oreo Sushi.
Custom Creations: Get creative! Just like the original recipe, you can try different fillings or toppings before storing, offering a delightful surprise when you serve these sweet treats later.
What to Serve with Oreo Sushi
Transform your Oreo Sushi into an unforgettable feast with these delightful pairings.
-
Fresh Fruit Medley: A mix of strawberries, bananas, and kiwis adds a burst of freshness, balancing the sweetness of the sushi. Enjoy the vibrant colors and juicy textures that brighten your plate!
-
Chocolate Dipping Sauce: Serve alongside a warm chocolate sauce for an indulgent twist, allowing guests to dip their bites for extra decadence. This rich addition elevates the experience with every delectable morsel.
-
Whipped Cream: A dollop of fluffy whipped cream introduces a lightness that complements the dense textures of Oreo Sushi, making each bite wonderfully creamy and satisfying. It also adds a fun, playful element!
-
Ice Cream: Pair your sushi with a scoop of vanilla or mint ice cream. The cold creaminess contrasts beautifully with the sweet rolls, creating a delightful combination of flavors and temperatures.
-
Sparkling Beverage: Offer a refreshing sparkling water or a fruity soda to cleanse the palate and lighten the sweetness, making the meal feel festive and fun.
-
Colorful Sprinkles: Provide sprinkles as a fun topping option for an extra crunch and a pop of color that kids and adults alike will love. This simple addition takes your presentation to the next level!
Make Ahead Options
Oreo Sushi is a fantastic choice for meal prep enthusiasts looking to save time on busy weeknights! You can prepare the cookie base and cream filling up to 24 hours ahead of time. Simply crush the Oreo cookies and mix them with milk to form the dough, then store it tightly wrapped in plastic wrap in the refrigerator. You can also keep the separated cream filling in an airtight container until you’re ready to assemble. When you’re ready to serve, spread the cookie paste on plastic wrap, layer the cream, roll up tightly, and refrigerate for 15 minutes to firm up before slicing. This way, you’ll have fresh, delicious Oreo Sushi with minimal effort!
Oreo Sushi Variations & Substitutions
Unleash your creativity and make this delightful recipe even more special with your own personal touches!
-
Fruity Delight: Add fresh slices of strawberries or bananas for a refreshing burst of flavor. The fruit complements the sweetness beautifully and adds a lovely color to your sushi rolls.
-
Nutty Crunch: Sprinkle in crushed nuts, like almonds or pistachios, within the filling for a delightful crunch. The combination of creamy and crunchy textures makes each bite a joy.
-
Chocolate Lover: Drizzle melted chocolate over the finished sushi for an extra indulgent touch. It adds a rich, silky glaze that elevates the flavor to new heights!
-
Coconut Bliss: Incorporate shredded coconut into the cookie paste for a tropical twist. The coconut pairs wonderfully with the Oreos, giving you a taste of summer in every bite.
-
Frozen Fun: Freeze the assembled sushi for a cool treat during hot months. It’s a delightful way to enjoy this dessert, transforming it into a refreshing snack that’s sure to impress.
-
Spiced Up: Add a pinch of cinnamon or nutmeg to the cookie mixture for a warm, aromatic twist. These spices can transport your taste buds to a cozy kitchen filled with comforting flavors.
-
Mini Sushi Rolls: Roll them smaller for bite-sized pieces that are perfect for parties or as a fun kid-friendly treat. They’re easier to pop in your mouth and share with friends!
-
Themed Variations: Try making Christmas Oreos Festive by adding holiday-themed sprinkles or colors for a seasonal twist. It’s a wonderful way to celebrate the holiday spirit!
Let your imagination run wild with these variations, and don’t hesitate to mix and match to create your perfect Oreo Sushi!
Expert Tips for Making Oreo Sushi
-
Smooth Texture: Make sure to crush the Oreo cookies finely to avoid a gritty texture in your sushi rolls; this ensures a delightful bite.
-
Flavored Fun: Don’t hesitate to experiment with different Oreo flavors, like mint or peanut butter, to create unique Oreo Sushi variations that excite your taste buds.
-
Creative Toppings: Encourage kids to personalize their rolls with colorful sprinkles or fresh fruit; this will make the Oreo Sushi even more visually appealing and fun to eat.
-
Chill Before Slicing: Refrigerate the rolled log before slicing; this helps firm up the mixture, making it easier to cut clean pieces that resemble sushi.
-
Fresh is Best: Serve Oreo Sushi the same day for the best texture and flavor; while it can be stored for up to 2 days, freshly made offers the best experience.
Oreo Sushi Recipe FAQs
Can I use any type of Oreo cookie for Oreo Sushi?
Absolutely! Feel free to experiment with various Oreo flavors like mint, peanut butter, or even seasonal limited editions. Each variation adds a unique twist to your Oreo Sushi, making it an exciting dessert adventure!
How should I store leftover Oreo Sushi?
To keep your Oreo Sushi fresh, store any leftovers in an airtight container in the refrigerator for up to 2 days. This helps maintain its delightful texture and flavor, ensuring every bite remains as enjoyable as the first.
Can I freeze Oreo Sushi for later?
Yes, you can freeze Oreo Sushi! Wrap each slice individually in plastic wrap and put them in a freezer-safe bag. They can last for up to 1 month in the freezer. When you’re ready to enjoy, simply thaw in the fridge overnight, and serve chilled or at room temperature.
What if my cookie mixture is too sticky?
If your Oreo mixture becomes too sticky, you can simply add a little more crushed Oreo crumbs to achieve a more manageable consistency. Ensure it remains thick enough to hold its shape when rolled. Also, chilling the mixture for a short time can help firm it up for easier handling!
Is Oreo Sushi safe for pets?
While Oreos are delightful for humans, they aren’t suitable for pets, particularly due to the sugar and chocolate content, which can be harmful to animals. Always keep these tasty treats out of reach of your furry friends!
Can I add toppings before rolling?
Very! Adding toppings like sprinkles or sliced fruits directly to the cookie mixture before rolling can create a fun and colorful surprise. Just make sure to distribute them evenly; this way, you’ll enjoy a delightful crunch and burst of flavor in each bite!

Oreo Sushi: Create This Fun, Sweet Treat in Minutes
Ingredients
Equipment
Method
- Separate the Oreos by twisting each cookie to remove the creamy filling. Place the creamy centers in one bowl and the cookie halves in a zip-top bag.
- Crush the cookie halves in the bag until fine crumbs form, about 2-3 minutes. Gradually mix in milk until a thick, dough-like paste develops.
- Lay a sheet of plastic wrap on a flat surface. Spread the cookie paste evenly to create a rectangle about ¼ inch thick, and layer the creamy filling evenly over it.
- Carefully roll the mixture into a tight log using the plastic wrap, twist the ends to secure, and refrigerate for about 15 minutes.
- After chilling, unwrap and slice the log into bite-sized pieces about 1-inch thick. Serve with optional toppings.
Leave a Reply