
The aroma of miso butter wafts through my kitchen, instantly transporting me to my favorite Asian bistro. Today, I’m excited to share my quick and flavorful Miso Butter Salmon recipe, a dish that transforms regular salmon into a sweet and savory explosion of taste. Perfect for busy weeknights or impressing your dinner guests, this recipe offers the ease of using an air fryer or oven, ensuring you spend less time cooking and more time enjoying. The golden, slightly caramelized exterior pairs beautifully with the tender, flaky fish, making it a true crowd-pleaser. Plus, the rich umami flavors from the miso compound butter elevate it to a whole new level of deliciousness! Are you ready to bring a touch of gourmet to your dinner table? Let’s dive into this mouthwatering recipe!

Why is Miso Butter Salmon a Must-Try?
Flavor Explosion: This dish combines sweet and savory elements that make every bite a delight!
Quick & Convenient: With just a few simple steps, you can whip up this gourmet meal in under 30 minutes.
Oven or Air Fryer: Whether you’re using the oven or air fryer, you’ll enjoy perfectly cooked salmon every time.
Crowd-Pleaser: Its rich umami flavor will impress family and friends, making it a hit at any dinner party.
Versatile Pairings: Serve it with sides like steamed rice or sautéed vegetables for a complete meal, just like with our Feta Stuffed Salmon or Honey Butter Tteokbokki. This Miso Butter Salmon is sure to become a staple in your kitchen!
Miso Butter Salmon Ingredients
For the Miso Butter
- Unsalted Butter – A rich base that melds beautifully with the miso for a creamy texture.
- White Miso Paste – The star ingredient that brings depth and umami; remember, you can substitute regular miso if you reduce the amount to avoid excess saltiness.
- Brown Sugar – This balances the savory miso flavor with a touch of sweetness.
- Fresh Ginger – Adds warmth and aromatic complexity; grated ginger incorporates more smoothly into the mixture.
- Garlic – Provides a delightful pungency; freshly minced garlic is preferred for the best taste.
- Green Onions – Fresh and vibrant, they add a lovely garnish and a burst of flavor.
For the Salmon
- Salmon Fillets – The main attraction; select wild-caught for optimal taste and quality.
This miso butter salmon is a delightful twist on your usual weeknight meals, enticing your taste buds with its rich and savory flavors!
Step‑by‑Step Instructions for Miso Butter Salmon
Step 1: Make the Compound Butter
In a medium bowl, combine ½ cup of softened unsalted butter, 3 tablespoons of white miso paste, 2 tablespoons of brown sugar, 1 tablespoon of freshly grated ginger, and 2 cloves of minced garlic. Mash the mixture together with a fork until fully blended, creating a creamy, well-incorporated compound butter that is rich and aromatic. This will be the flavorful topping for your miso butter salmon.
Step 2: Prepare the Salmon
Place your wild-caught salmon fillets on a lined baking sheet or a plate. Using a butter knife or spatula, equally spread a generous layer of the miso butter mixture over the top of each fillet. Ensure the salmon is well-coated with the creamy blend, as this will enhance its flavor and create a delicious glaze during cooking, setting the stage for a perfect miso butter salmon.
Step 3: Cook the Salmon (Oven Method)
Preheat your oven to 375°F (190°C). Once heated, place the salmon in the oven and bake for 12–15 minutes. Keep an eye on your salmon; it should turn opaque and flake easily with a fork when done. For an added caramelization, switch to broil for the final 1–2 minutes, allowing the top to brown slightly while ensuring it doesn’t burn, enhancing the miso butter salmon’s rich flavors.
Step 4: Cook the Salmon (Air Fryer Method)
Preheat your air fryer to 400°F (204°C). Cut a piece of parchment paper or foil to fit the basket, and place it inside. Carefully place the salmon fillets in the basket, ensuring they are not crowded, and cook for 9–10 minutes. You’ll know your salmon is ready when it is flaky and tender, ensuring a delightful texture in your miso butter salmon.
Step 5: Serve the Dish
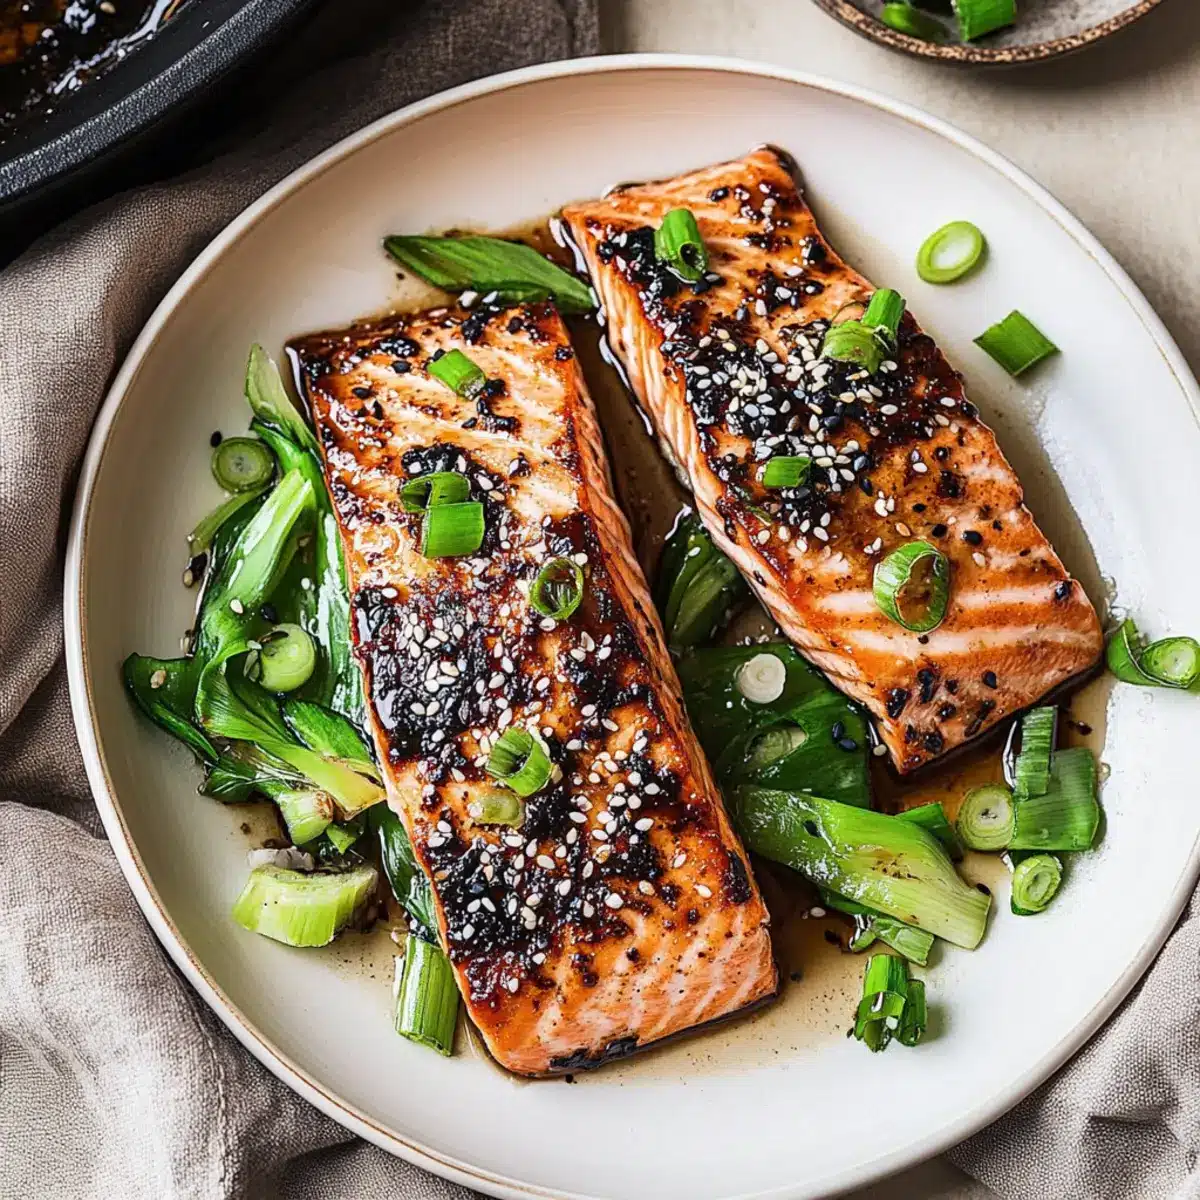
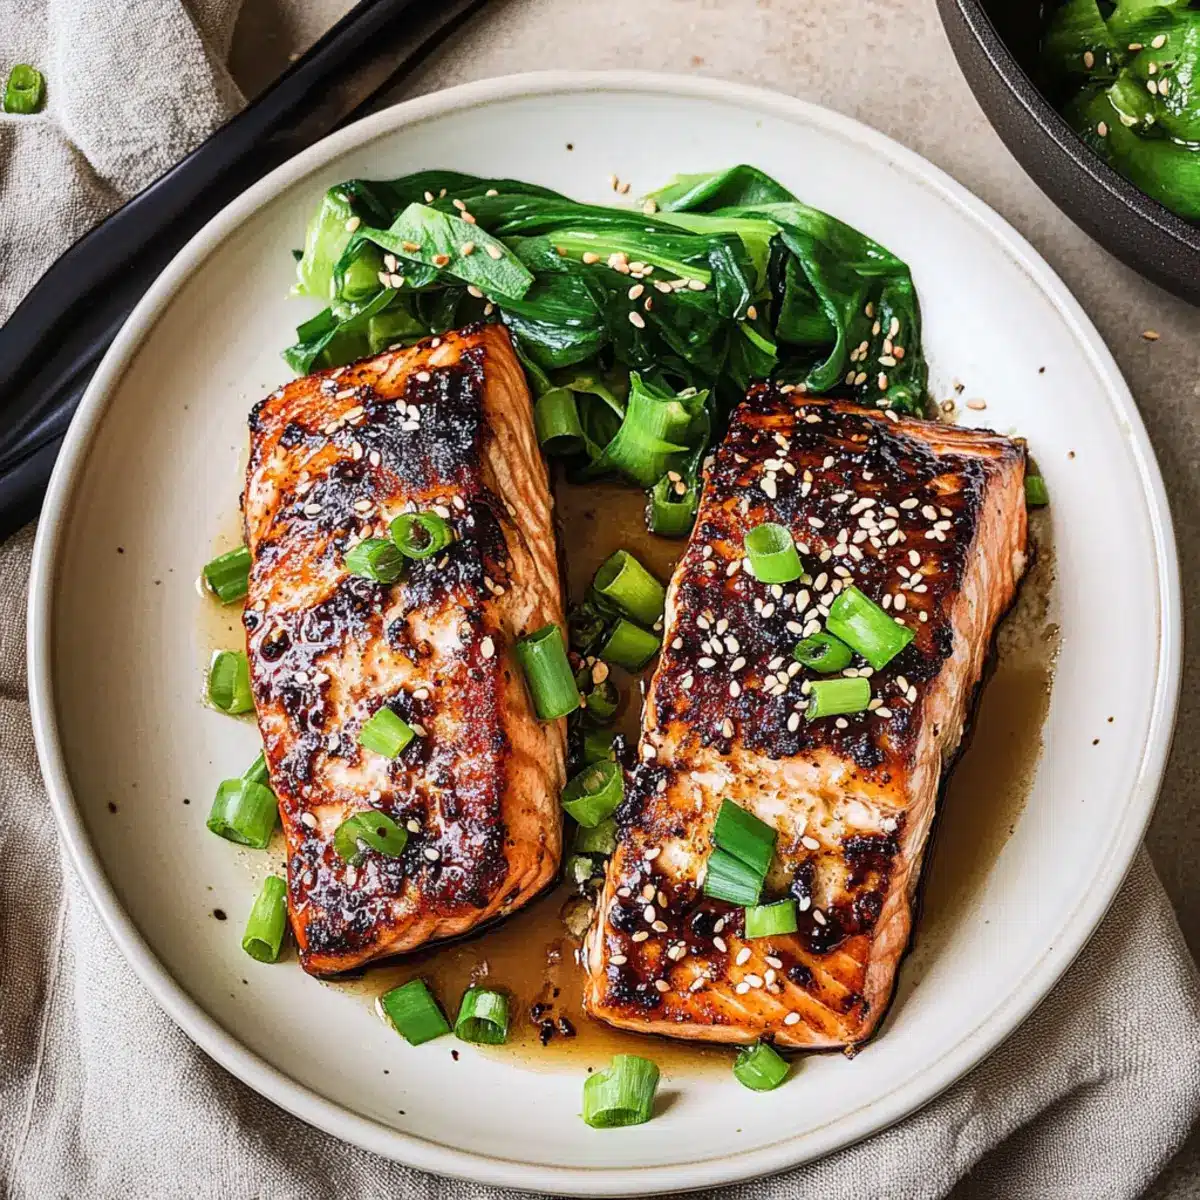
Once cooked, carefully transfer the salmon fillets to a serving platter. Drizzle any remaining miso butter over the top for an extra flavorful finish. Garnish with thinly sliced green onions and, if desired, a sprinkle of sesame seeds for added crunch. Your miso butter salmon is now beautifully presented and ready to be served alongside steamed rice and sautéed vegetables for a complete meal!
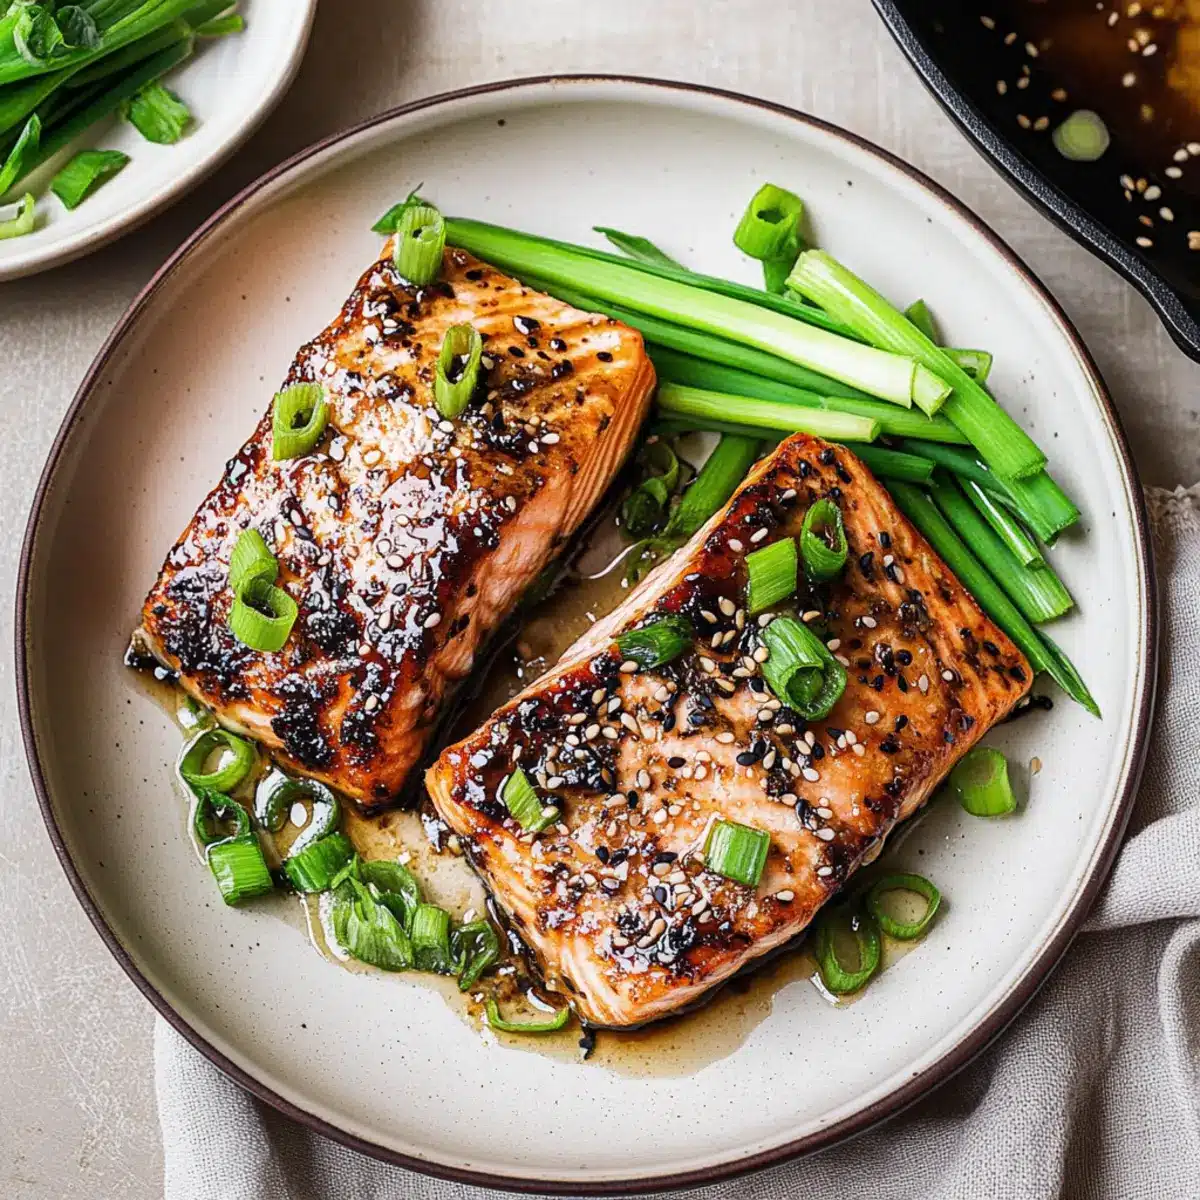
What to Serve with Miso Butter Salmon
Enhance your dining experience by pairing this flavorful dish with delightful sides that complement its rich umami notes.
-
Steamed Rice: The perfect canvas for soaking up the miso butter, providing a neutral base to balance the salmon’s bold flavors.
-
Sautéed Green Beans: Tender-crisp green beans add a satisfying crunch and vibrant color, making your plate as appealing as it is delicious.
-
Crispy Roasted Broccoli: With a smoky, charred flavor that contrasts beautifully with the salmon, this side adds a lovely texture and nutrition.
-
Coconut Rice: Creamy and subtly sweet, this aromatic rice brings a hint of tropical flavor, pairing exquisitely with the miso butter’s savory richness.
-
Asian Slaw: A refreshing mix of cabbage, carrots, and sesame dressing that adds a crunchy contrast and wakes up your palate with each bite.
-
Chilled Sake: For a celebratory touch, enjoy a glass of chilled sake, which harmonizes with the dish’s umami notes and elevates the experience.
-
Matcha Cheesecake: For dessert, a light and creamy matcha cheesecake provides a delightful, slightly earthy finish, making your meal unforgettable.
Miso Butter Salmon Variations & Substitutions
Get ready to explore delightful twists on your Miso Butter Salmon, adding layers of flavor and fun to your kitchen experience!
-
Miso Swap: Replace white miso with red or yellow for a different flavor profile that brings out more richness.
-
Spicy Kick: Add sriracha or red chili flakes to the miso butter for an exciting heat that adds depth to the dish.
-
Citrusy Zing: Mix in a teaspoon of fresh lemon or lime juice to brighten the flavors and cut through the richness of the butter.
-
Herbaceous Touch: Incorporate fresh herbs like cilantro or basil into the miso butter, giving your salmon a fresh, fragrant zing that can really elevate the dish!
-
Sweet Surprise: Experiment with honey or maple syrup instead of brown sugar for a unique sweetness that complements the umami beautifully.
-
Texture Adventure: Top your salmon with crushed nuts like almonds or sesame seeds before serving, offering a delightful crunch that contrasts the tender fish.
-
Veggie Boost: Serve with a side of roasted vegetables or a fresh salad to enhance your meal’s healthiness, just as you would with Spicy Buttermilk Fried chicken.
-
Alternative Grain: Swap out rice for quinoa or farro as a side. These options add texture and pair divinely with the rich miso butter flavors.
Let your creativity run wild while preparing this tasty Miso Butter Salmon; happy cooking!
How to Store and Freeze Miso Butter Salmon
Fridge: Store leftover miso butter salmon in an airtight container for up to 3 days to maintain its moisture and flavor.
Freezer: For longer storage, wrap the salmon in plastic wrap and then in aluminum foil or place it in a freezer-safe bag. It will last up to 3 months.
Reheating: When ready to enjoy, thaw in the fridge overnight. Reheat in the oven at 300°F for about 15 minutes, ensuring the salmon remains juicy and tender.
Unused Miso Butter: Keep any leftover miso butter in the fridge for up to 5 days, allowing it to soften before use on your next miso butter salmon creation.
Make Ahead Options
These Miso Butter Salmon fillets are perfect for meal prep enthusiasts! You can prepare the miso butter up to 3 days in advance; simply blend the softened unsalted butter, miso paste, brown sugar, ginger, and garlic, and store it in an airtight container in the refrigerator. Additionally, you can coat the salmon fillets with the miso butter mixture up to 24 hours ahead; just cover and refrigerate them until ready to cook. This ensures the salmon absorbs all those delicious flavors without compromising quality. When it’s time to cook, just follow the baking or air frying instructions, and you’ll enjoy a restaurant-quality meal with minimal effort after a long day!
Expert Tips for Miso Butter Salmon
-
Room Temperature Salmon: Allow your salmon fillets to come to room temperature before cooking. This ensures even cooking throughout and prevents the center from remaining raw.
-
Watch the Broil: Keep a close eye on your salmon while broiling. Even a minute too long can lead to over-browning, ruining the delicate flavors of your miso butter salmon.
-
Miso Variability: Miso paste varies in saltiness, so if you choose a different type (red or yellow), adjust the quantity to avoid overpowering saltiness in your dish.
-
Storage Tips: Any leftover miso butter can be stored in the fridge for up to 5 days. Allow it to soften at room temperature before using it again to maintain the creamy texture.
-
Perfect Pairings: For optimal flavor and a complete meal, serve your miso butter salmon with sides like quinoa or mixed vegetables, enriching your dining experience.
Miso Butter Salmon Recipe FAQs
What type of salmon should I use?
Absolutely! For the best flavor and texture, I recommend using wild-caught salmon fillets. They tend to be firmer and have a richer taste compared to farmed varieties. Look for vibrant, moist fillets without any dark spots or unpleasant odors, as these can indicate a lack of freshness.
How should I store leftover miso butter salmon?
You can store any leftover miso butter salmon in an airtight container in the fridge for up to 3 days. To maintain the salmon’s moisture and flavor, simply place it in the container right after it has cooled down. When you’re ready to enjoy it again, I suggest reheating it in the oven at 300°F for about 15 minutes to keep it juicy.
Can I freeze miso butter salmon?
Yes, you can! To freeze miso butter salmon, wrap it tightly in plastic wrap to prevent freezer burn, then wrap it in aluminum foil or place it in a freezer-safe bag. It will remain fresh for about 3 months. When ready to eat, thaw it in the fridge overnight, then reheat it gently in the oven.
What should I do if my miso butter mixture is too salty?
Very! If you find that your miso butter is too salty, the first step is to taste the miso paste before mixing it in. If it’s a bit salty, you might want to use less or mix it with additional softened butter to balance the flavor. Alternatively, adding a pinch of sugar can help neutralize the saltiness slightly.
Are there any dietary considerations for miso butter salmon?
Absolutely! If you or your guests have allergies, be mindful that this recipe contains dairy and fish. The miso paste also can contain gluten, so if you need a gluten-free option, look for gluten-free miso available in specialty stores. For anyone with soy allergies, you might want to steer clear of miso altogether and consider a different sauce.
How long will my leftover miso butter last in the fridge?
The unused miso butter can be stored in the fridge for up to 5 days. Be sure to keep it in an airtight container to help keep its richness intact. Allow it to soften at room temperature before using it again, and its creamy texture will return, ready to add flavor to your next dish!
Miso Butter Salmon That's Juicy, Flaky, and Full of Flavor
Ingredients
Equipment
Method
- Make the Compound Butter: In a medium bowl, combine softened butter, miso paste, brown sugar, grated ginger, and minced garlic. Mash until fully blended.
- Prepare the Salmon: Place salmon fillets on a lined baking sheet. Spread a generous layer of the miso butter mixture over each fillet.
- Oven Method: Preheat oven to 375°F (190°C). Bake salmon for 12-15 minutes until opaque and flaky. Broil for 1-2 minutes for caramelization.
- Air Fryer Method: Preheat air fryer to 400°F (204°C). Cook salmon for 9-10 minutes until flaky and tender.
- Serve the Dish: Transfer salmon to a serving platter. Drizzle remaining miso butter over the top, garnish with green onions, and serve with rice and vegetables.
Leave a Reply