
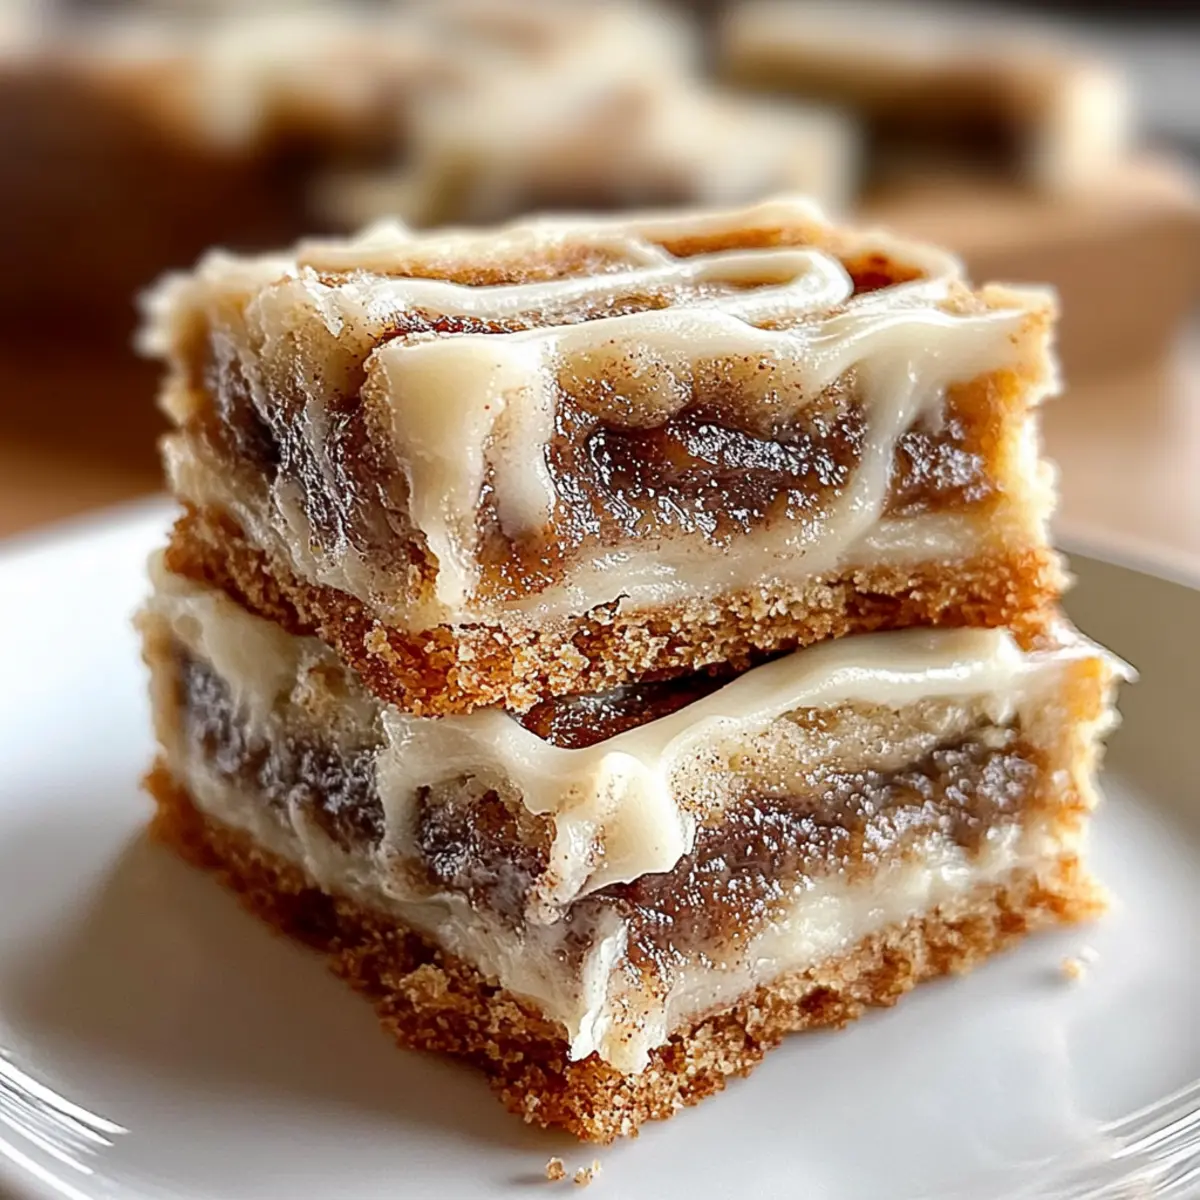
As the aroma of warm cinnamon wafts through the air, it’s hard not to feel an irresistible pull to treat yourself. These Easy Cinnamon Roll Bliss Bars are your ticket to transforming a cozy dessert craving into a reality in record time. With no yeast required, this quick and easy recipe brings the indulgence of cinnamon rolls into a delightful, portable bar form. The buttery base meets a gooey cinnamon-sugar filling, all lovingly topped with luscious cream cheese frosting. Perfect for those busy weeknights or when you’re hosting a laid-back brunch, these bliss bars come together effortlessly. Are you ready to satisfy your sweet tooth with minimal fuss?

Why are these bars a must-try?
Comfort Food Reimagined: Enjoy a delightful twist on traditional cinnamon rolls without the hassle of yeast.
Quick & Easy: With simple steps, you can whip up these bars in just under an hour – perfect for spontaneous dessert cravings!
Gooey Goodness: The combination of a tender base and a rich cinnamon-sugar filling creates a mouthwatering texture that melts in your mouth.
Crowd Pleaser: Whether for family dinners or casual gatherings, these bars are sure to steal the show – pair them with your favorite coffee or serve alongside ice cream for a decadent treat!
Customization Options: Feel free to experiment by adding nuts or spices; the versatility makes these bliss bars even more enjoyable for everyone! To enhance your baking repertoire, check out my delicious Cinnamon Vanilla Custard Pie or my indulgent Cinnamon Molasses Frosting.
Cinnamon Roll Bliss Bars Ingredients
For the Bars
- All-Purpose Flour – Base structure for the bars; can substitute with gluten-free flour for a GF version.
- Granulated Sugar – Adds sweetness and tenderness to the crust; no direct substitute recommended.
- Brown Sugar – Contributes a deep caramel flavor to the filling; can use dark brown sugar for a richer taste.
- Butter (softened) – Provides richness and moisture; don’t use melted butter; must be softened to cream properly.
- Baking Powder – Leavening agent for the crust; do not substitute with baking soda without adjusting other ingredients.
- Salt – Enhances overall flavor; essential for balance; don’t omit.
- Eggs – Binds the mixture and adds moisture; can’t substitute without altering texture.
- Vanilla Extract (alcohol-free) – Adds depth of flavor; use regular vanilla extract if not restricted.
For the Filling
- Cinnamon – Key flavor in the filling; you can add nutmeg for additional warmth.
- Cardamom – Enhances the spiced flavor profile; optional but highly recommended for a more sophisticated taste.
- Heavy Cream – Adds consistency to the filling; can substitute with milk for a lighter version.
For the Frosting
- Cream Cheese – Basis for the frosting; ensure it’s softened for easy mixing.
- Powdered Sugar – Sweetens and thickens the frosting; no substitutes needed for texture.
- Milk – Used in the frosting to achieve desired consistency; you can replace it with heavy cream for richness.
With these irresistible Cinnamon Roll Bliss Bars ingredients on hand, you’re set to create a comforting dessert that everyone will love!
Step‑by‑Step Instructions for Cinnamon Roll Bliss Bars
Step 1: Preheat and Prepare
Begin by preheating your oven to 350°F (175°C). While it’s warming up, take a 9×13 inch baking pan and line it with parchment paper, allowing some overhang on the sides for easy removal later. This step is crucial to ensure your Cinnamon Roll Bliss Bars come out easily and retain their shape.
Step 2: Cream the Butter and Sugars
In a large mixing bowl, combine the softened butter, granulated sugar, and brown sugar. Using an electric mixer, cream the mixture on medium speed until it’s light, fluffy, and pale in color, about 3-5 minutes. This process incorporates air into the batter, contributing to the soft texture of your bars.
Step 3: Add Eggs and Vanilla
Next, crack in the eggs one at a time, mixing well after each addition to combine them fully. Add the alcohol-free vanilla extract and continue to beat until everything is smoothly incorporated. The mixture should be velvety and uniform, creating a rich base for your Cinnamon Roll Bliss Bars.
Step 4: Combine Dry Ingredients
In a separate bowl, whisk together the all-purpose flour, baking powder, and salt until well blended. Gradually add the dry mixture into the wet ingredients, mixing just until combined. It’s important not to overmix to maintain the tenderness in your bars. Reserve about one cup of this dough for topping.
Step 5: Press Dough into the Pan
Take the remaining dough and evenly press it into the bottom of the prepared baking pan. Use your fingers or an offset spatula to create a smooth layer. Bake this base in the preheated oven for 10-12 minutes or until it’s just set but not browned, allowing it to retain a soft texture.
Step 6: Prepare the Cinnamon Filling
While the base bakes, prepare the filling by whisking together the brown sugar, cinnamon, cardamom, and melted butter in a medium bowl. The mixture should be thick and creamy. Pour this enticing filling over the baked base as soon as it comes out of the oven, spreading it evenly for a delicious layer.
Step 7: Add Dough Topping
Take the reserved one cup of dough and dot it over the cinnamon filling in small pieces. With a knife, gently swirl the dough into the filling, ensuring not to fully combine them but creating beautiful patterns. This step adds visual appeal to your Cinnamon Roll Bliss Bars and ensures each bite has that gooey filling.
Step 8: Bake Again
Return the pan to the oven and bake for another 18-22 minutes. The edges should be golden brown, and the center should be just set. Avoid overbaking, as you want the bars to remain soft and chewy. Once done, remove from the oven and let them cool completely in the pan.
Step 9: Make the Frosting
While the bars cool, prepare the creamy frosting. In a mixing bowl, beat together the softened cream cheese and butter until smooth. Gradually add in the powdered sugar and a splash of milk, mixing until you reach your desired consistency. The frosting should be thick, creamy, and easy to spread.
Step 10: Frost and Serve
Once the Cinnamon Roll Bliss Bars are completely cool, use a spatula to spread the luscious cream cheese frosting evenly over the top. Allow the frosting to set for about 15 minutes before lifting the bars out using the parchment paper overhang. Cut them into squares and serve them while still slightly warm for the ultimate indulgence!
How to Store and Freeze Cinnamon Roll Bliss Bars
Room Temperature: Keep your Cinnamon Roll Bliss Bars in an airtight container for up to 3 days to maintain their delightful gooey texture and freshness.
Fridge: For longer storage, refrigerate the bars in an airtight container, where they can last up to 5 days without losing quality.
Freezer: Unfrosted bars can be frozen for up to 2 months. Wrap them tightly in plastic wrap and then place in an airtight container.
Reheating: To enjoy them warm, simply microwave individual squares for about 10-15 seconds. Enjoy the gooey goodness that melts in your mouth!
What to Serve with Cinnamon Roll Bliss Bars
Indulge in the cozy sweetness of these delightful bars complemented by perfect pairings for a complete experience.
- Rich Coffee: A warm cup of coffee balances the sweetness and enhances the comforting flavors of the bars; morning perfection!
- Vanilla Ice Cream: Serve with a scoop of vanilla ice cream for a creamy, dreamy dessert enjoyed warm or chilled.
- Fresh Fruit Salad: Bright, tangy fruits like berries or citrus offer a fresh contrast, cutting through the richness of the bars.
- Caramel Sauce: Drizzle warm caramel over the bars for an extra layer of indulgence, making every bite even more luxurious.
- Whipped Cream: Light and airy whipped cream adds a delightful touch of fluffiness that complements the gooey texture of the bars.
- Chai Latte: The warm spices in a chai latte beautifully echo the cinnamon flavor, creating a cozy pairing for a chilly day.
- Nutty Granola: Crumble some nutty granola on top before serving to add a crunchy texture that enhances the overall experience.
- Hot Cocoa: For a comforting twist, serve alongside a mug of hot cocoa topped with marshmallows to embrace a cozy vibe.
Expert Tips for Cinnamon Roll Bliss Bars
-
Butter Temperature: Make sure your butter is softened, not melted, to achieve that light and fluffy texture in your bars.
-
Controlled Mixing: Avoid overmixing when combining the wet and dry ingredients. This keeps the texture tender—just combine until the flour disappears.
-
Swirl Technique: Be gentle when swirling the reserved dough into the cinnamon filling; this keeps delicious layers for every bite of the Cinnamon Roll Bliss Bars.
-
Thorough Cooling: Let the bars cool completely before frosting. If not cooled, the cream cheese frosting will melt, leaving a gooey mess instead of a creamy topping.
-
Proper Storage: Store your bliss bars in an airtight container to maintain freshness for up to 3 days at room temperature; they can also be refrigerated for up to 5 days.
Cinnamon Roll Bliss Bars Variations
Feel free to play with these delightful Cinnamon Roll Bliss Bars and make them your own!
- Gluten-Free: Swap all-purpose flour with a gluten-free blend for a celiac-friendly treat.
- Nutty Twist: Add chopped pecans or walnuts to the filling for a delightful crunch that complements the gooey texture.
- Milk Substitute: Use almond or oat milk in the frosting for a lighter option that still delivers creamy goodness.
- Spiced Up: Amp up the warmth with a dash of pumpkin pie spice or a touch of extra cardamom in the filling.
- Chocolate Drizzle: Melt dark or white chocolate and drizzle over the frosted bars for a luxurious touch that chocolate lovers will adore.
- Fruity Fun: Incorporate dried fruits like raisins or chopped apples into the filling for a fruity surprise in every bite.
- Vegan Delight: Substitute eggs with flax eggs and use plant-based cream cheese and butter to make a vegan version that everyone can enjoy.
- Sweet Surprise: Top with a sprinkle of toasted coconut or a light dusting of cinnamon sugar right before serving for a delightful visual and textural addition.
No matter how you choose to customize these bars, they are sure to be a hit! For an extra flavor boost, consider pairing these bliss bars with my creamy Cinnamon Molasses Frosting or enjoy alongside a slice of my decadent Cinnamon Vanilla Custard Pie. Your sweet tooth will thank you!
Make Ahead Options
These Cinnamon Roll Bliss Bars are perfect for meal prep enthusiasts! You can prepare the dough up to 24 hours in advance; simply mix the wet and dry ingredients, then refrigerate the combined mixture. The filling can also be made ahead and stored in the fridge for up to 3 days; just give it a good stir before using. When you’re ready to bake, spread the filling over the dough and proceed with the baking instructions. This way, you’ll have delicious, gooey Cinnamon Roll Bliss Bars ready to go with minimal effort on busy nights, ensuring they are just as delightful when served!
Cinnamon Roll Bliss Bars Recipe FAQs
How do I choose ripe ingredients for my Cinnamon Roll Bliss Bars?
Absolutely! For the best results, ensure your butter is truly softened at room temperature; it should feel cool but not oily. Use fresh eggs and make sure your baking powder is still active (check the expiration date!) for proper rising.
How should I store Cinnamon Roll Bliss Bars?
Very simply! Keep your Cinnamon Roll Bliss Bars in an airtight container at room temperature for up to 3 days or in the refrigerator for up to 5 days. This maintains their soft and gooey texture while also ensuring their freshness.
Can I freeze Cinnamon Roll Bliss Bars?
Yes, you can! To freeze unfrosted bars, wrap them tightly in plastic wrap, then place them in an airtight container. They can last up to 2 months in the freezer. When you’re ready to enjoy, simply thaw in the fridge overnight or on the counter for a few hours.
What if my Cinnamon Roll Bliss Bars turn out too dense?
If your bars are denser than expected, it could be because of overmixing the batter or using melted butter rather than softened. To make adjustments, embrace gentle mixing when combining wet and dry ingredients and ensure your butter is softened to room temperature before creaming.
Are there any dietary considerations for Cinnamon Roll Bliss Bars?
Absolutely! If you’re making these for someone with gluten sensitivities, you can substitute the all-purpose flour with gluten-free flour. Always consider potential allergies, like ensuring your cream cheese frosting is free from any additives that might contain allergens.
Can I make these Cinnamon Roll Bliss Bars dairy-free?
Yes, you can easily modify this recipe to be dairy-free! Use plant-based butter for the crust and coconut or almond cream cheese for the frosting. Additionally, substitute heavy cream with almond or oat milk in the filling for a delicious dairy-free version!
Cinnamon Roll Bliss Bars that are Quick and Irresistibly Gooey
Ingredients
Equipment
Method
- Preheat the oven to 350°F (175°C) and line a 9x13 inch baking pan with parchment paper.
- In a mixing bowl, cream the softened butter, granulated sugar, and brown sugar until light and fluffy.
- Add eggs one at a time, mixing well after each addition, followed by the vanilla extract.
- In a separate bowl, whisk together the flour, baking powder, and salt, then gradually mix into the wet ingredients.
- Press the remaining dough into the baking pan and bake for 10-12 minutes until just set.
- Prepare the filling by mixing the brown sugar, cinnamon, cardamom, and melted butter, pour over the baked base.
- Dot the reserved dough over the filling and gently swirl it in with a knife.
- Bake again for 18-22 minutes until golden brown on the edges.
- Beat the softened cream cheese and butter, then add powdered sugar and milk to make the frosting.
- Once cool, frost the bars and let sit for 15 minutes before cutting and serving.
Leave a Reply