
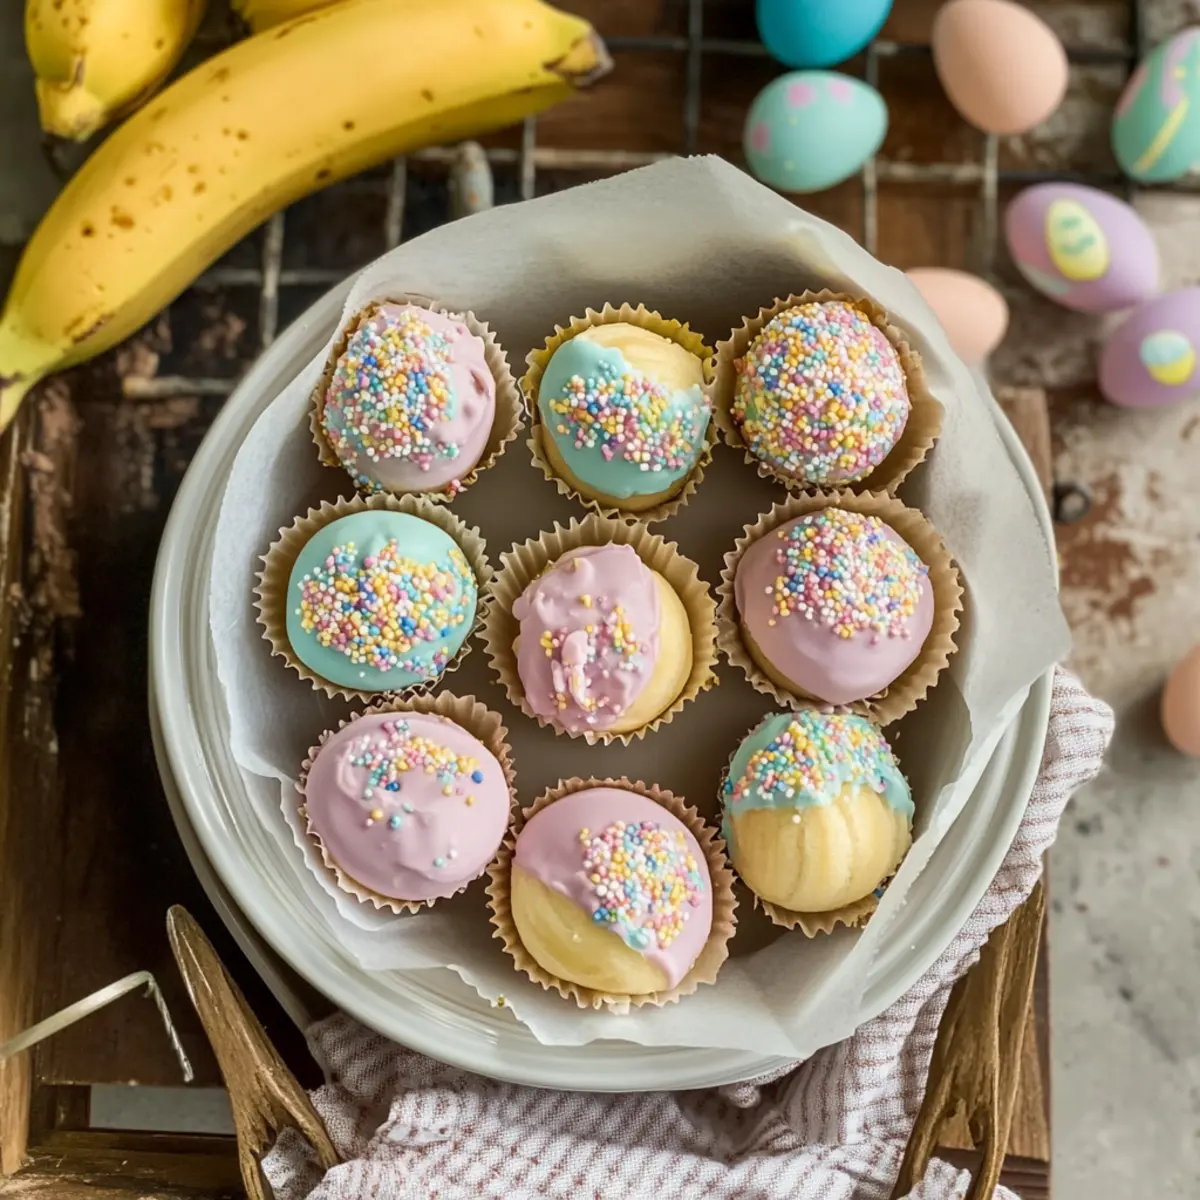
As I stood in the kitchen, the aroma of ripe bananas filled the air, whisking me back to lazy afternoons spent making dessert with family. These Banana Pudding Easter Truffles are a delightful way to capture that nostalgia while offering a modern twist! The combination of creamy banana pudding and crunchy vanilla wafers, all encased in a vibrant pastel chocolate shell, makes these no-bake treats not only a breeze to whip up but also an instant crowd-pleaser for your Easter gatherings. They’re perfect for anyone looking to swap fast food for a homemade delight. Plus, the best part? You can customize them with fun variations like coconut or peanut butter to keep things exciting. Curious how to make these delightful bites that are sure to impress? Let’s dive into the recipe!
Why Are These Truffles So Irresistible?
No-Bake Convenience: These Banana Pudding Easter Truffles require no baking, making them a quick and easy option for busy home cooks.
Kid-Friendly Fun: Perfect for little hands, this recipe invites creativity and participation, turning dessert-making into a joyful family activity.
Customizable Variations: From Coconut Banana Truffles to Peanut Butter Banana Truffles, you can easily switch it up to cater to different tastes and preferences.
Festive Appeal: With their vibrant pastel colors, these treats not only taste fantastic but also elevate your Easter dessert table, charming guests of all ages.
Nostalgic Flavor: Each bite carries the delightful essence of classic banana pudding, bringing back cherished memories while offering a contemporary twist.
Elevate your dessert game this Easter and say goodbye to boring, fast food with these delightful homemade truffles!
Banana Pudding Easter Truffles Ingredients
For the Truffle Mixture
• Crushed Vanilla Wafers – Provides texture and sweetness; substitute with graham crackers for a different flavor.
• Cream Cheese (1/2 cup, softened) – Adds creaminess and richness; use mascarpone as an alternative for a different flavor.
• Banana Pudding Mix (3.4 oz package, dry) – Delivers classic banana flavor; ensure it is dry, as instant pudding won’t work for these truffles.
• Milk (2 tablespoons) – Helps to bind the mixture; almond or oat milk can be used for a dairy-free option.
• Vanilla Extract (1 teaspoon) – Adds depth of flavor; swap with almond extract for an interesting twist.
For the Chocolate Coating
• White Chocolate Chips or Candy Melts (2 cups) – Creates the coating; you can use milk or dark chocolate for a different chocolate profile.
• Food Coloring (pastel colors) – For decorative touches; optional for deeper colors but not necessary for flavor.
For Decorations (Optional)
• Crushed Vanilla Wafers – For a crunchy topping; adds an extra layer of flavor and texture to your truffles.
• Easter Sprinkles – For a festive touch; perfect for making these Banana Pudding Easter Truffles visually appealing.
• Colored Chocolate Drizzle – Adds a stylish finish; a great way to express creative flair!
Get ready to wow your family and friends with these irresistible Banana Pudding Easter Truffles!
Step‑by‑Step Instructions for Banana Pudding Easter Truffles
Step 1: Make the Truffle Mixture
In a large mixing bowl, blend 1 cup of crushed vanilla wafers, ½ cup softened cream cheese, 3.4 oz of dry banana pudding mix, 2 tablespoons of milk, and 1 teaspoon of vanilla extract. Use a spatula or mixer until a cohesive dough forms, about 2-3 minutes. The mixture should be smooth and slightly sticky, reminiscent of cookie dough, inviting you to shape it into delightful truffles.
Step 2: Shape the Truffles
Now it’s time to form your truffles! With clean hands, scoop out tablespoon-sized portions of the banana pudding mixture and roll them into smooth balls. Place each shaped truffle on a parchment-lined baking sheet. The truffles should be about 1 inch in diameter and should hold their shape well. Refrigerate them for about 30 minutes to firm up, making the coating process a breeze.
Step 3: Melt the Chocolate
For the vibrant coating, melt 2 cups of white chocolate chips or candy melts in a microwave-safe bowl. Heat in 30-second intervals, stirring after each, until completely smooth; this should take about 1.5 to 2 minutes total. Be cautious not to overheat, as this can cause the chocolate to seize. The melted chocolate should have a glossy finish, enticing you to dip those truffles.
Step 4: Coat the Truffles
Take your chilled truffles from the refrigerator and dip each one into the melted chocolate. Use a fork to lift each truffle, allowing the excess chocolate to drip off gently. Place the coated truffles back on the parchment-lined baking sheet. Each truffle should be evenly coated with a smooth layer of chocolate, ready for a decorative touch to elevate their festive charm.
Step 5: Decorate the Truffles
Before the chocolate sets, sprinkle crushed vanilla wafers or colorful Easter sprinkles over each truffle for an extra festive flair. You can also drizzle melted colored chocolate over the top for a fun design. This step takes no more than 5 minutes but transforms your Banana Pudding Easter Truffles into eye-catching treats that are sure to impress your guests.
Step 6: Let Them Set
Allow the decorated truffles to set at room temperature or pop them in the fridge for 15-20 minutes to firm up the chocolate coating. They should feel solid to the touch when ready. Once set, these delightful bites will boast a beautiful, hardened shell and an irresistible creamy interior, making them perfect for any Easter gathering or sweet moment.
Step 7: Serve and Enjoy
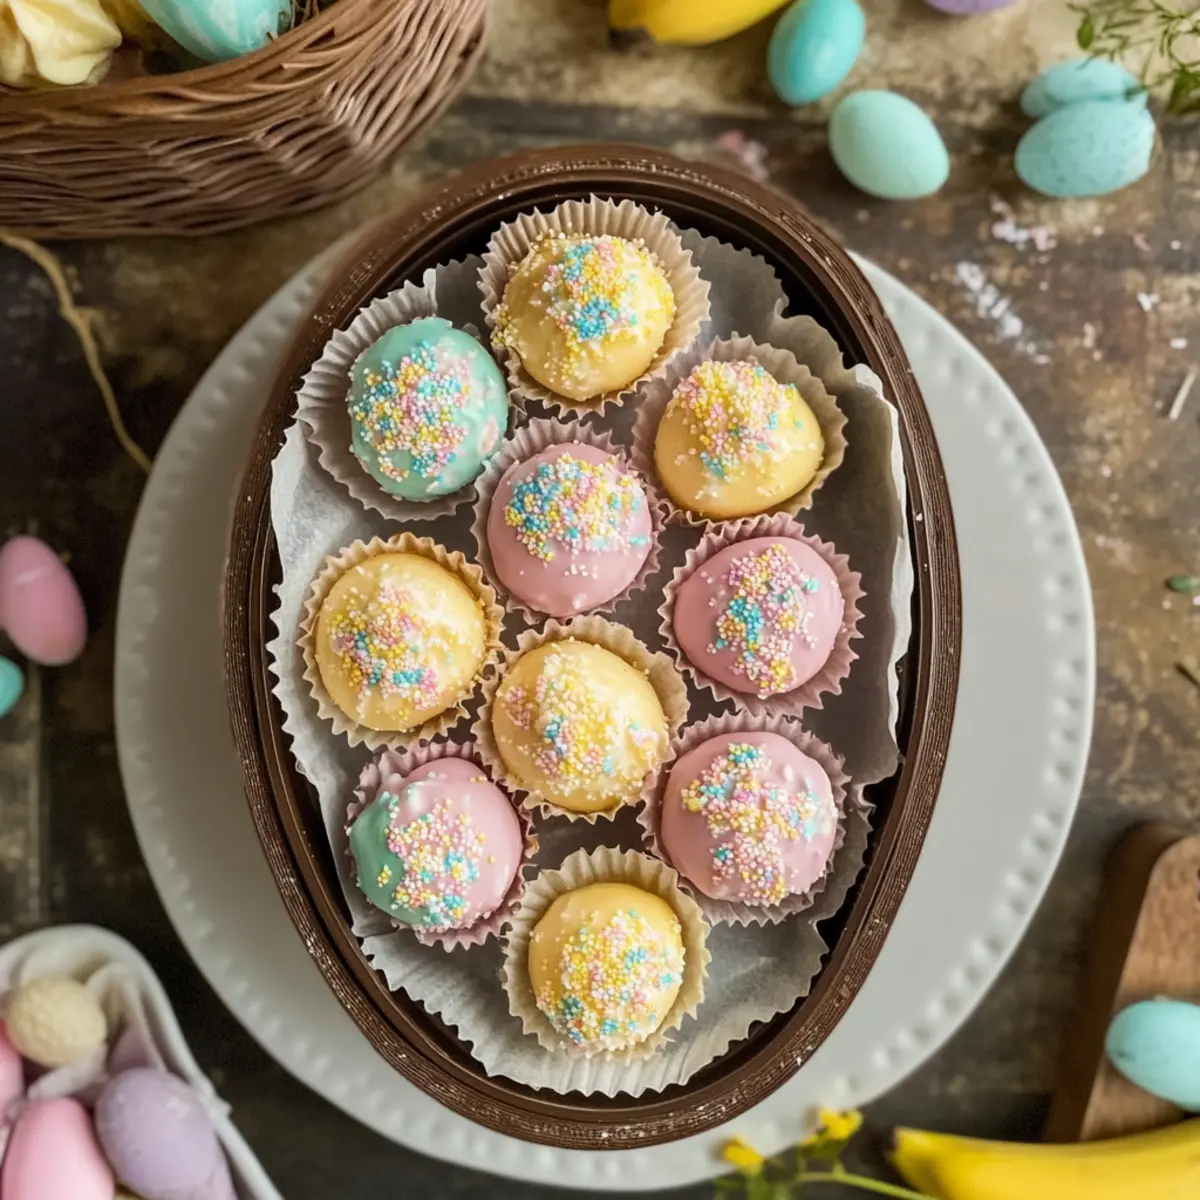
Present your lovely Banana Pudding Easter Truffles in decorative bowls or gift boxes. They are deliciously rich yet bite-sized, ideal for indulging without guilt! Perfect for sharing with family and friends, these truffles are a delightful alternative to fast food, captivating everyone with both their taste and appearance.
What to Serve with Banana Pudding Easter Truffles
Indulging in these delightful truffles opens up a world of incredible pairings that can elevate your Easter gathering into a joyous feast.
-
Creamy Fruit Salad:
A refreshing blend of seasonal fruits adds brightness and balances the sweetness of the truffles. Consider strawberries, pineapples, and kiwi. -
Light Vanilla Ice Cream:
Serve alongside a scoop of vanilla ice cream to add a rich and creamy contrast, creating a delightful temperature contrast with the truffles. -
Spring Green Salad:
A crisp salad with spring greens, nuts, and a light vinaigrette complements the sweetness while providing a refreshing bite. -
Chocolate Mint Mocktail:
This vibrant drink offers a sweet, refreshing flavor that pairs beautifully with the creamy texture of the truffles, perfect for kids and adults alike. -
Toasted Coconut Flakes:
Sprinkle toasted coconut on top of the truffles for an added crunch and tropical flair, enhancing the banana flavor while adding texture. -
Mini Carrot Cakes:
The spices and moistness of mini carrot cakes create a delicious autumnal flavor that pairs wonderfully with the sweet, creamy goodness of the truffles. -
Lemonade with Fresh Mint:
The zesty punch of lemonade awakens the palate, offering a refreshing counterpart to the rich creaminess of the truffles, making each bite even more enjoyable. -
Easter-themed Cookies:
Serve with buttery cookies adorned with pastel icing; they’ll create a whimsical dessert spread that children and adults will adore.
Creating a spread with these delightful combinations will make your Easter celebrations memorable and thoroughly enjoyable!
Storage Tips for Banana Pudding Easter Truffles
Room Temperature: Store the truffles in a cool, dry place for up to 2 days in an airtight container to keep them fresh.
Fridge: For longer freshness, keep your Banana Pudding Easter Truffles in the refrigerator for up to 5 days, wrapped well to maintain their creamy texture.
Freezer: You can freeze these delightful treats for up to 2 months. Place them in a single layer on a baking sheet until solid, then transfer to an airtight container.
Reheating: Thaw frozen truffles in the fridge overnight before serving for the best flavor and texture. Enjoy them chilled or at room temperature!
Make Ahead Options
These Banana Pudding Easter Truffles are an excellent choice for meal prep, allowing you to save time on busy days! You can prepare the truffle mixture and shape the balls up to 24 hours in advance; just refrigerate them in an airtight container to keep them fresh. Additionally, you can melt the chocolate and set aside for up to 3 days. When you’re ready to serve, simply dip the chilled truffles into the melted chocolate, decorate them with sprinkles or crushed wafers, and let them set for 15-20 minutes. This way, you’ll still enjoy the same delicious taste without the last-minute rush!
Banana Pudding Easter Truffles Variations
Feel free to get creative and customize these delicious truffles to match your family’s tastes and dietary needs!
-
Coconut Banana Truffles: Roll the truffles in shredded coconut for a tropical twist. This addition enhances the flavor with a delightful crunch that echoes beach vibes!
-
Peanut Butter Banana Truffles: Mix in 2 tablespoons of creamy peanut butter for a nutty and rich flavor boost. The combination is pure bliss for peanut butter lovers!
-
Mint Banana Truffles: Add a drop of mint extract into the melted chocolate coating for a refreshing twist. It brings a unique flavor that adds a zing to the classic banana pudding taste.
-
Gluten-Free Option: Substitute crushed vanilla wafers with gluten-free graham crackers for a gluten-free treat. No one will miss the regular wafers, as the delicious banana flavor still shines through!
-
Vegan Version: Replace cream cheese with a plant-based alternative and use dairy-free chocolate for a vegan-friendly dessert. These truffles will still be rich and satisfying!
-
Chocolate-Covered Almonds: Top the truffles with crushed chocolate-covered almonds instead of vanilla wafers. It adds an unexpected crunch and nutty flavor that will surprise your taste buds!
-
Spicy Kick: Mix a pinch of cayenne pepper into the chocolate for a warm heat that pairs beautifully with the sweetness of the banana. It’s a fun combination for those who enjoy a little adventure in their desserts!
Explore these variations, and if you’re looking for more delightful inspiration, check out our delectable Banana Bread Chocolate or treat yourself to some rich Cream Cheese Banana delights. Your taste buds will thank you!
Expert Tips for Banana Pudding Easter Truffles
-
Use Quality Ingredients: Choose the ripest bananas and a high-quality banana pudding mix to maximize flavor in your truffles.
-
Chill for Firmness: Refrigerate the truffle mixture before shaping to make rolling them easier and ensure they hold their shape.
-
Melt Chocolate Mindfully: Heat chocolate in short bursts and stir frequently to avoid overheating, which can lead to seizing.
-
Festive Color Options: Don’t shy away from using pastel food coloring in the chocolate coating; it adds a cheerful touch to your Banana Pudding Easter Truffles.
-
Experiment with Add-ins: Try personalized touches, like incorporating toasted coconut or nuts into the truffle mixture for added texture and flavor.
Banana Pudding Easter Truffles Recipe FAQs
Why are some bananas better than others for this recipe?
Absolutely! When selecting bananas, look for ones that are ripe but not overly spotty. Ripe bananas have a natural sweetness that enhances the truffle flavor. A banana with a firm peel that’s just starting to develop small brown spots is perfect.
How should I store Banana Pudding Easter Truffles?
For optimal freshness, store your truffles in an airtight container at room temperature for up to 2 days. If you need them to last longer, they can be refrigerated for up to 5 days. Just make sure they are well-wrapped to maintain that creamy texture.
Can I freeze these truffles?
Definitely! You can freeze these delightful Banana Pudding Easter Truffles for up to 2 months. Arrange them in a single layer on a baking sheet until solid, then transfer them into an airtight container or freezer bag. To enjoy, simply thaw them in the fridge overnight for the best texture.
What if my chocolate coating seizes or doesn’t melt smoothly?
Very! If your chocolate seizes, it’s likely due to overheating or moisture. If that happens, add a teaspoon of vegetable oil or shortening and stir it well until smooth. For the best melting result, microwave the chocolate in 30-second intervals and stir after each round to prevent overheating.
Are these truffles suitable for all dietary needs?
While these truffles are a delightful treat, they contain dairy and gluten. If anyone in your family has allergies, substitute cream cheese with a dairy-free alternative and use gluten-free wafers. There are many options available to cater to various dietary preferences, so feel free to get creative!
How can I make these truffles more festive?
Oh, the more the merrier! To celebrate Easter, you can decorate the truffles with vibrant colored chocolate drizzles, crushed vanilla wafers, or festive sprinkles. This creative touch adds both texture and visual appeal, making them even more irresistible on your dessert table!
Banana Pudding Easter Truffles: No-Bake Sweet Treats for Family
Ingredients
Equipment
Method
- In a large mixing bowl, blend crushed vanilla wafers, softened cream cheese, banana pudding mix, milk, and vanilla extract until a cohesive dough forms, about 2-3 minutes.
- Scoop tablespoon-sized portions of the banana pudding mixture, roll into smooth balls, and place them on a parchment-lined baking sheet. Refrigerate for about 30 minutes.
- Melt white chocolate chips or candy melts in a microwave-safe bowl using 30-second intervals until completely smooth.
- Dip each chilled truffle into the melted chocolate and place back on the parchment-lined baking sheet.
- Before the chocolate sets, sprinkle crushed vanilla wafers or colorful sprinkles over each truffle.
- Allow the decorated truffles to set at room temperature or refrigerate for 15-20 minutes.
- Present your truffles in decorative bowls or gift boxes.
Leave a Reply