
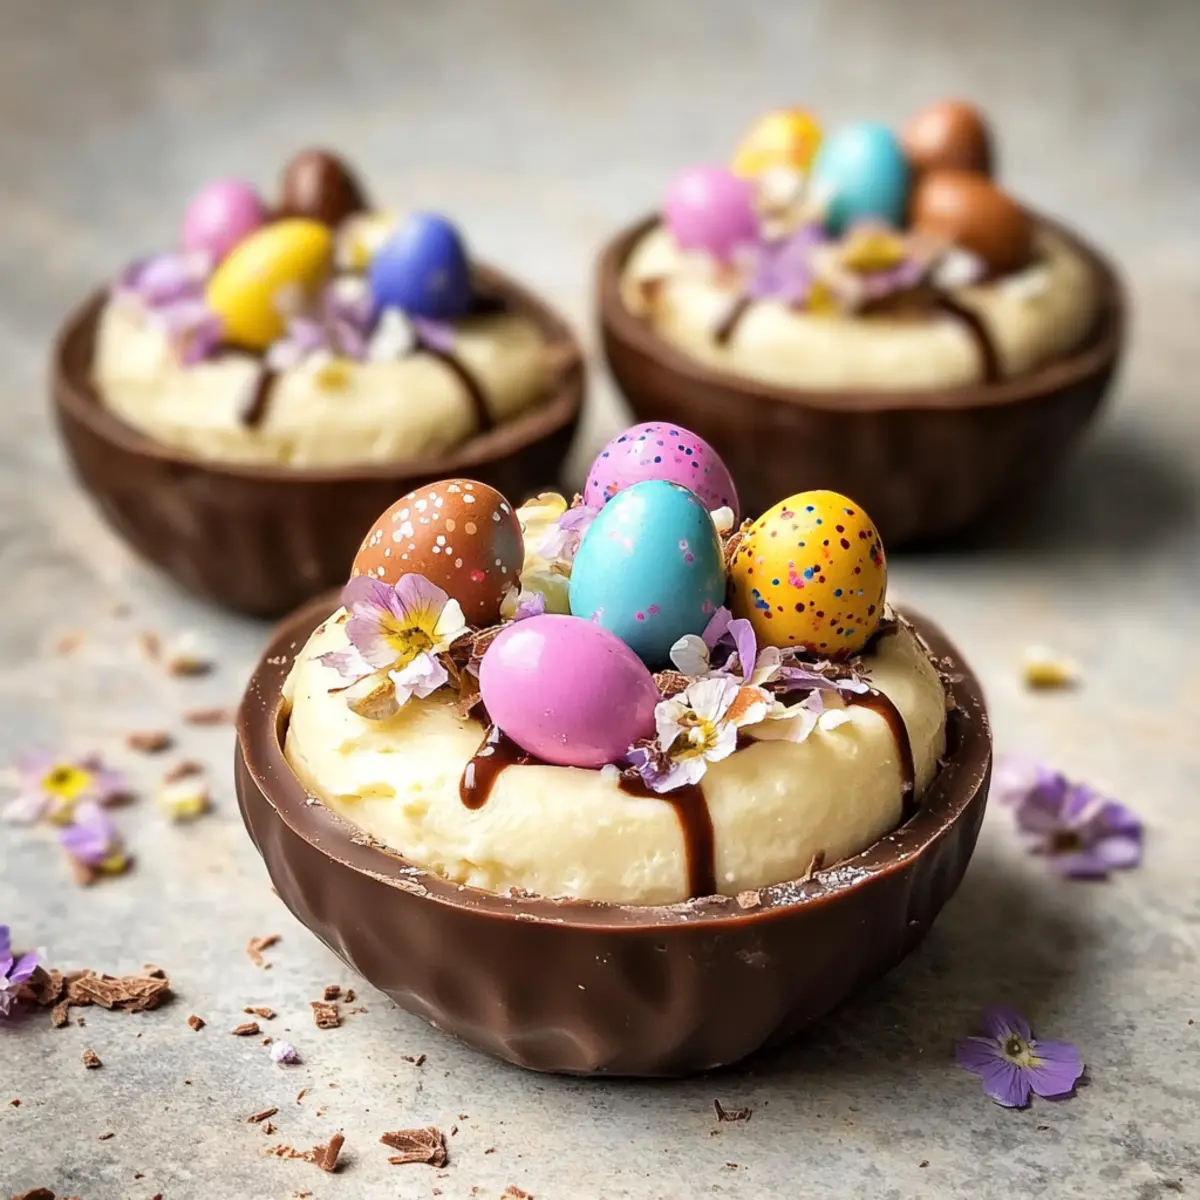
Easter is just around the corner, and the excitement is palpable! What better way to celebrate than with an indulgent No-Bake Easter Egg Cheesecake? This delightful dessert ingeniously combines the playful crunch of hollow chocolate shells with a smooth and airy cheesecake filling, creating a treat that’s bound to bring smiles to both kids and adults alike. I love how simple this recipe is, making it a perfect choice for anyone who wants to impress without spending hours in the kitchen. With minimal prep time and easy-to-find ingredients, this no-bake dessert not only saves you from the hassle of baking but also acts as a cheerful centerpiece for your holiday feast. Are you ready to whip up this festive delight and share it at your table?
Why Make Easter Egg Cheesecake?
Unforgettable presentation: These adorable chocolate shells make for a fun and festive display, guaranteed to impress your guests.
Effortless enjoyment: With no-bake instructions, you can quickly whip up this dessert, leaving more time for family and celebration.
Deliciously creamy: The rich cheesecake filling, combined with the crunch of chocolate, creates a delightful contrast that will have everyone coming back for more.
Versatile options: Feel free to personalize it! Swirl in some peanut butter or top with pastel sprinkles for added flair. If you love cheesecakes, check out my Cherry Cheesecake Swirl for another delightful option!
Great for gatherings: Perfect as a centerpiece for Easter brunch or spring celebrations, it’s festive and fun for all ages.
Make-ahead magic: Prepare it a day in advance for even better flavor, easing your holiday prep stress!
Easter Egg Cheesecake Ingredients
For the Chocolate Shells
• Hollow Chocolate Easter Eggs – These serve as edible bowls for your cheesecake; be gentle when handling to prevent cracks.
For the Base
• Crushed Graham Crackers or Digestive Biscuits – Provides a firm, sweet foundation; try gluten-free cookie crumbs for a variation.
• Melted Butter – Helps bind the crumb mixture for a sturdy base.
For the Cheesecake Filling
• Full Fat Cream Cheese – The creamy star of this Easter Egg Cheesecake; ensure it’s softened to avoid lumps during mixing.
• Powdered Sugar – Sweetens your filling while ensuring a smooth consistency.
• Cold Heavy Cream – Whipped to stiff peaks, it adds lightness to the filling.
• Vanilla Extract – Complements the cheesecake with its warm, inviting flavor.
For the Toppings
• Melted Chocolate (optional) – A decorative drizzle takes the presentation to the next level.
• Mini Chocolate Eggs (optional) – Fun decorative elements that enhance the festive feel.
• Extra Cookie Crumbs (optional) – Sprinkle for an added crunch and texture.
Step‑by‑Step Instructions for Easter Egg Cheesecake
Step 1: Prepare the Chocolate Shells
Using a warm knife, carefully cut each hollow chocolate Easter egg in half to create bowls. Take your time with this process to avoid cracks, ensuring clean edges. Once halved, gently lay the chocolate shells aside, ready to be filled with that delightful Easter Egg Cheesecake mixture.
Step 2: Make the Base
In a mixing bowl, combine crushed graham crackers or digestive biscuits with melted butter. Stir until the mixture resembles damp sand, indicating it’s well combined. Firmly press the crumb mixture into the base of each chocolate shell, creating a sturdy foundation for your cheesecake. Place the filled shells in the refrigerator to chill for 15 minutes.
Step 3: Mix the Cheesecake Filling
In another bowl, beat the softened cream cheese until smooth using an electric mixer, then gradually add in powdered sugar and vanilla extract. Continue mixing until everything is thoroughly combined, achieving a creamy and lump-free texture. This rich filling is the heart of your Easter Egg Cheesecake, so ensure it’s perfectly smooth before moving on.
Step 4: Whip the Heavy Cream
In a separate bowl, pour in the cold heavy cream and whip it using electric beaters until stiff peaks form. This step is crucial, as the whipped cream will add lightness and a fluffy texture to your cheesecake filling. Take care not to overwhip, as this can create a grainy texture instead of the desired airy result.
Step 5: Combine the Mixtures
Gently fold the whipped cream into the cream cheese mixture using a spatula. It’s important to do this carefully to maintain the airiness of the whipped cream, which gives your Easter Egg Cheesecake its delightful lightness. The filling should be luscious and creamy, perfect for spooning into the chocolate shells.
Step 6: Fill the Chocolate Shells
Spoon the cheesecake filling into the chilled chocolate shells, smoothing the tops with a spatula for an even finish. Be generous with the filling, but ensure not to overfill, allowing for a neat presentation. Once filled, these delightful shells are ready for decorating!
Step 7: Add Toppings and Chill
Drizzle the tops of your filled Easter Egg Cheesecake shells with melted chocolate for an enticing finish. Feel free to add mini chocolate eggs or extra cookie crumbs for festive decoration. Cover the cheesecake with plastic wrap and refrigerate for at least 2 hours to set, allowing the flavors to meld beautifully.

How to Store and Freeze Easter Egg Cheesecake
Fridge: Store any leftover Easter Egg Cheesecake in an airtight container in the fridge for up to 3 days, ensuring the chocolate shells remain crisp.
Freezer: For longer storage, freeze the cheesecake (unfilled) in a freezer-safe container for up to 1 month. Thaw in the fridge overnight before serving.
Reheating: There’s no need to reheat this no-bake dessert; simply enjoy it chilled right out of the fridge for the best texture and flavor.
Make-Ahead: Prepare this delightful Easter Egg Cheesecake a day in advance to enhance the flavor and make hosting stress-free!
Expert Tips for Easter Egg Cheesecake
Room Temperature Cream Cheese: Ensure your cream cheese is softened to room temperature to achieve a smooth, lump-free filling for your Easter Egg Cheesecake.
Gentle Whipping: Be careful when whipping the heavy cream; stop once stiff peaks form to prevent graininess and maintain the fluffiness of your cheesecake.
Warm Knife Technique: Use a warm knife when cutting the chocolate eggs to create clean edges, reducing the risk of cracks that might spoil their appearance.
Chill Properly: Allow the filled chocolate shells to chill adequately in the fridge for at least 2 hours to set the cheesecake filling properly; this ensures easy slicing and a firm texture.
Decorative Options: Get creative with toppings! Consider using pastel sprinkles or different types of chocolate for added flair and festive spirit on your Easter Egg Cheesecake.
Plan Ahead: For enhanced flavor, prepare this cheesecake a day in advance. This not only saves time but allows all the delicious flavors to meld together beautifully.
Easter Egg Cheesecake Variations & Substitutions
Feel free to get creative and customize this delightful cheesecake to suit your taste and preferences!
- Gluten-Free Base: Swap crushed graham crackers with gluten-free cookie crumbs for a gluten-free option. Everyone can enjoy this festive treat!
- Nutella Twist: Substitute some cream cheese with Nutella for a rich, hazelnut-infused filling. A dream for chocolate lovers!
- Citrus Zing: Add freshly grated lemon or orange zest to the filling for a refreshing citrus note. This brightens the flavor beautifully!
- Flavorful Swirls: Blend melted chocolate into the cheesecake filling to deepen the chocolate flavor. Each bite becomes an indulgent experience.
- Creamy Yogurt: Use cream cheese’s lighter cousin, Greek yogurt, for a tangy twist and lower fat content while maintaining creaminess.
- Toppings Galore: Try unique toppings like pastel sprinkles, sliced fresh strawberries, or caramel chips for added flair. Personalize your presentation!
- Dairy-Free Delight: Swap cream cheese for a dairy-free alternative, using cashew or almond-based cream cheese, to cater to dietary needs.
- Spiced Up: Incorporate a dash of cinnamon or pumpkin spice into the base for cozy warmth. Perfect for a spring twist!
Unleash your creativity with these variations and check out my delicious Coconut Pineapple Cheesecake for another fun twist!
Make Ahead Options
These Easter Egg Cheesecakes are perfect for busy home cooks looking to save time! You can prepare the chocolate shells and graham cracker base up to 24 hours in advance, keeping the components in the refrigerator to maintain their freshness. Additionally, the cheesecake filling can be made a day ahead; simply whip the cream and fold it into the cream cheese mixture, then store it in an airtight container. When ready to serve, spoon the filling into the chocolate shells, add your desired toppings, and refrigerate for at least 2 hours to set. With these make-ahead tips, you’ll enjoy a delightful dessert with minimal last-minute effort!
What to Serve with Easter Egg Cheesecake?
Bring your holiday feast to life with delightful accompaniments that complement this sweet, whimsical dessert.
-
Fresh Berries: Their natural tartness balances the richness of the cheesecake, adding a pop of color and freshness to your plate.
-
Chocolate-Covered Strawberries: A luscious chocolate treat that mirrors the flavors in the cheesecake while enhancing the festive spirit. These sweet bites make for a delightful pairing.
-
Mint Chocolate Chip Ice Cream: The cool creaminess and minty notes will harmonize beautifully with the chocolate and creamy cheesecake, bringing a refreshing twist.
-
Whipped Cream: Light and fluffy, it’s the classic accompaniment, providing extra elegance and softness to each bite of the cheesecake.
-
Decadent Hot Chocolate: A warm, rich drink that perfectly complements the smoothness of the cheesecake, cozying up your dessert table during the holiday.
-
Colorful Fruit Salad: A mix of tropical and seasonal fruits refreshes the palate, offering a bright contrast that lightens the overall dessert experience.
-
Carrot Cake Muffins: Embrace the Easter theme with these moist muffins; their spice adds another layer of flavor and complements the cheesecake beautifully.
-
Lavender Lemonade: A refreshing, lightly sweet drink that brightens the palate and adds a touch of sophistication to the overall dining experience.
Elevate your Easter celebration by combining these varied flavors and textures with your Easter Egg Cheesecake!
Easter Egg Cheesecake Recipe FAQs
How do I choose the perfect chocolate eggs for the shells?
Absolutely! When selecting your hollow chocolate Easter eggs, look for ones that are smooth and free of cracks. Aim for high-quality chocolate that has a shiny surface, indicating freshness. Check the expiration date to ensure they are at their best for your delightful Easter Egg Cheesecake!
How should I store leftover Easter Egg Cheesecake?
You can store any leftover Easter Egg Cheesecake in an airtight container in the fridge for up to 3 days. This will help keep the chocolate shells crisp while the filling maintains its creamy consistency. If you notice any dark spots forming on the chocolate, that’s a sign it may start losing its freshness, so try to enjoy within a few days!
Can I freeze the Easter Egg Cheesecake for later?
Yes! To freeze your Easter Egg Cheesecake, prepare the chocolate shells filled with the cheesecake mixture, but leave off any toppings. Place them in a freezer-safe container and freeze for up to 1 month. When you’re ready to enjoy, simply thaw them in the fridge overnight. This way, you’ll have a delightful dessert ready for any occasion!
What should I do if my cheesecake filling turns out lumpy?
Oh no! If your filling is lumpy, it might be because the cream cheese was not softened enough. For a smooth result next time, make sure the cream cheese is at room temperature before mixing. If lumps persist, you can pass the mixture through a fine mesh sieve for a creamy texture. Keep folding the whipped cream gently to maintain airiness!
Can I make this dessert gluten-free?
Very! To make your Easter Egg Cheesecake gluten-free, simply swap the crushed graham crackers or digestive biscuits for gluten-free cookie crumbs. There are various brands available that provide the same delightful sweetness and base texture. Just check the packaging to ensure they meet your dietary needs!
Is this dessert safe for pets or people with allergies?
Great question! This Easter Egg Cheesecake contains chocolate, which is toxic to dogs and other pets. So, make sure to keep it stored safely away from furry friends. For those with dairy allergies, consider using dairy-free cream cheese and whipped cream alternatives. Remember to label your dessert accordingly to avoid any allergic reactions!
Easter Egg Cheesecake: A Fun No-Bake Treat to Impress!
Ingredients
Equipment
Method
- Using a warm knife, carefully cut each hollow chocolate Easter egg in half to create bowls.
- In a mixing bowl, combine crushed graham crackers or digestive biscuits with melted butter and press into the base of each chocolate shell.
- Beat the softened cream cheese until smooth, then gradually add in powdered sugar and vanilla extract.
- Whip the cold heavy cream until stiff peaks form, then fold it into the cream cheese mixture.
- Spoon the cheesecake filling into the chilled chocolate shells, smoothing the tops with a spatula.
- Drizzle melted chocolate on top of the filled shells and add mini chocolate eggs or extra cookie crumbs as decoration.
- Cover with plastic wrap and refrigerate for at least 2 hours to set.
Leave a Reply