
As I stood in my kitchen, the sweet aroma of coconut and pandan wafted through the air, instantly transporting me to the vibrant streets of Vietnam. It was time to make my favorite Easy Banh Bo Nuong—this delightful Vietnamese Honeycomb Cake that never fails to impress. Not only is this recipe gluten-free and dairy-free, but it’s also incredibly simple to whip up for any occasion, whether you’re hosting friends or indulging in a cozy night at home. The captivating honeycomb texture combined with the ethereal flavors brings a unique twist to traditional desserts, making it a wow factor for every palate. Curious about how to create this alluring treat that looks as good as it tastes? Let’s dive into the steps!
Why is this cake so irresistible?
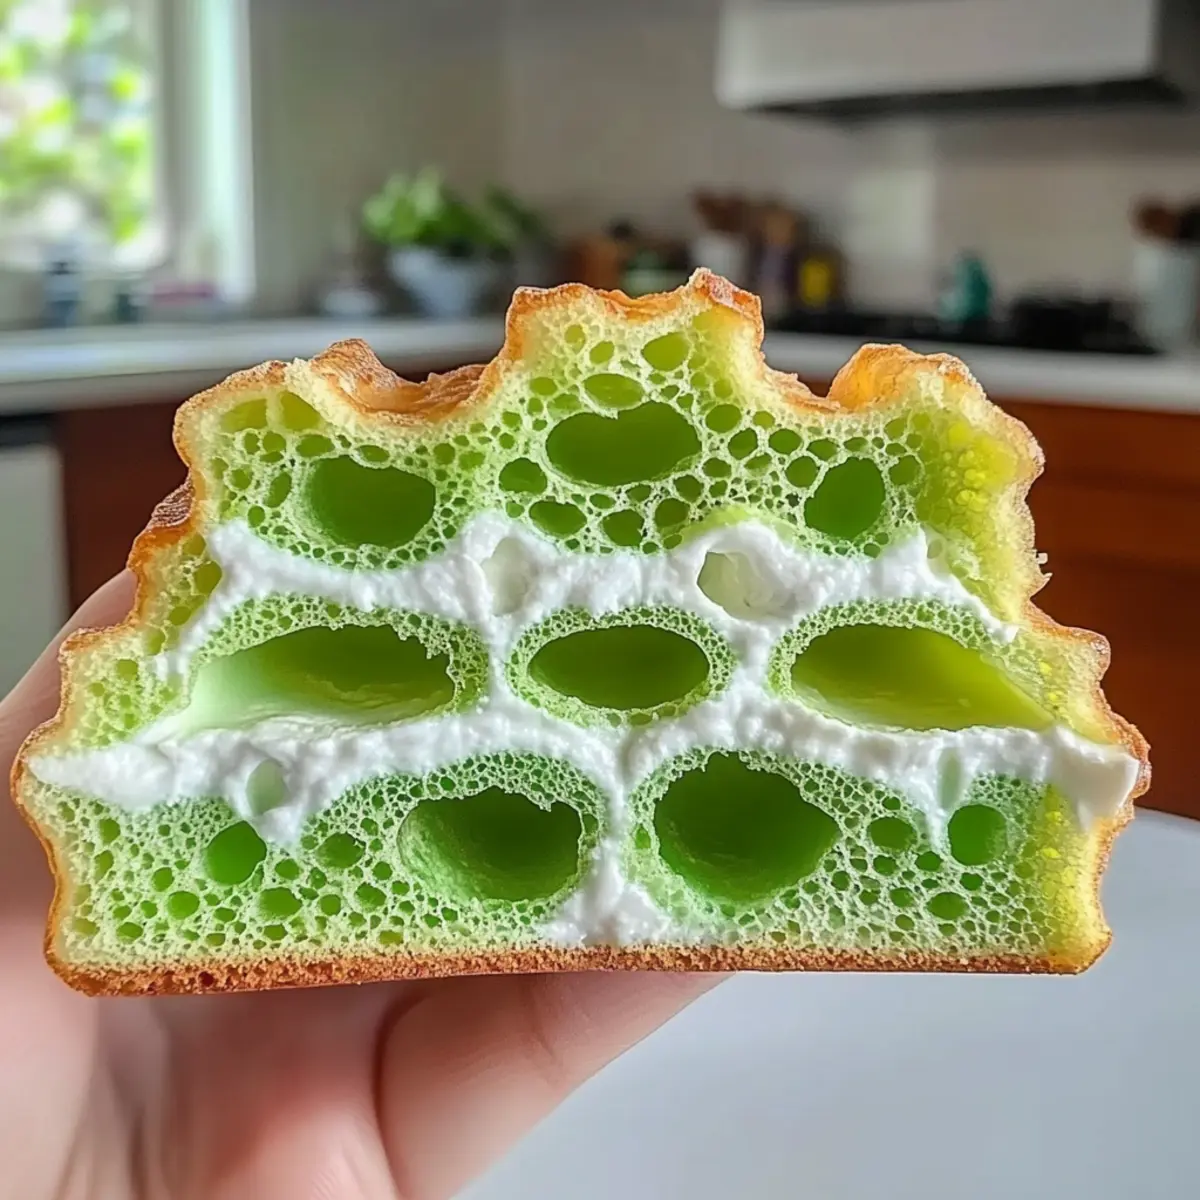
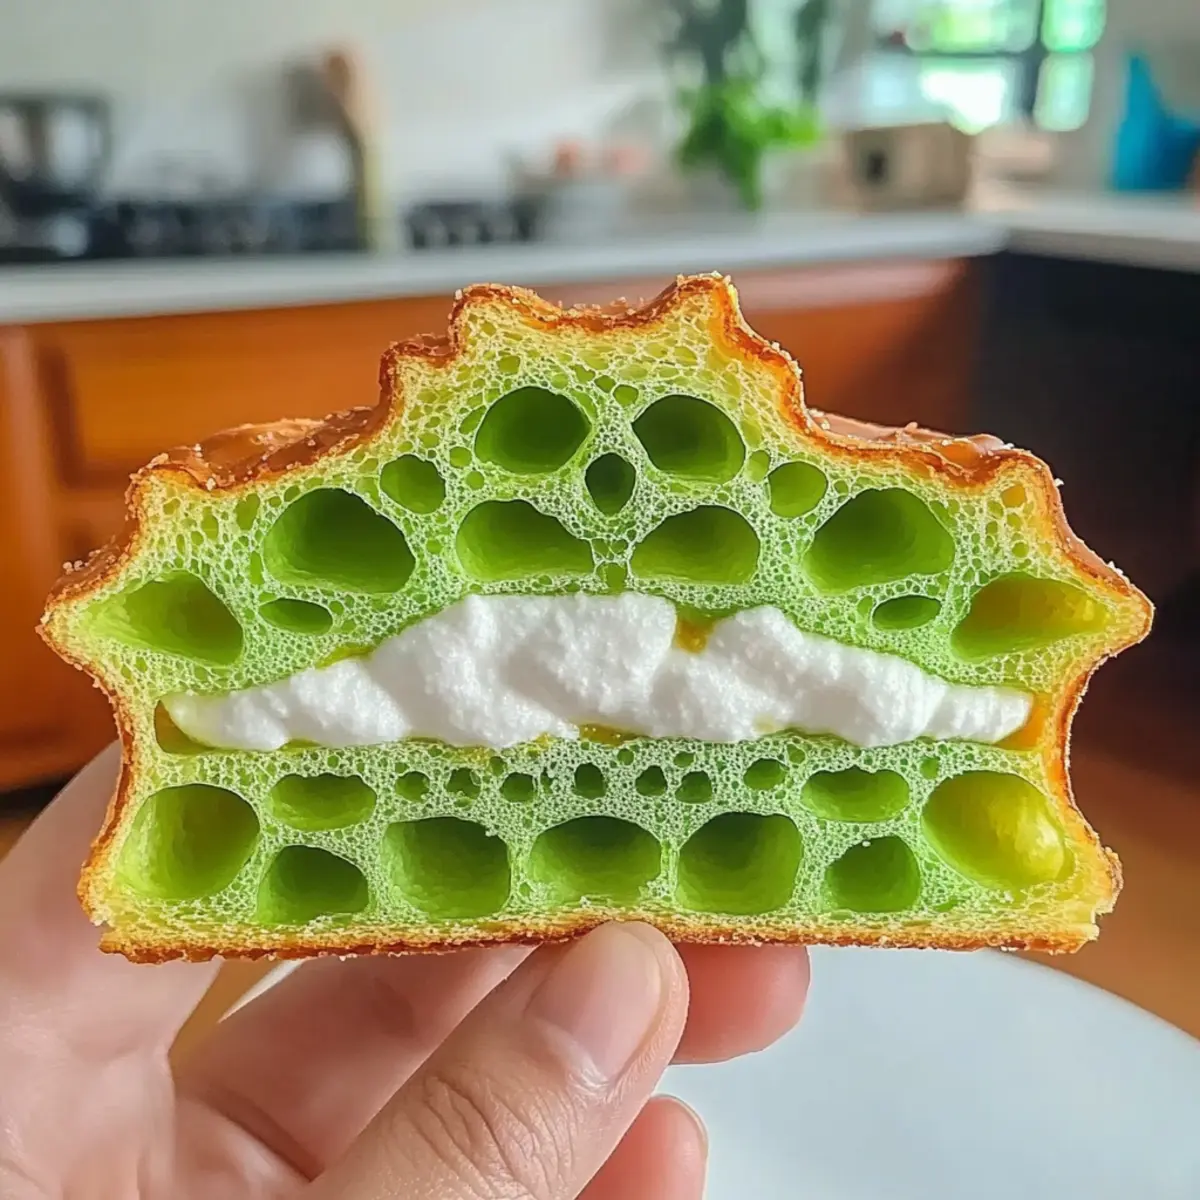
Fluffy, delectable texture: This Vietnamese Honeycomb Cake boasts a lightness that melts in your mouth, thanks to the tapioca starch that gives it that signature honeycomb look. Unique flavors: The delightful combination of pandan and coconut invites you on a fragrant journey straight to Vietnam. Quick and easy: It’s a simple recipe making it perfect for busy weekdays or spontaneous gatherings. Diet-friendly: Gluten-free and dairy-free, this cake suits a variety of dietary needs, allowing everyone to indulge. Versatile serving ideas: Pair it with fresh fruits or a scoop of coconut ice cream for an elevated experience that will impress any guest!
Vietnamese Honeycomb Cake Ingredients
For the Cake
• Coconut Milk – A crucial ingredient for creating a rich texture; opt for full-fat for the best flavor.
• Pandan Leaves – These impart a unique, aromatic essence; feel free to substitute with 1 tsp of pandan extract if you can’t find the leaves.
• Eggs – Provide essential structure and moisture; large eggs work best for an airy cake.
• Granulated Sugar – Sweetens the cake perfectly; adjust to taste if you prefer a less sweet dessert.
• Pandan Extract – Heightens the pandan flavor; if using leaves, only use 0.5 tsp; double if using extract exclusively.
• Vanilla Extract – Adds depth to the overall flavor profile; a must for a well-rounded taste.
• Tapioca Starch – Essential for achieving the cake’s signature honeycomb texture; don’t substitute this ingredient!
• Baking Powder – Necessary for leavening the cake; check its freshness to ensure proper rise.
• Salt – Balances sweetness, enhancing the overall flavor of the cake.
For Serving (Optional)
• Fresh Fruits – Think mango or berries for a refreshing contrast that enhances your Vietnamese Honeycomb Cake experience.
• Coconut Ice Cream – Creamy and delicious, it pairs beautifully with the lightness of the cake.
This collection of ingredients is your gateway to creating an amazingly delectable Vietnamese Honeycomb Cake that everyone will love!
Step‑by‑Step Instructions for Vietnamese Honeycomb Cake
Step 1: Preheat Oven
Begin by preheating your oven to 350°F (177°C). Place a bundt pan inside the oven to warm for about 10 minutes. This ensures that the batter will rise beautifully and release easily once baked. It’s a crucial step for achieving that delightful honeycomb texture in your Vietnamese Honeycomb Cake.
Step 2: Prepare Coconut Mixture
In a blender, combine 14 ounces of coconut milk with 10 pandan leaves, blending until smooth. Once fully blended, strain the mixture through a fine sieve into a bowl to remove any solids. This flavorful coconut mixture provides a rich base for your cake and infuses it with aromatic pandan essence.
Step 3: Mix Wet Ingredients
In a large mixing bowl, whisk together the strained coconut mixture, 5 large eggs, and 1.33 cups of granulated sugar. Gently combine these ingredients until the mixture is smooth and well-blended. This step ensures that your Vietnamese Honeycomb Cake will be moist and slightly sweet, enhancing its overall flavor profile.
Step 4: Add Flavorings
Stir in 0.5 teaspoons of pandan extract and 1 teaspoon of vanilla extract into the wet ingredients. Mix until just combined, allowing the flavors to meld together. This adds depth and a delightful aromatic quality to the cake, ensuring each bite is bursting with the luscious tastes of coconut and pandan.
Step 5: Combine Dry Ingredients
In a separate bowl, whisk together 1.5 cups of tapioca starch, 1 tablespoon of baking powder, and a pinch of salt. Carefully fold this dry mixture into the wet ingredients until just combined—don’t overmix! This is essential for maintaining the light, airy texture of your Vietnamese Honeycomb Cake while allowing it to rise perfectly in the oven.
Step 6: Pour and Bake
Pour the batter into the warm bundt pan, spreading it evenly. Place it in the preheated oven and bake for 50-55 minutes, or until a toothpick inserted into the center comes out clean and the top turns a beautiful golden color. Keep an eye on it to ensure that it rises beautifully into that characteristic honeycomb shape.
Step 7: Cool the Cake
Once baked, remove your Vietnamese Honeycomb Cake from the oven and let it cool in the pan for about 10 minutes. Then, invert the cake onto a wire rack and allow it to cool completely for another 60 minutes. This cooling process is crucial to maintain the cake’s shape and integrity before serving.
Expert Tips for Vietnamese Honeycomb Cake
-
Preheat Pro Tip: Make sure to preheat your bundt pan for 10 minutes; this aids in even baking and helps the cake release easily.
-
Strain for Smoothness: Always strain your coconut mixture after blending; this eliminates lumps and ensures a tender, fluffy Vietnamese Honeycomb Cake.
-
Check Your Baking Powder: A fresher baking powder guarantees the cake rises properly. Test it by adding a bit to water for fizz before using.
-
Don’t Rush Cooling: Allow the cake to cool completely in the pan before inverting. This step is vital in preserving its gorgeous honeycomb shape.
-
Sweetness Adjustment: Feel free to adjust the sugar level to suit your taste. Remember, traditional recipes can vary, so tailor it to your preference!
Variations & Substitutions for Vietnamese Honeycomb Cake
Feel free to explore delightful twists and adaptations for your Vietnamese Honeycomb Cake, making it uniquely yours!
-
Mini Banh Bo Nuong: Use cupcake or muffin tins instead of a bundt pan for individual cake portions; they’re perfect for sharing!
-
Flavor Boosts: Add a teaspoon of grated ginger for warmth, or experiment with orange or almond extract for a unique twist. Each adjustment surprises the palate, enhancing the cake’s character.
-
Nutty Crunch: Fold in some finely chopped toasted nuts, like almonds or cashews, for added texture. The added crunch beautifully contrasts with the cake’s softness.
-
Dairy-Free Creaminess: Top with whipped coconut cream in place of regular whipped cream. It complements the cake while keeping it dairy-free—a perfect pairing!
-
Tropical Twist: Incorporate shredded coconut or finely diced fresh pineapple into the batter for a summery, tropical flavor. A fun variation that adds a burst of freshness!
-
Sweet Heat: Drizzle with a spicy mango sauce for a sweet and spicy contrast that elevates every slice. Just the right kick to wow your guests!
-
Chilled Delight: Serve it slightly chilled alongside scoops of coconut ice cream or fresh mango slices for a refreshing dessert experience. The balance of flavors is simply divine!
No matter how you customize your Vietnamese Honeycomb Cake, there’s always room for creativity—just like in my other beloved desserts, such as the rich Snowball Cake Light or refreshing Berry Icebox Cake. Enjoy every delicious bite!
How to Store and Freeze Vietnamese Honeycomb Cake
Room Temperature: Keep your honeycomb cake in an airtight container at room temperature for up to 3 days. This helps retain its delightful texture and flavors.
Fridge: If you wish to extend its life, refrigerate it in an airtight container for up to 1 week. Be sure to let it come to room temperature before serving for the best taste.
Freezer: For longer storage, freeze the cake wrapped tightly in plastic wrap and then in foil for up to 2 months. Thaw in the fridge overnight before enjoying it again.
Reheating: If you prefer it warm, gently heat slices in the microwave for 15-20 seconds. Enjoy the revitalized flavors of your Vietnamese Honeycomb Cake!
Make Ahead Options
These Easy Banh Bo Nuong (Vietnamese Honeycomb Cake) are perfect for busy home cooks looking to save time during the week! You can prepare the wet and dry ingredients separately up to 24 hours in advance; simply store them in tightly sealed containers in the refrigerator. This keeps the ingredients fresh and ensures the flavors meld beautifully. When you’re ready to bake, combine the wet and dry mixtures, pour them into your pre-heated bundt pan, and proceed with the baking instructions. By prepping ahead, you can enjoy this delectable dessert with minimal effort, making it just as delightful for gatherings or quiet nights at home!
What to Serve with Irresistible Vietnamese Honeycomb Cake
Embrace the delightful experience of pairing this enchanting dessert with fresh and vibrant accompaniments that awaken the senses.
- Fresh Mango Slices: The juicy sweetness of mango contrasts beautifully with the cake’s airy texture, enhancing your experience with a tropical flair.
- Coconut Ice Cream: A scoop of creamy coconut ice cream adds an indulgent cold element that complements the flavors in the cake wonderfully.
- Chilled Green Tea: Refreshing green tea with a hint of mint provides a subtle cooling effect that balances the dessert’s sweetness.
- Tropical Fruit Salad: A medley of pineapple, kiwi, and berries introduces varying textures and flavors, making each bite an exciting experience.
- Tapioca Pearls: Sweetened and cooked tapioca pearls add a chewy texture, creating a playful contrast to the lightness of the honeycomb cake.
- Almond Cookies: The nutty flavor of almond cookies offers a delightful crunch, elevating your dessert table with an enchanting mix of tastes.
- Ginger Tea: A warm cup of ginger tea provides a zesty kick, perfectly complementing the soft, delicate flavors of your Vietnamese Honeycomb Cake.
- Fresh Coconut Strips: Lightly toasted coconut strips add an extra layer of flavor and texture, enhancing the cake’s coconut essence.
Vietnamese Honeycomb Cake Recipe FAQs
How do I select the best coconut milk for the cake?
Absolutely! When choosing coconut milk, opt for full-fat varieties for a richer and creamier texture in your Vietnamese Honeycomb Cake. Look for cans with no additives or preservatives—just pure coconut milk. You can tell it’s good quality if it appears thick and creamy, with a layer of coconut cream on top when you open the can.
What’s the best way to store leftovers?
To keep your honeycomb cake fresh, store it in an airtight container at room temperature for up to 3 days. If you need it to last longer, refrigerate it for up to a week, and let it come to room temperature before serving to enjoy its full flavor and texture.
Can I freeze Vietnamese Honeycomb Cake?
Certainly! To freeze, wrap individual slices tightly in plastic wrap, then place them in a freezer-safe container or bag. It can be frozen for up to 2 months. When you’re ready to enjoy it, simply thaw in the fridge overnight. If you prefer a warm slice, pop it in the microwave for 15-20 seconds after thawing!
What if my cake doesn’t rise as expected?
Very commonly, this can happen due to expired baking powder. Always check the freshness of your baking powder by adding a teaspoon to warm water—if it fizzes, it’s good to go! Additionally, make sure not to overmix the batter when combining wet and dry ingredients, as this can lead to a denser texture.
Are there any dietary considerations with this recipe?
Absolutely! This recipe is both gluten-free and dairy-free, making it a delightful option for those with specific dietary needs. However, be sure to double-check all packaging for potential allergens, particularly if using extracts. It’s always best to adapt the recipe based on individual dietary restrictions or preferences.
Can I use alternative ingredients for a different flavor?
Yes, indeed! If you want to try a twist, consider adding a teaspoon of grated ginger for a hint of warmth or swap in some orange or almond extract instead of pandan for a unique flavor twist! Just remember to stick with the tapioca starch as a core ingredient to maintain that signature honeycomb texture.
Delicious Vietnamese Honeycomb Cake You’ll Love to Make
Ingredients
Equipment
Method
- Preheat your oven to 350°F (177°C). Place a bundt pan inside the oven to warm for about 10 minutes.
- In a blender, combine 14 ounces of coconut milk with 10 pandan leaves, blending until smooth. Strain the mixture through a fine sieve into a bowl.
- In a large mixing bowl, whisk together the strained coconut mixture, 5 large eggs, and 1.33 cups of granulated sugar until smooth.
- Stir in 0.5 teaspoons of pandan extract and 1 teaspoon of vanilla extract into the wet ingredients.
- In a separate bowl, whisk together 1.5 cups of tapioca starch, 1 tablespoon of baking powder, and a pinch of salt. Carefully fold this mixture into the wet ingredients until just combined.
- Pour the batter into the warm bundt pan and bake for 50-55 minutes or until a toothpick comes out clean.
- Once baked, cool the cake in the pan for about 10 minutes, then invert onto a wire rack and cool completely for another 60 minutes.
Leave a Reply