
The aroma of sweet-savory grilled chicken wafted through the air, transporting me straight to bustling izakayas in Tokyo. It’s amazing how one dish can evoke such powerful memories. Today, I’m thrilled to share my take on Japanese Chicken Yakitori, a dish that beautifully combines tender grilled chicken skewers with a glossy glaze that makes any gathering feel like a special occasion. What I love about this recipe is its effortless preparation and versatility; whether you’re hosting a summer barbecue or simply seeking a comforting family dinner, it fits the bill perfectly. Plus, with options to customize the skewers to your taste, this meal can cater to everyone’s preferences, making it a true crowd-pleaser. Are you ready to fire up your grill and create something magical?
Why is Japanese Chicken Yakitori So Loved?
Aromatic Delight: The rich, sweet-savory glaze transforms each bite into a flavor explosion that tantalizes your taste buds.
Quick Prep Time: With simple steps, you’ll have these juicy skewers ready in no time—perfect for busy weeknights or unexpected guests!
Easy Customization: Tailor the ingredients to fit any dietary needs. Add veggies like bell peppers for color or spice it up with a pinch of chili flakes!
Ultimate Crowd-Pleaser: Whether served at a family dinner or a backyard BBQ, this dish appeals to everyone, creating memorable experiences around the grill.
Elevate your meal with sides from our Street Corn Chicken Rice Bowl, or pair it with a warm Chicken Avocado Melt for a delightful feast!
Japanese Chicken Yakitori Ingredients
- Get ready for a culinary adventure!
For the Chicken Skewers
- Boneless Chicken (breast or thighs) – Tender, juicy pieces are essential for perfect skewers; feel free to substitute with firm tofu or colorful veggies for a vegetarian option.
- Wooden Skewers – These are essential for grilling; soak them in water to prevent burning during cooking.
For the Marinade & Sauce
- Garlic – This adds depth. Use freshly minced garlic for the best flavor!
- Ginger – A fresh zing to brighten up the dish; freshly grated ginger is preferred over powdered for that authentic taste.
- Soy Sauce – The backbone of the yakitori sauce, providing umami and saltiness. Substitute with Tamari or coconut aminos for a gluten-free version.
- Red Wine or Mirin – This adds a touch of sweetness; mirin is classic, but a splash of white wine with sugar works in a pinch.
- Brown Sugar – Sweetens the sauce and helps achieve that caramelized finish on the chicken.
- Rice Vinegar – Balances sweetness with a bit of tang; distilled vinegar can be used if needed.
- Cornstarch – Essential for thickening the yakitori sauce to a syrupy consistency.
Feel free to gather these ingredients and embark on a delicious journey of flavors with your homemade Japanese Chicken Yakitori!
Step‑by‑Step Instructions for Japanese Chicken Yakitori
Step 1: Soak the Skewers
Begin by soaking your wooden skewers in water for 10–20 minutes. This prevents them from burning on the grill while you prepare your delicious Japanese Chicken Yakitori. Gather a shallow dish, fill it with water, and place the skewers inside, ensuring they are fully submerged. This small step enhances your grilling experience and keeps the skewers intact as you cook.
Step 2: Prepare the Yakitori Sauce
In a medium saucepan, combine the soy sauce, water, red wine or mirin, brown sugar, and rice vinegar. Place the pot over medium heat and stir gently until the brown sugar dissolves completely, about 2-3 minutes. This savory-sweet sauce forms the base of your yakitori, infusing the chicken with incredible flavor. Set aside a quarter cup for marinating later.
Step 3: Trim and Cut the Chicken
While your sauce cools, take your boneless chicken and trim any excess fat. Cut the chicken into 1–2 inch chunks to ensure even cooking on your grill. Lightly pound the pieces with a meat mallet for tenderness, ensuring they all cook through beautifully. This preparation will guarantee juicy bites in every skewer of your Japanese Chicken Yakitori.
Step 4: Marinate the Chicken
In a bowl, combine the chicken pieces with the minced garlic, grated ginger, and the reserved yakitori sauce. Allow the chicken to marinate for at least 10 minutes, but longer—up to 30 minutes—will deepen the flavor. As the chicken absorbs the marinade, the scents of garlic and ginger will fill your kitchen, igniting anticipation for your forthcoming meal.
Step 5: Cook the Yakitori Sauce
Return to your saucepan with the remaining yakitori sauce and bring it to a gentle simmer over low heat. In a small bowl, mix a tablespoon of cornstarch with a splash of cold water to create a slurry. Gradually whisk this slurry into the sauce, stirring constantly until it thickens to a syrupy consistency, about 3-5 minutes. This glaze will later coat your grilled chicken skewers beautifully.
Step 6: Thread the Chicken onto Skewers
Once marinated, take the chicken pieces and carefully thread them onto your soaked skewers, ensuring they fit snugly but aren’t overcrowded. This allows air circulation while grilling, yielding better cooking results. Each skewer should have about 3-4 pieces of chicken for the best grilling experience with your Japanese Chicken Yakitori.
Step 7: Grill the Skewers
Preheat your grill to medium-high heat, aiming for a temperature around 375°F (190°C). Place the chicken skewers on the grill and cook for 8–12 minutes, turning frequently. Use a basting brush to coat the skewers with the thickened yakitori sauce every few minutes for that signature caramelized finish. Aim for an internal temperature of 165°F (74°C) for safety.
Step 8: Serve with Style
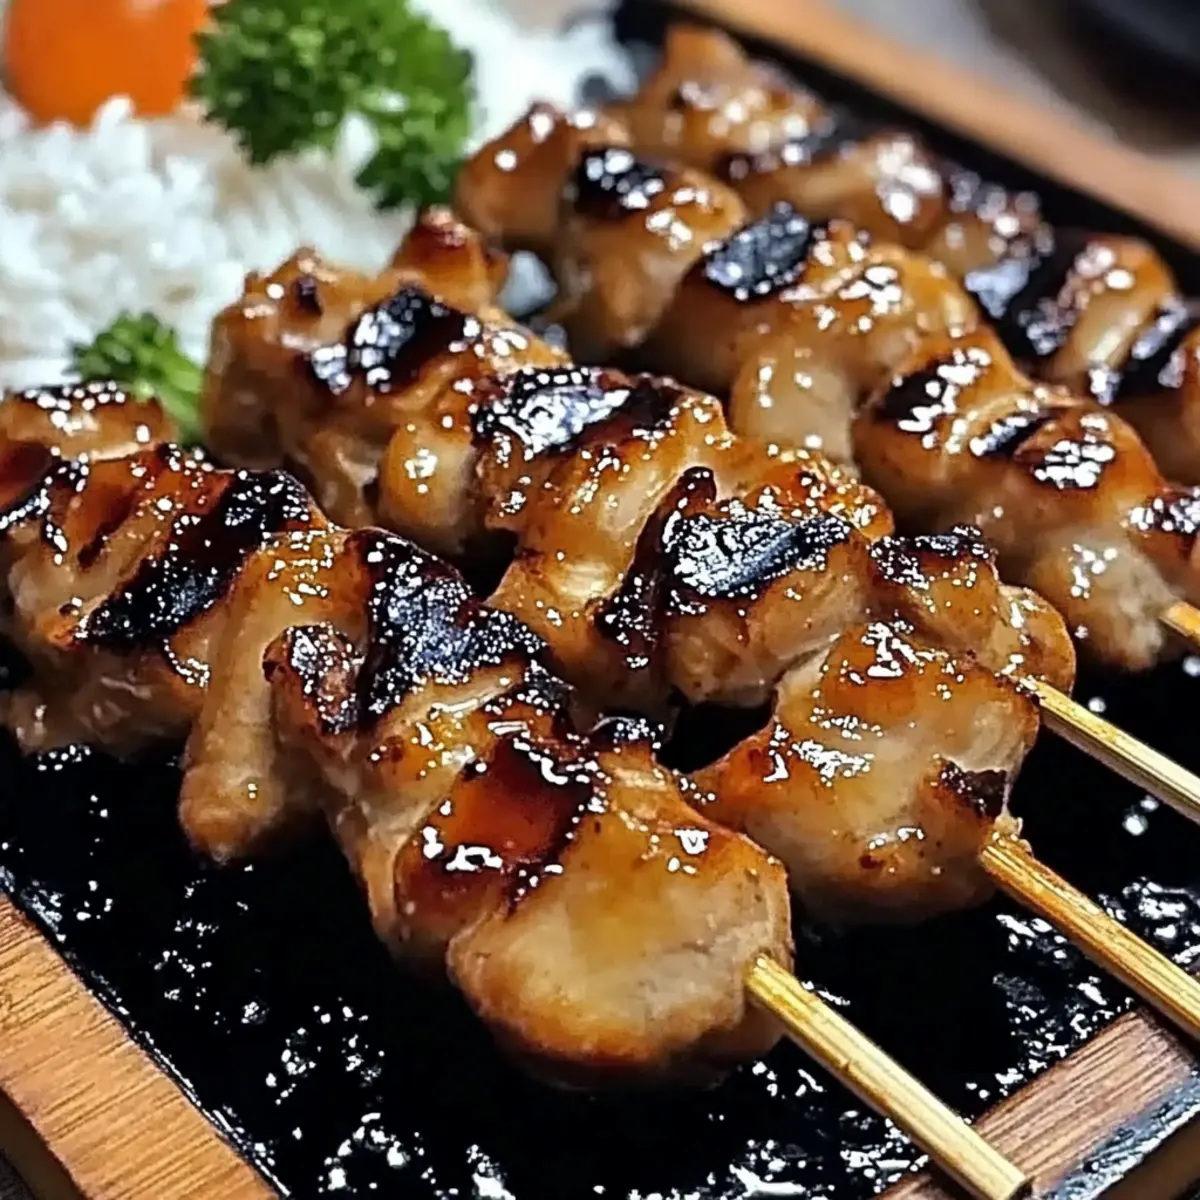
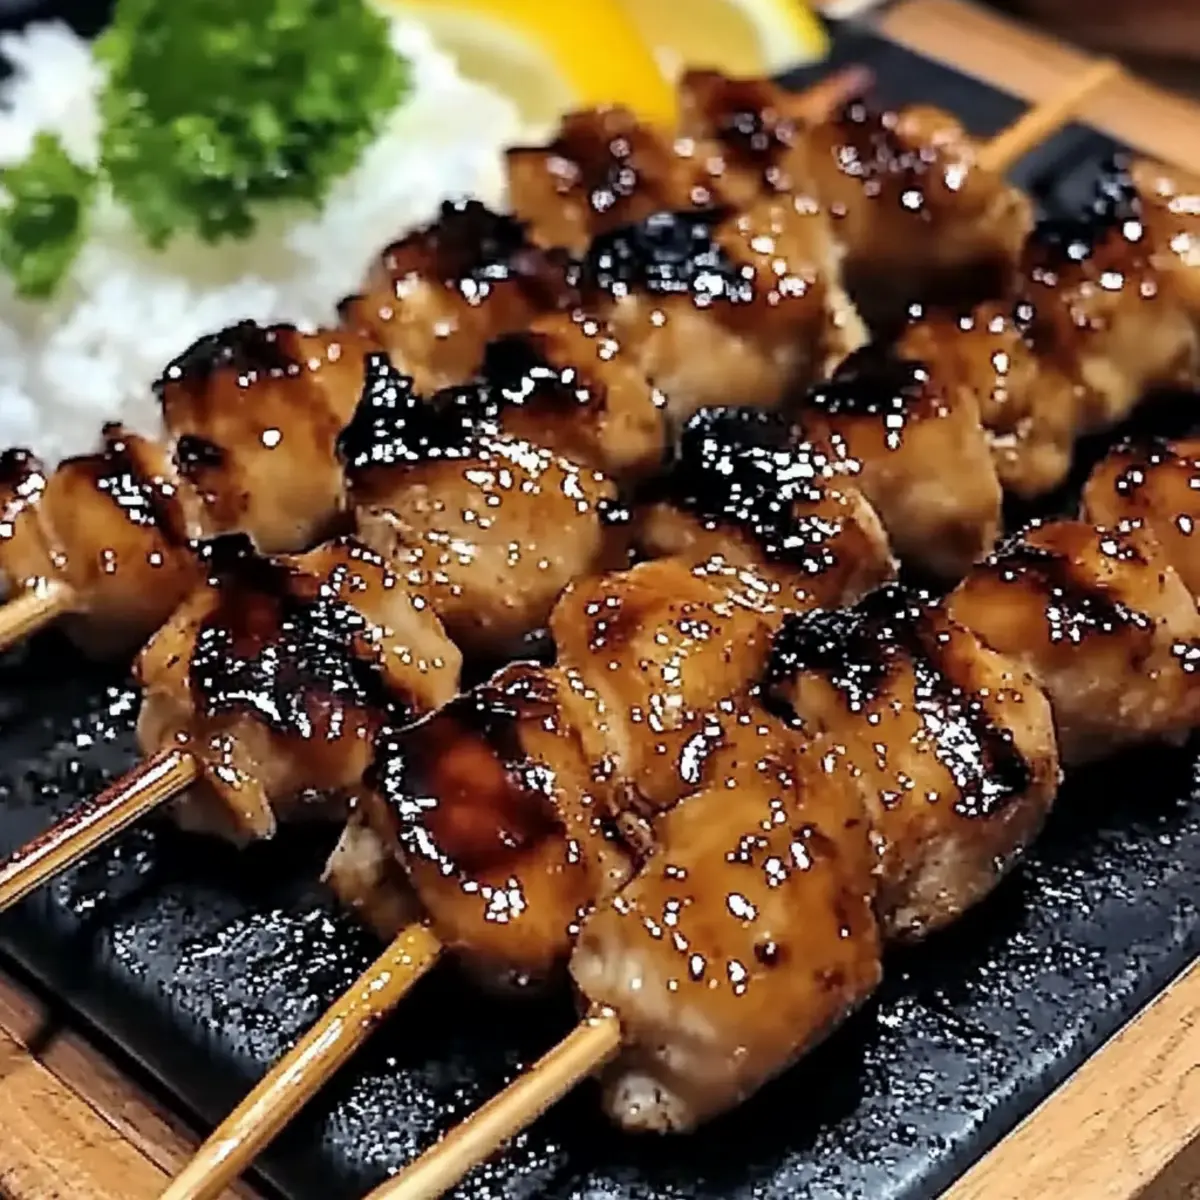
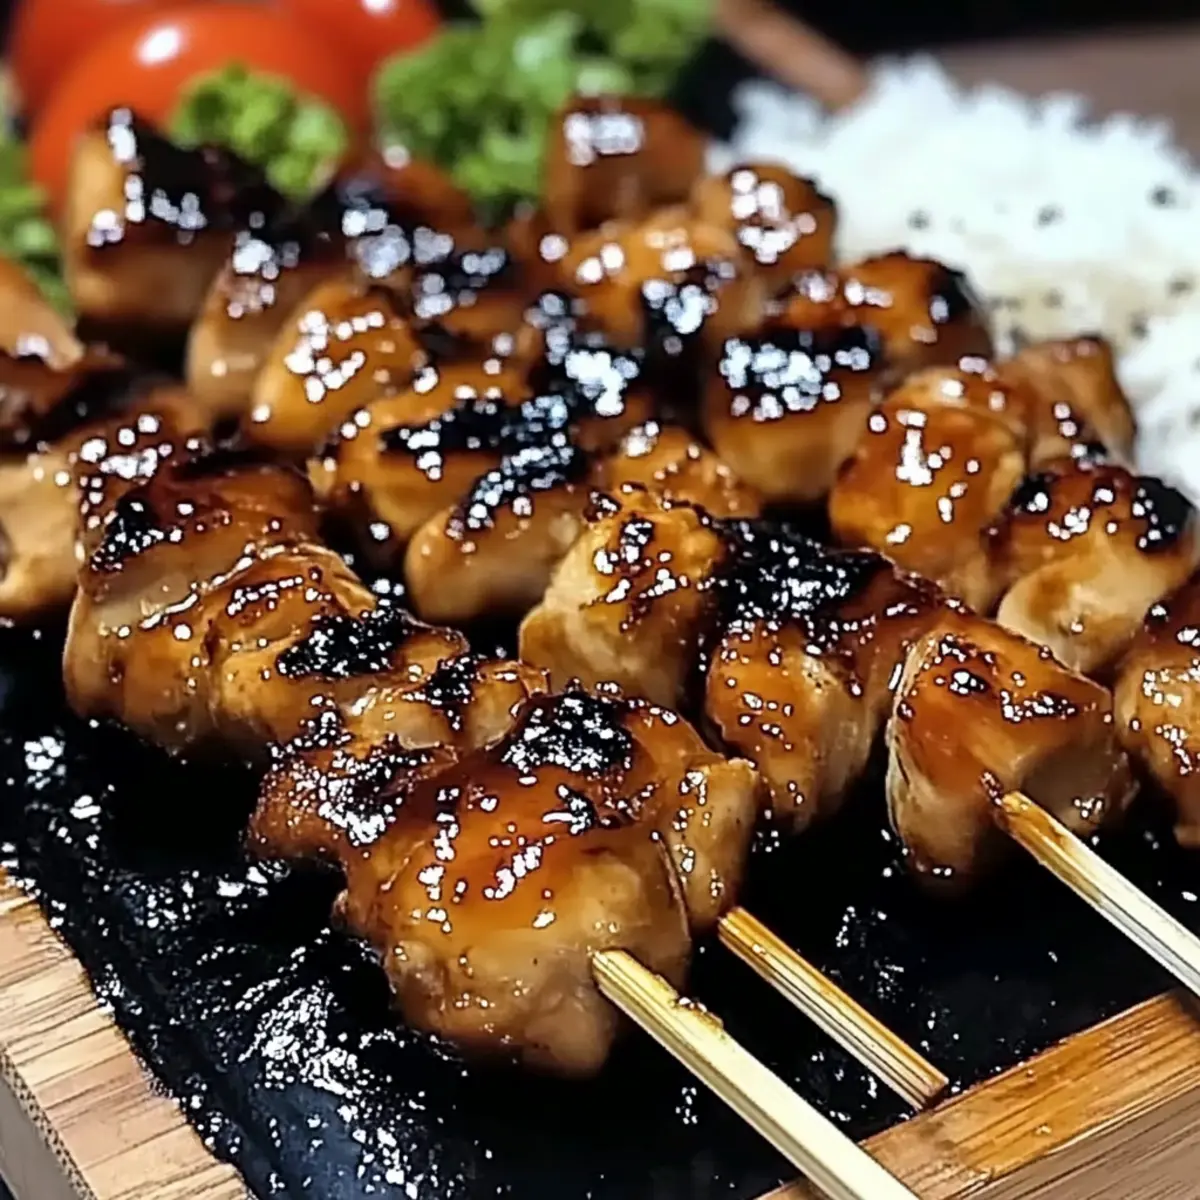
Once cooked through and beautifully caramelized, transfer the grilled chicken yakitori skewers to a serving platter. You can drizzle any remaining yakitori sauce over them for extra flavor. Serve the skewers hot alongside steamed rice and pickled vegetables for a lovely, well-rounded meal. Enjoy the mouthwatering aroma and watch your guests enjoy every bite!

What to Serve with Japanese Chicken Yakitori
Serving up Japanese Chicken Yakitori opens the door to a feast of flavors and experiences that make every meal memorable.
- Steamed Rice: Fluffy, white rice serves as a neutral base that lets the rich flavors of the yakitori shine.
- Pickled Vegetables: The tanginess of pickled cucumbers or radishes provides a refreshing contrast, balancing the savory richness of the chicken.
- Miso Soup: A warm bowl of miso soup adds a comforting element, enhancing the overall dining experience with umami flavors.
- Edamame: Lightly salted, steamed edamame pods offer a delightful crunch and a pop of freshness to your meal.
- Grilled Veggies: Charred bell peppers and zucchini not only add color, but also complement the grilled aspect of the yakitori.
- Sake or Japanese Beer: Pairing your skewers with a chilled sake or a crisp Japanese beer enhances the authentic vibe of your meal and elevates the overall flavor.
Imagine sharing this beautifully arranged spread with loved ones, each bite full of flavor and nostalgia. Enjoy your culinary journey!
Make Ahead Options
These Japanese Chicken Yakitori skewers are perfect for meal prep enthusiasts! You can marinate the chicken in the garlic, ginger, and reserved yakitori sauce up to 24 hours in advance. Simply place the coated chicken in an airtight container in the refrigerator to deepen the flavors. Additionally, the yakitori sauce can be prepared ahead and stored in the fridge for up to 1 week for convenient use. When you’re ready to cook, thread the marinated chicken onto soaked skewers and grill them straight from the fridge. This ensures that your weeknight dinners can be just as delicious but with significantly less effort! Enjoy the same flavorful experience with minimal fuss!
Expert Tips for Japanese Chicken Yakitori
-
Quality Ingredients: Use fresh, high-quality chicken and soy sauce for the best flavor. Dull ingredients can lead to a bland experience.
-
Marination Time: For more intense flavors, marinate your chicken for at least 30 minutes, but if time allows, consider marinating overnight.
-
Consistent Grill Temperature: Maintain a steady medium-high heat while grilling to prevent any pieces from getting burnt. A fluctuating temperature can ruin your Japanese Chicken Yakitori.
-
Regular Basting: Baste the skewers regularly with your thickened sauce to keep the meat moist and ensure a shiny, flavorful glaze on each skewer.
-
Vegetable Additions: Feel free to incorporate colorful vegetables like bell peppers or zucchini between the chicken pieces for extra nutrition and visual appeal.
-
Check Internal Temperature: Use a meat thermometer to ensure the internal temperature reaches 165°F (74°C) before removing the skewers from the grill for safe consumption.
Japanese Chicken Yakitori Variations
Feel free to play with flavors and ingredients to make this dish your own!
-
Vegetable Additions: Add bell peppers, zucchini, or mushrooms to your skewers for extra color and nutrition. This twist not only enhances presentation but adds delightful textures to each bite.
-
Spicy Kick: Heat things up by mixing in chili flakes or a dash of sriracha to the yakitori sauce. A touch of heat can elevate the sweetness and add more depth to every mouthful.
-
Different Proteins: Swap out the chicken for pork or beef to create your own version of yakitori. Just be sure to adjust cooking times for each meat type to maintain that juicy tenderness.
-
Tofu Version: For a vegetarian option, replace chicken with firm tofu or a medley of vegetables. Marinate them just as you would the chicken to infuse them with the sauce’s flavors.
-
Soy Sauce Alternatives: Try using Tamari or coconut aminos for a gluten-free yakitori option. Each brings its own unique taste whilst ensuring everyone can enjoy delicious flavors.
-
Infused Sauces: Add a splash of citrus juice or zest—like lemon or lime—to your sauce for a refreshing zing that cuts through the sweetness.
-
Sweet Alternatives: Experiment with honey or maple syrup instead of brown sugar for a different level of sweetness that pairs beautifully with the tangy elements of the sauce.
Ready to savor those delectable skewers? Pair them with a side of steamed rice or some pickled vegetables, and feel free to explore more recipes like our Korean Chicken Bao or Soy Garlic Chicken for even more culinary adventures!
How to Store and Freeze Japanese Chicken Yakitori
Fridge: Store leftover yakitori in an airtight container for up to 3 days to maintain freshness and flavor.
Freezer: For prolonged storage, freeze the chicken skewers in a single layer, then transfer to a zip-top bag for up to 3 months.
Reheating: Thaw frozen yakitori in the fridge overnight. Reheat by baking at 350°F for 10-15 minutes or on a stovetop over low heat with a splash of water to enhance moisture.
Wrapping: When storing, ensure each skewer is wrapped individually in plastic wrap or foil to prevent freezer burn and preserve the delicious glazed texture.
Japanese Chicken Yakitori Recipe FAQs
How do I select ripe ingredients for my Japanese Chicken Yakitori?
Absolutely! When choosing boneless chicken for yakitori, look for pieces that are pale pink and free from dark spots or bruises. For ginger, select firm, smooth roots with a strong aroma. Fresh garlic should be plump and without any green shoots. If using vegetables, opt for bright-colored, crisp bell peppers or zucchini for the best flavor and texture.
How should I store leftover Japanese Chicken Yakitori?
Very! After enjoying your delicious yakitori, let the skewers cool down before placing them in an airtight container. They can be stored in the refrigerator for up to 3 days. For optimal flavor retention, it’s essential to seal the container tightly to prevent any moisture from escaping or unwanted odors from affecting the chicken.
Can I freeze Japanese Chicken Yakitori? If so, how?
Certainly! To freeze your yakitori, first, allow the skewers to cool completely. Lay them in a single layer on a baking sheet to freeze for about 1-2 hours. Once solid, transfer the skewers to a zip-top bag, removing as much air as possible to prevent freezer burn. They can be stored in the freezer for up to 3 months, preserving their delicious flavors!
What are some common troubleshooting tips for Japanese Chicken Yakitori?
If your yakitori isn’t caramelizing or the glaze is too thin, it could be due to inconsistent grill heat or insufficient basting. Always ensure your grill maintains a medium-high temperature around 375°F (190°C) and baste the skewers regularly with the thickened sauce. If the glaze is too runny, simmer it longer; you can also add a bit more cornstarch mixed with water to thicken it further.
Are there any dietary considerations I should be aware of for Japanese Chicken Yakitori?
Absolutely! This dish is versatile and can be adapted to meet various dietary needs. For a gluten-free version, substitute soy sauce with Tamari or coconut aminos. Also, you can replace the chicken with firm tofu or a variety of vegetables for a vegetarian option. Always check for allergies regarding soy or garlic, and adjust ingredient selections accordingly to accommodate all guests.
Can I make the yakitori sauce ahead of time?
Yes! I often make a batch of yakitori sauce in advance, which can enhance its flavors. You can store the sauce in an airtight container in the refrigerator for up to a week. Just give it a good stir before using it to make sure the ingredients are well combined, and you’ll have a delicious boost ready for your grilled chicken or veggies!
Grill Up Joy with Homemade Japanese Chicken Yakitori
Ingredients
Equipment
Method
- Soak the wooden skewers in water for 10-20 minutes.
- Combine soy sauce, water, red wine or mirin, brown sugar, and rice vinegar in a saucepan over medium heat for 2-3 minutes until brown sugar dissolves.
- Trim excess fat from chicken and cut into 1-2 inch chunks, lightly pound if desired.
- Marinate chicken pieces with minced garlic, grated ginger, and reserved yakitori sauce for at least 10-30 minutes.
- Simmer remaining yakitori sauce and whisk in cornstarch slurry until thickened, about 3-5 minutes.
- Thread marinated chicken onto soaked skewers, ensuring pieces aren't overcrowded.
- Grill skewers on medium-high heat for 8-12 minutes, basting with sauce regularly.
- Serve hot with remaining sauce, steamed rice, and pickled vegetables.
Leave a Reply