
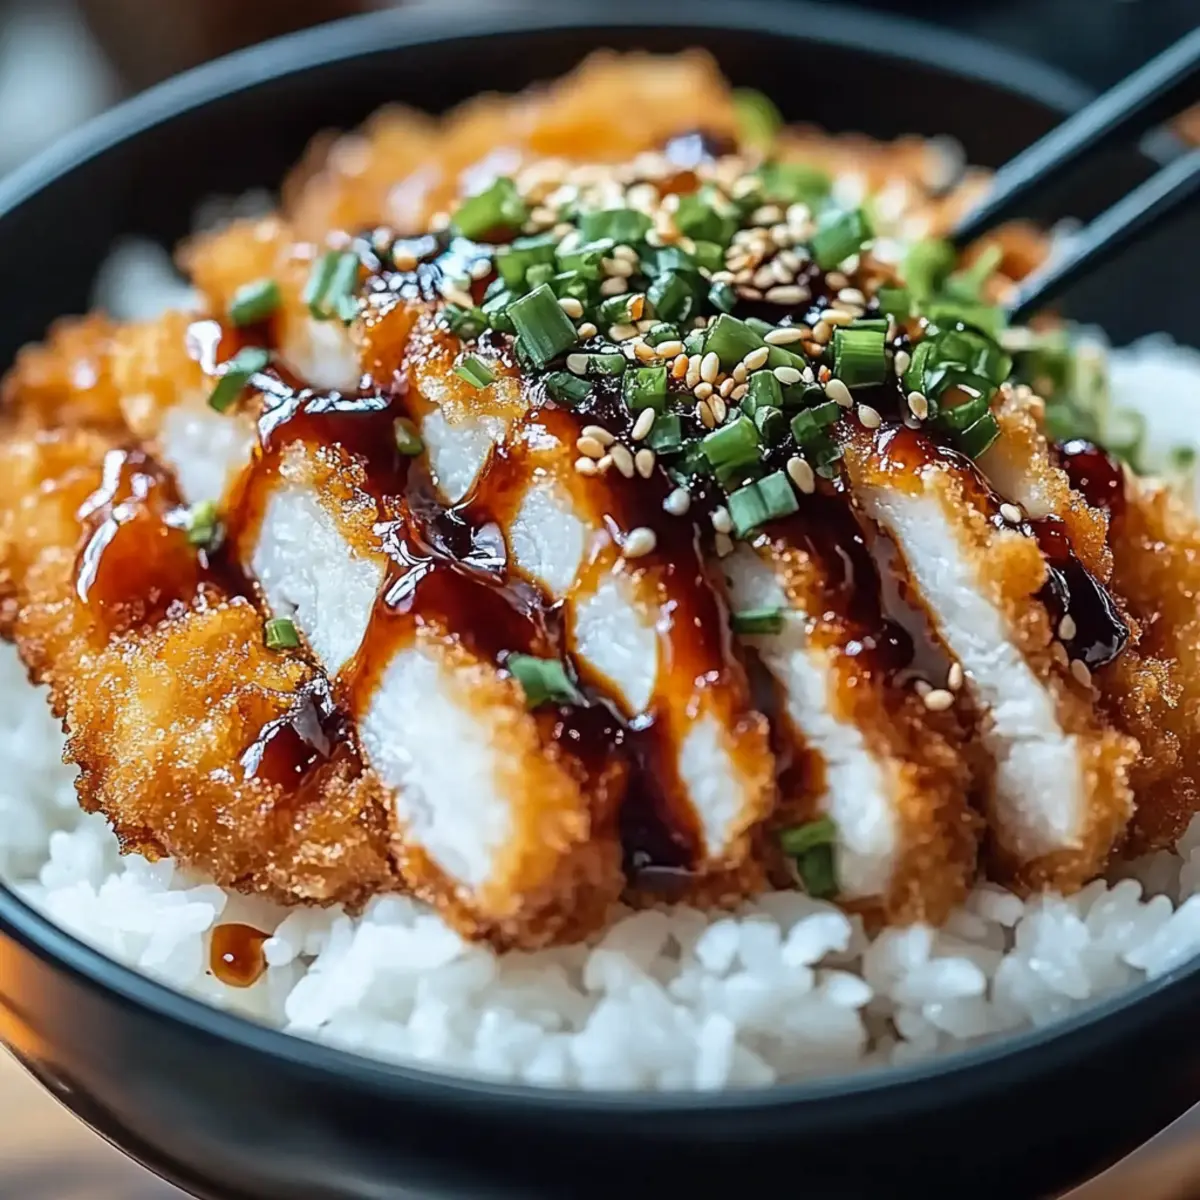
The mingling scents from my kitchen whisk me back to bustling Tokyo streets, where vibrant food stalls serve up Japanese Katsu Bowls, each a masterpiece of crispy perfection. As I recreate this beloved dish of golden-brown pork cutlet on fluffy rice, topped with my homemade tonkatsu sauce, I’m reminded of how comfort food can transport you to a different world. This Japanese Katsu Bowl recipe is not only quick to prepare but also an impressive crowd-pleaser that you can customize with chicken or tofu. Whether it’s a cozy weeknight dinner or a special occasion, each bite is a satisfying balance of crunch, tenderness, and flavor that will leave everyone at the table craving more. What would you add to make it your own delightful version?
Why is this Katsu Bowl a must-try?
Flavorful Kick: The sweet and tangy tonkatsu sauce introduces a burst of flavor that elevates each bite, reminiscent of charming Japanese streets filled with culinary delights.
Simple Process: With only a few ingredients and straightforward steps, you’ll have this comforting meal ready in no time, perfect for any busy schedule.
Customizable Options: Whether you prefer crispy pork, tender chicken, or even tofu, you can easily adapt this recipe to satisfy your cravings and dietary needs.
Crowd Pleaser: Impress family and friends with a homemade dinner that feels special yet is easy enough for a weeknight. For a delightful side, consider pairing it with Japanese Cotton Cheesecake for a sweet finish!
Japanese Katsu Bowls Ingredients
• Explore the essential components for crafting the perfect katsu experience!
For the Cutlet
- Boneless Pork Loin Chops – A flavorful main protein, easily swapped with chicken or tofu for a different twist.
- Panko Breadcrumbs – These provide a delightful crunch; regular breadcrumbs can be used in a pinch.
- All-Purpose Flour – Helps the coating stick nicely; gluten-free flour is an option for those with dietary needs.
- Large Egg – Binds everything together; if you’re looking for a vegan alternative, consider a flax egg.
For the Rice Base
- Short-Grain White Rice – It offers a fluffy, comforting base; brown rice can be used for extra nutrients.
For the Sauce
- Tonkatsu Sauce – Adds a sweet and tangy flavor, and can be homemade or store-bought for convenience.
For Frying
- Vegetable Oil – Essential for frying and achieving that golden crust; canola or peanut oil are good alternatives.
For Garnish
- Green Onions – Adds color and freshness; feel free to substitute with chives or omit them altogether.
- Sesame Seeds – Brings a nutty flavor and texture; can be left out if you’re avoiding seeds.
Step‑by‑Step Instructions for Crispy Japanese Katsu Bowls with Homemade Tonkatsu Sauce
Step 1: Prepare the Rice
Begin by rinsing 1 cup of short-grain white rice under cold water until the water runs clear, which helps remove excess starch. Next, cook the rice according to the package instructions, typically bringing it to a boil with a 1:1.5 rice-to-water ratio, then reducing the heat to low for about 15-20 minutes. The rice should be fluffy and tender, ready to cradle the delicious katsu.
Step 2: Pound the Pork Chops
While the rice cooks, take 2 boneless pork loin chops and place them between two sheets of plastic wrap or parchment paper. Using a meat mallet or rolling pin, pound the pork to an even ½-inch thickness; this ensures even cooking and tenderness. You’ll know it’s ready when the meat looks uniform and slightly flattened, making it perfect for a crispy Japanese katsu.
Step 3: Set Up a Breading Station
Now, it’s time to prepare your breading station. Arrange three shallow dishes side by side: one with all-purpose flour, another with a beaten large egg, and the third filled with panko breadcrumbs. This setup will streamline the breading process, making it easier to coat each pork chop for your katsu bowls. Get your frying skillet ready, as you’ll need it shortly.
Step 4: Bread the Pork Chops
Take one pounded chop and dredge it in the flour, ensuring both sides are evenly coated, then dip it in the beaten egg to allow the panko to adhere. Finally, press the chop into the panko breadcrumbs, covering it completely and pressing down gently to create a thick layer of crunch. Repeat this process for both chops, setting them aside on a plate until you’re ready to fry.
Step 5: Fry the Chops
Heat about ⅓ inch of vegetable oil in a large skillet over medium heat—aim for 350°F, which is perfect for frying. Once the oil shimmers, carefully lower each breaded chop into the skillet, frying for 4-5 minutes per side until golden brown and crispy. Use tongs to flip them, ensuring a beautifully even color. Once done, transfer the katsu to a plate lined with paper towels to absorb excess oil.
Step 6: Assemble the Bowls
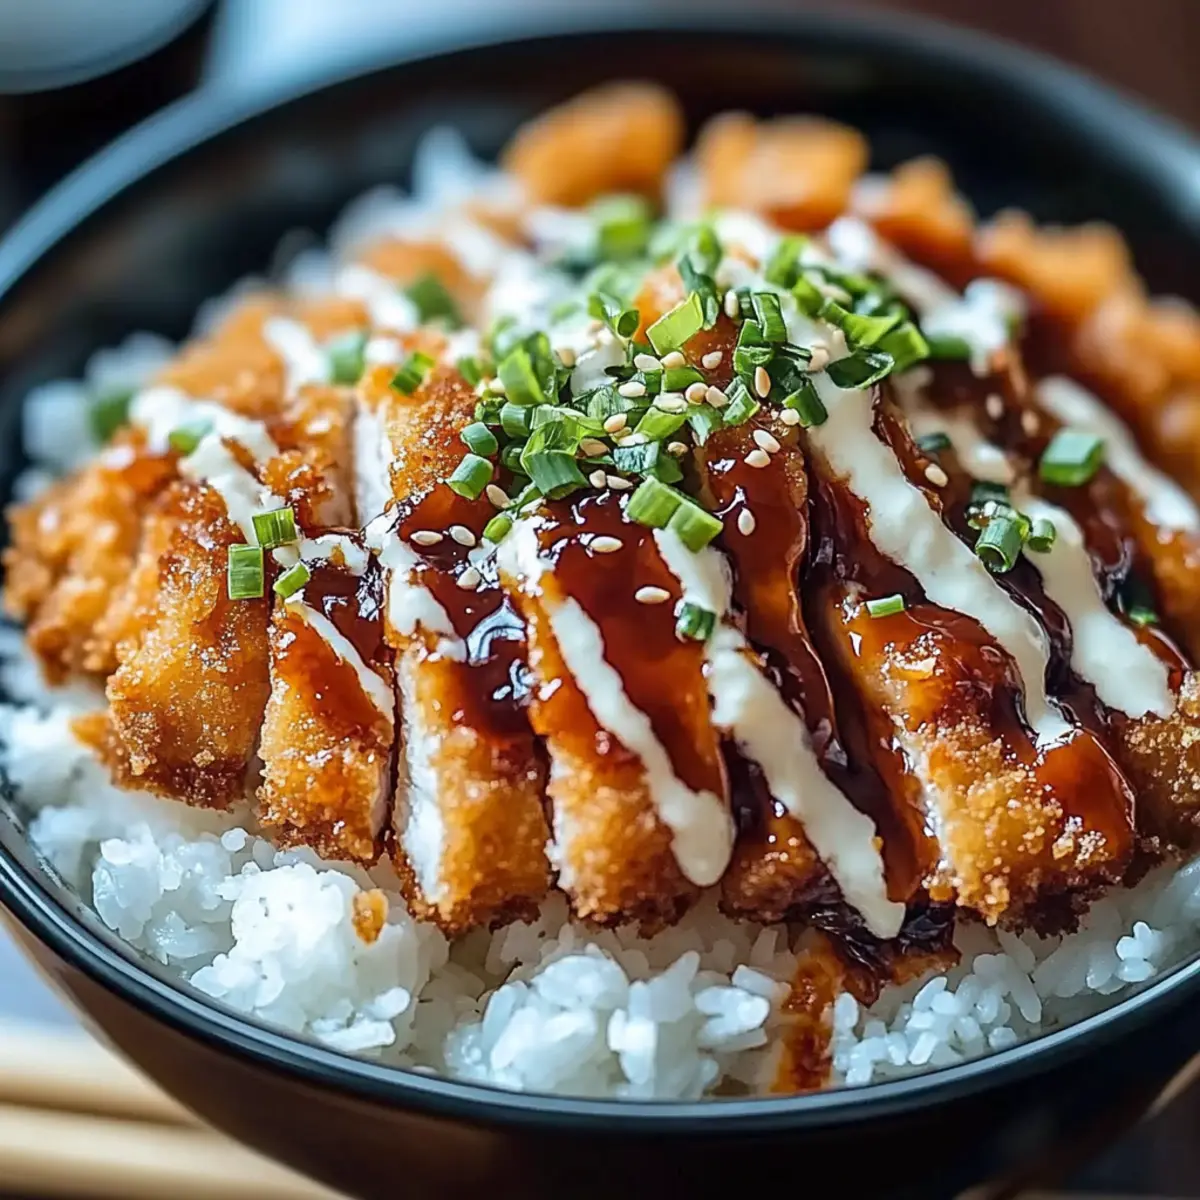
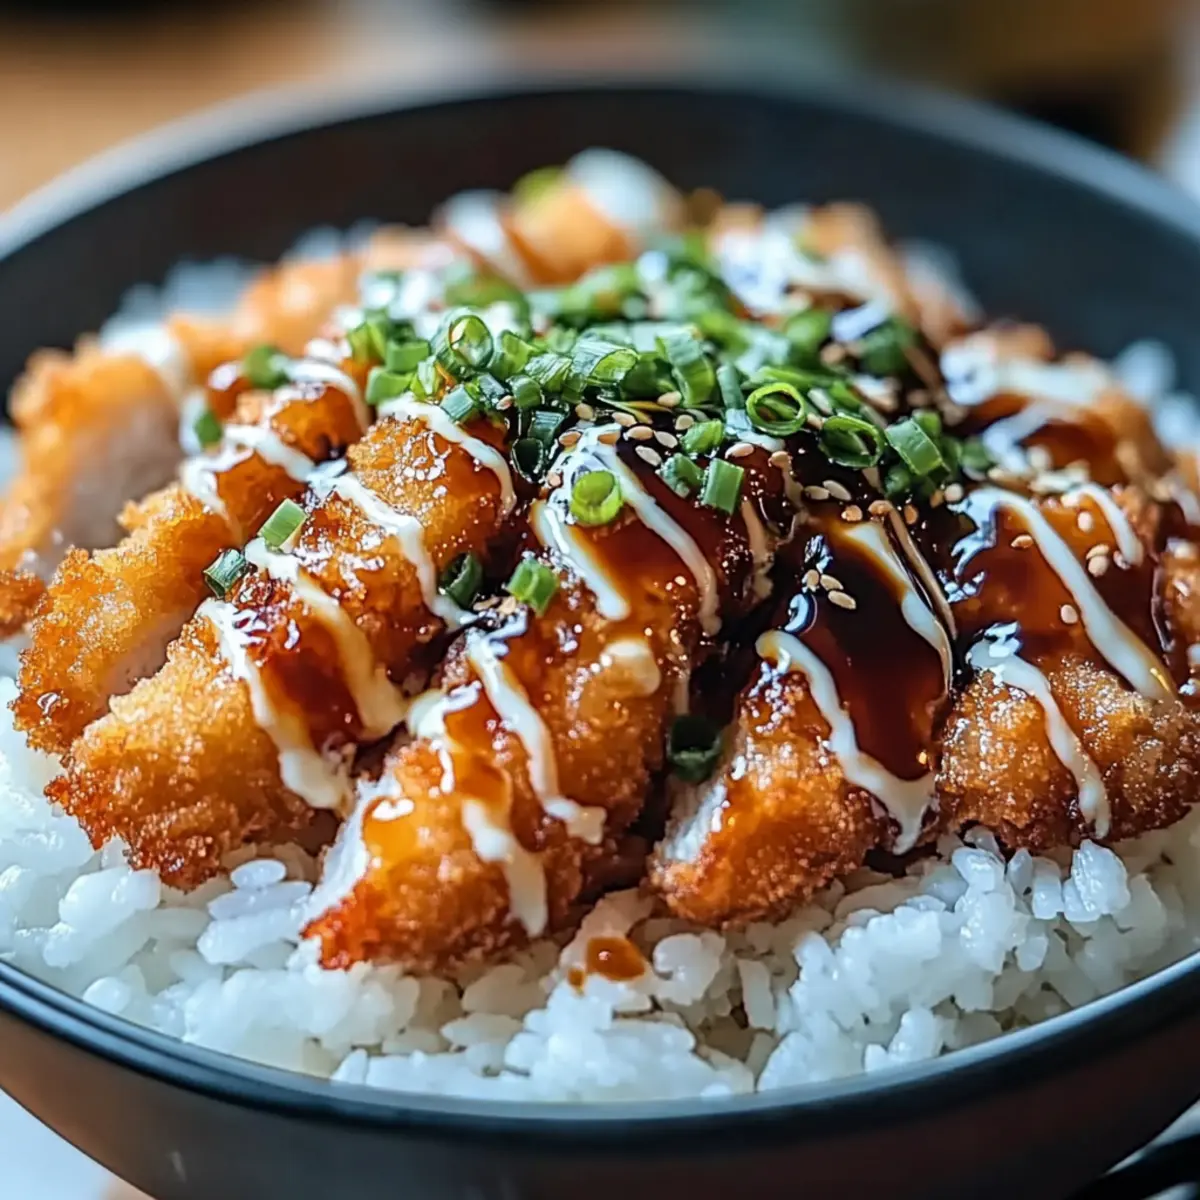
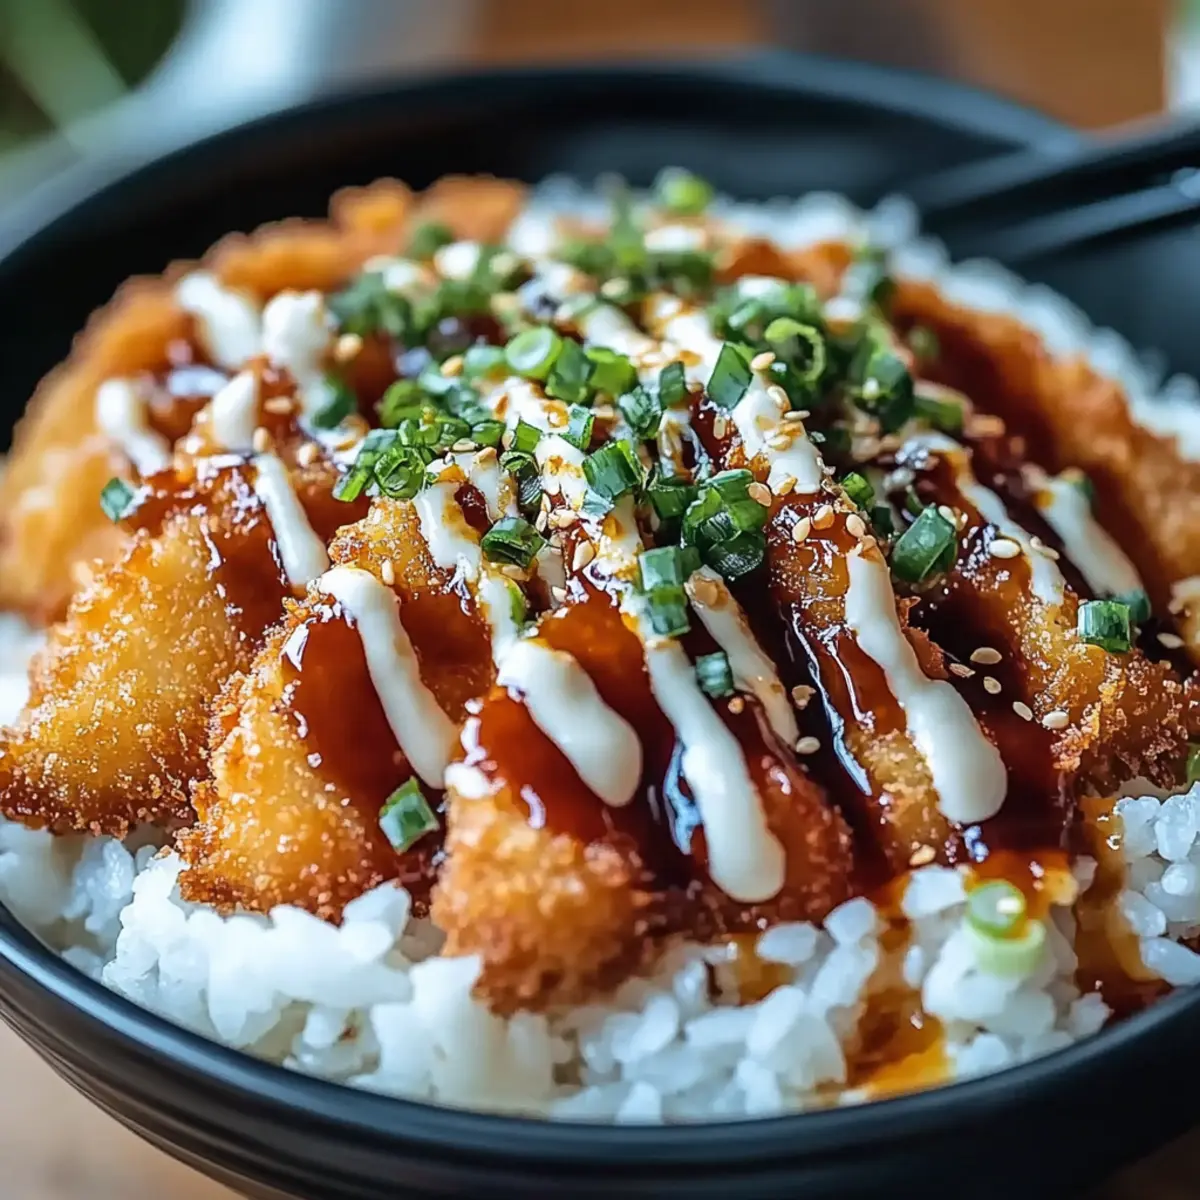
Finally, it’s time to assemble your crispy Japanese katsu bowls. Begin by scooping fluffy rice into individual bowls as a base. Top the rice generously with sliced katsu, then drizzle your desired amount of homemade tonkatsu sauce over the pork. For a pop of color and freshness, garnish with chopped green onions and a sprinkle of sesame seeds. Sit back and enjoy your deliciously satisfying meal!
What to Serve With Crispy Japanese Katsu Bowls
Elevate your dining experience by creating a balanced meal that complements the rich flavors of your katsu bowls.
- Steamed Miso Soup: A warm, savory soup that enhances the meal’s comforting essence and offsets the crispy cutlet perfectly.
- Light Cucumber Salad: Crunchy cucumbers tossed in a tangy vinegar dressing provide freshness that lightens the meal and adds a delightful contrast.
An invigorating salad will cleanse the palate beautifully between bites of rich tonkatsu. Just imagine the refreshing crunch!
- Pickled Vegetables: A colorful assortment of pickled radishes or ginger adds a zesty kick, balancing the sweetness of the tonkatsu sauce.
- Edamame: Steamed edamame sprinkled with sea salt is a nutritious side that pairs well with the crispy texture of katsu, fostering a satisfying snack.
- Steamed Broccoli or Asian Greens: Lightly steamed greens drizzled with sesame oil will offer a touch of earthiness that complements the dish’s flavors and adds another layer of nutrition.
Don’t forget to serve a chilled Sapporo beer or green tea to wash down your meal, encapsulating the complete Japanese dining experience!
Japanese Katsu Bowls Variations
Feel free to personalize your katsu bowls with these tasty variations that will ignite your creativity in the kitchen!
- Chicken Option: Swap the pork with boneless chicken thighs or breasts for a lighter twist. You’ll enjoy a tender and juicy alternative that still delivers all the delicious flavors.
- Tofu Delight: Substitute the pork with firm tofu for a vegetarian version. Just press the tofu to remove excess moisture and follow the same breading method—it’s incredibly satisfying!
- Brown Rice: Instead of traditional short-grain white rice, opt for brown rice. It adds a nutty flavor and a hearty texture while increasing the nutritional value of your meal.
- Spicy Kick: Add a dash of sriracha or chili oil to your tonkatsu sauce for a zesty, heat-infused finish. It’s a fantastic way to elevate the flavor profile and satisfy spice lovers!
- Pickled Vegetables: Incorporate quick-pickled radishes or carrots for a bright, crunchy contrast. These tangy bites will balance the richness of the katsu beautifully!
- Herb Infusion: Toss in some fresh herbs such as cilantro or basil on top of your katsu bowls for a refreshing twist that enhances the overall taste.
- Crispy Crust Variations: Experiment with different coatings like crushed cornflakes or a mix of panko and grated Parmesan for an irresistible crispy texture. This little change can make your katsu extraordinary!
- Sauce Variations: For a fun twist on tonkatsu sauce, try a homemade miso glaze or teriyaki sauce as an alternative drizzled on top. Both bring delightful sweetness and depth that’s simply irresistible!
By exploring these variations, you can craft your perfect bowl worthy of sharing with friends and family. For a delightful dessert to complement your meal, consider pairing it with an airy Japanese Cotton Cheesecake for the perfect sweet finish!
How to Store and Freeze Japanese Katsu Bowls
Fridge: Store leftover Japanese Katsu Bowls in an airtight container for up to 3 days, ensuring the rice and katsu remain separate for better texture.
Freezer: For longer storage, freeze the katsu separately from the rice; they can last up to 2 months. Wrap tightly in plastic wrap and place in a freezer-safe bag.
Reheating: To preserve the katsu’s crunch, reheat it in an oven at 375°F for about 10-15 minutes, rather than using a microwave, which can make it soggy.
Sauce Storage: Store any leftover tonkatsu sauce in the fridge for up to a week in a sealed container, ready to drizzle on future meals!
Make Ahead Options
These crispy Japanese Katsu Bowls are perfect for meal prep enthusiasts! You can bread the pork chops and keep them in the refrigerator for up to 24 hours before frying to maintain their delicious crunch. Simply coat the pork in flour, dip in egg, and cover with panko breadcrumbs, then store them in an airtight container to prevent moisture. Additionally, you can cook the rice a day ahead and refrigerate it, then reheat it before serving. When you’re ready to enjoy, just fry the breaded chops for about 4-5 minutes per side until golden brown, assemble your bowls, and drizzle with tonkatsu sauce for a satisfying meal that feels freshly made, even on the busiest days!
Expert Tips for Japanese Katsu Bowls
Hot Oil: Always preheat your oil before frying. A properly heated oil creates that beautiful, crispy texture without soaking up excess oil.
Pound Evenly: Make sure your pork is pounded to an even thickness. This ensures each piece cooks uniformly, avoiding any dry spots.
Avoid Crowding: Fry in batches if your skillet is small. Crowding the pan can lower the oil temperature, resulting in soggy katsu instead of the desired crunch.
Drain Efficiently: Let your katsu rest on paper towels after frying. This step is crucial for keeping that delicious crispiness intact!
Customize Proteins: Feel free to swap out pork for chicken or tofu in your Japanese Katsu Bowls, giving you a chance to explore different flavors and textures.
Crispy Japanese Katsu Bowls with Homemade Tonkatsu Sauce Recipe FAQs
How do I choose the right pork for my katsu?
Absolutely! For the juiciest katsu, I recommend using boneless pork loin chops; they offer great flavor and tenderness. Look for chops that are bright pink with minimal dark spots. If you’re opting for chicken, boneless, skinless thighs are a fantastic alternative; they’ll stay juicy during cooking. Alternatively, if you’re going for a vegan option, extra-firm tofu works beautifully when pressed to remove excess moisture.
How should I store leftovers of my katsu bowls?
Very! Leftover Japanese Katsu Bowls can be kept in an airtight container in the fridge for up to 3 days. To maintain the crispy texture, store the katsu separately from the rice. This way, it won’t get soggy. If it’s already mixed, consume it sooner rather than later for the best taste!
Can I freeze my katsu and rice for later?
You certainly can! For best results, freeze the katsu and rice separately. Wrap the cooled katsu tightly in plastic wrap, then place it in a freezer-safe bag; it should last up to 3 months. For the rice, portion it out in airtight containers. To reheat, thaw both in the refrigerator overnight and bake the katsu in a preheated oven at 375°F for about 10-15 minutes, ensuring to keep that crunch!
What if my katsu is soggy when I fry it?
Don’t worry! If your katsu turns out soggy, make sure your oil is hot enough before frying—aim for around 350°F. Crowding the pan can also lower the oil temperature, leading to a soggy crust. Fry in batches if necessary. If this happens, try letting the fried katsu rest on paper towels for a few minutes to absorb excess oil.
Can I use a gluten-free alternative for this recipe?
Absolutely! You can substitute all-purpose flour with gluten-free flour for the coating, and replace panko breadcrumbs with gluten-free breadcrumbs. Just ensure that your tonkatsu sauce also meets your dietary needs, or you can easily whip up a homemade version with gluten-free soy sauce.
Is tonkatsu sauce safe for pets or allergies?
That’s a good question! Traditional tonkatsu sauce contains ingredients like soy sauce, which isn’t safe for pets; always keep these dishes away from furry friends. For allergies, check the labels on store-bought sauces for allergens like wheat or gluten. You can make your own by mixing ketchup with soy sauce and a hint of sugar, adjusting to your taste!
Crispy Japanese Katsu Bowls with Easy Tonkatsu Sauce Recipe
Ingredients
Equipment
Method
- Rinse the rice under cold water until the water runs clear, then cook according to package instructions.
- Pound the pork chops between plastic wrap to an even ½-inch thickness.
- Set up a breading station with flour, beaten egg, and panko breadcrumbs.
- Dredge each chop in flour, dip in egg, and coat with breadcrumbs, pressing down to adhere.
- Heat oil in a skillet over medium heat and fry each breaded chop for 4-5 minutes on each side until golden.
- Assemble the bowls with rice, sliced katsu, tonkatsu sauce, and garnishes.
Leave a Reply