
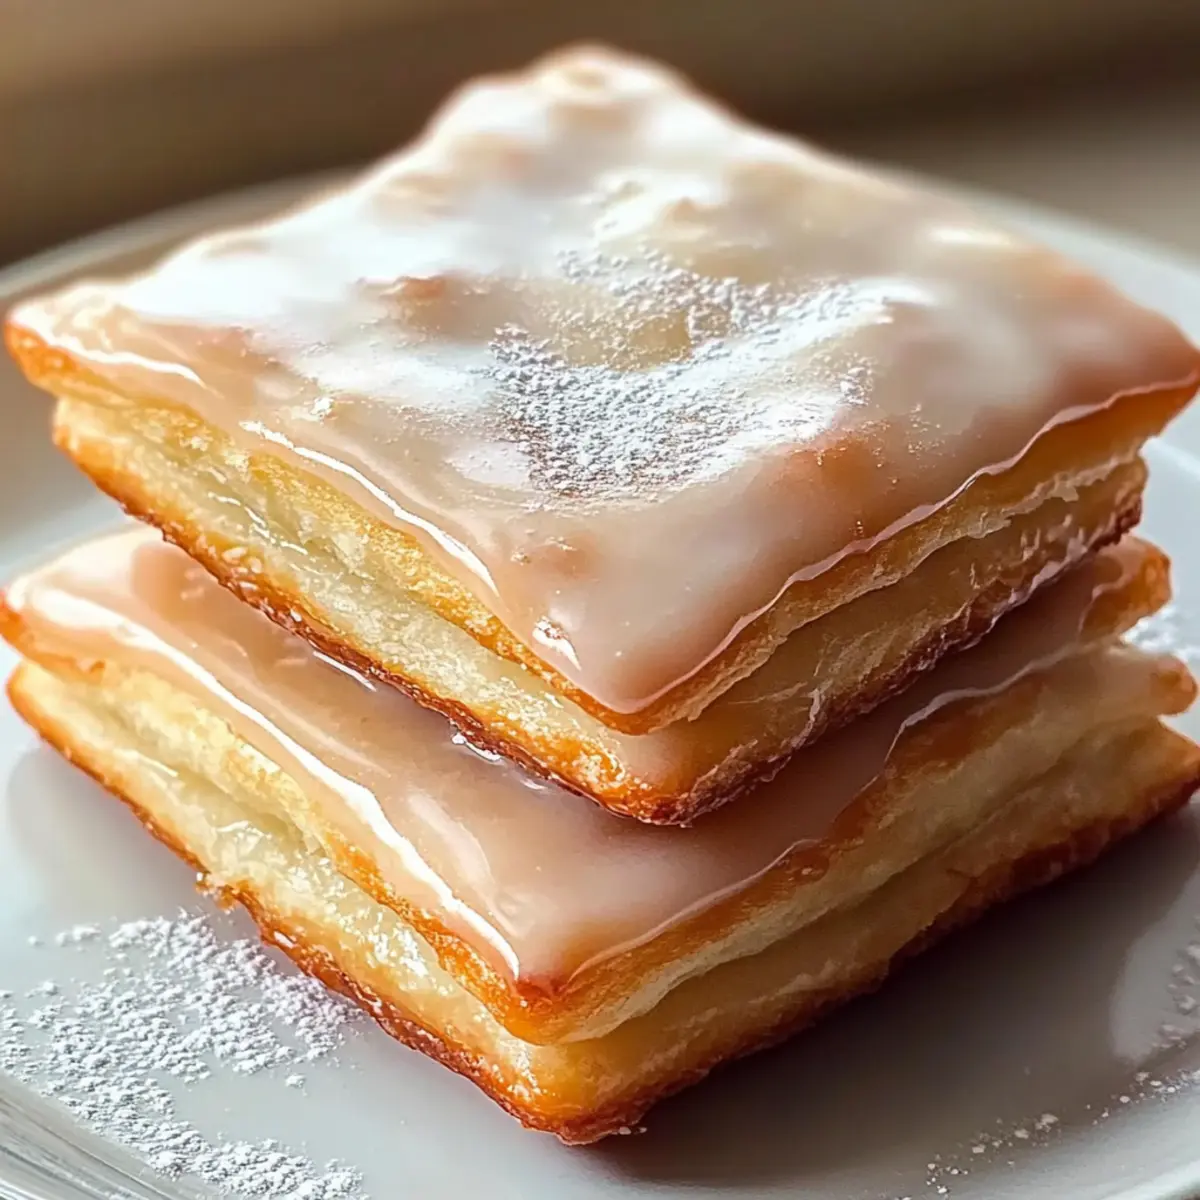
As I stood in my kitchen, the enticing aroma of freshly fried dough filled the air—there’s nothing quite like it. Today, I’m diving into the world of Glazed Buttermilk Beignets, those pillowy pastries that promise a melt-in-your-mouth experience with each heavenly bite. Not only are these sweet delights surprisingly easy to whip up, but they’re also a genuine crowd-pleaser, making them a fantastic addition to brunches or simply a sweet afternoon treat. With a warm, luscious vanilla glaze that shimmers invitingly, these beignets are bound to impress not just your taste buds but also family and friends. Ready to indulge in a homemade culinary adventure? Let’s get frying!
Why Are These Beignets a Must-Try?
Indulgence Awaits: These Glazed Buttermilk Beignets offer a unique blend of flavors and textures, delivering a delightful experience that you won’t forget.
Easy to Customize: Feel free to experiment! Add your favorite toppings or glazes for a personal twist, whether you prefer honey or chocolate sauce.
Perfect for Any Occasion: Whether it’s brunch, a party, or just a treat for yourself, these beignets will impress your guests and satisfy your sweet cravings.
Quick and Simple: With steps designed for beginners, you can whip these up in no time—more time to savor the joy of homemade goodness!
Freshly Made Magic: Best enjoyed warm, these little treasures can transport you back to your favorite café with just one bite. For an extra treat on the side, try pairing with Spicy Buttermilk Fried chicken for a delightful meal combination!
Glazed Buttermilk Beignets Ingredients
For the Dough
- Water – Hydration for the dough; make sure it’s warm (between 105-110°F) to activate the yeast.
- Sugar – Sweetness and yeast activator; granulated sugar is your best bet.
- Buttermilk – Brings a slight tang and moisture for a tender crumb; substitute with yogurt or milk plus a dash of vinegar if necessary.
- Egg – Adds richness and structure to the dough; can be replaced with a flax egg for a vegan alternative.
- Flour – Acts as the main structure; all-purpose flour works perfectly, and you may add more if the dough feels too sticky.
- Active Dry Yeast – This leavening agent helps the dough rise; use fresh yeast for optimal results.
- Melted Butter – Introduces flavor and moisture; unsalted butter is recommended for better control over the salt.
For the Glaze
- Powdered Sugar – Essential for a smooth, sweet glaze that really shines; mix with vanilla and milk for the perfect finish.
With these Glazed Buttermilk Beignets ingredients, you’re all set to create a sweet treat that will warm both your heart and your kitchen!
Step‑by‑Step Instructions for Glazed Buttermilk Beignets
Step 1: Activate Yeast
In a small bowl, combine warm water (105-110°F), sugar, and active dry yeast, stirring gently. Allow the mixture to rest for about 5 to 10 minutes, until frothy and bubbly; this indicates that your yeast is alive and ready to work its magic in these Glazed Buttermilk Beignets.
Step 2: Mix Wet Ingredients
In a separate large bowl, whisk together the buttermilk, egg, and melted butter until fully combined. Once your yeast mixture is frothy, gently fold it into this wet mixture. This creates a rich, moist base that will make your beignets delightfully tender.
Step 3: Combine Dry Ingredients
Gradually add in the all-purpose flour to the wet mixture, mixing until a soft, slightly sticky dough forms. Be careful not to overmix; you want your Glazed Buttermilk Beignets to remain light and airy. If the dough feels too sticky, add a sprinkle of flour until you achieve the desired consistency.
Step 4: Rise
Transfer the dough to a lightly greased bowl, covering it with a clean kitchen towel. Place it in a warm spot and let it rise for about 1 hour, or until it has doubled in size. This is a crucial step for creating fluffy beignets, so be patient while the yeast works its magic!
Step 5: Prepare Dough
After the dough has risen, gently punch it down and then roll it out on a floured surface to about ½-inch thickness. Use a sharp knife or a pizza cutter to cut the dough into 2-inch squares. These squares will puff up beautifully into your Glazed Buttermilk Beignets when fried.
Step 6: Heat Oil
In a deep fryer or a heavy pot, heat oil to 350°F. Use a thermometer to ensure the oil is at the correct temperature; this is essential to achieving perfectly golden and crispy beignets. While waiting for the oil, prepare a plate lined with paper towels for draining.
Step 7: Fry Beignets
Carefully add the dough squares into the hot oil in batches, frying them for 1 to 2 minutes on each side until they turn a lovely golden brown. Use a slotted spoon to flip them over, making sure they cook evenly. Once done, drain the beignets on the paper towels to absorb any excess oil.
Step 8: Glaze
While the beignets are still warm, dip each one into a glaze made from powdered sugar, milk, and vanilla extract. Let the excess glaze drip off and set them on a cooling rack to allow the glaze to set, creating a delightful shine on your Glazed Buttermilk Beignets.

Storage Tips for Glazed Buttermilk Beignets
Room Temperature: Store in an airtight container at room temperature for up to 2 days. This keeps them soft, but they’re best enjoyed fresh!
Freezer: For longer storage, freeze unglazed beignets in a single layer on a baking sheet, then transfer to an airtight container for up to 2 months.
Reheating: To regain that delightful texture, reheat frozen beignets in a preheated oven at 350°F for about 10-15 minutes until warmed through.
Glazing Tip: If glazing after freezing, warm the beignets slightly before dipping to help the glaze adhere properly for the best taste experience!
Expert Tips for Glazed Buttermilk Beignets
-
Yeast Activation: Ensure your water is the right temperature (105-110°F) to keep the yeast alive; too hot will kill it, preventing your beignets from rising.
-
Dough Consistency: Be careful not to overmix the dough; a light, slightly sticky texture creates the best Glazed Buttermilk Beignets.
-
Oil Temperature: Use a thermometer to keep oil at 350°F during frying. Oil that’s too hot can burn the exteriors before cooking through.
-
Fry in Batches: Don’t overcrowd the pot while frying; this helps maintain the oil temperature and ensures evenly cooked beignets.
-
Glazing Warm Beignets: Dip your beignets in the glaze while they are still warm for better adherence, resulting in a delightful shiny finish.
Make Ahead Options
These Glazed Buttermilk Beignets are perfect for meal prep, allowing you to enjoy their deliciousness with half the effort during busy mornings or gatherings! To prepare ahead, you can make the dough up to 24 hours in advance. Simply follow the recipe until the rising step, then cover the dough tightly and refrigerate it overnight. When you’re ready to fry, bring the dough to room temperature for about 30 minutes before rolling and cutting it into squares. For best quality, fry the beignets promptly after cutting; they’ll be just as delightful as freshly made and will save you precious time when entertaining or feeding the family!
Glazed Buttermilk Beignets Variations
Feel free to get creative and tailor these delightful pastries to your taste buds!
-
Dairy-Free: Substitute buttermilk with almond or coconut milk mixed with a splash of vinegar for a vegan-friendly version.
This maintains the desired texture while offering a unique flavor twist. -
Spiced Glaze: Add a pinch of cinnamon or nutmeg to the glaze for a hint of warmth and complexity.
This simple enhancement can transport you to cozy autumn evenings! -
Chocolate Lovers: Dip the beignets in a rich chocolate glaze instead of vanilla for indulgent sweetness.
You can also drizzle melted chocolate over the tops for an artistic touch. -
Citrus Lift: Incorporate lemon or orange zest into the glaze for a refreshing zing that brightens each bite.
This will balance the sweetness, bringing a lovely contrast to the dish. -
Nutty Crunch: Sprinkle crushed nuts, like pecans or walnuts, over the glaze for added texture and flavor.
This provides a delightful crunch that pairs beautifully with the soft beignets. -
Festive Sprinkles: Top with colored sugar or sprinkles for a fun and celebratory look, perfect for special occasions.
No one can resist those charming little pops of color! -
Savory Surprise: Mix in shredded cheese or herbs into the dough for a savory version of these beignets.
Pair them with a spicy dipping sauce—these are sure to impress at any gathering! -
Fruit Fusion: Top with fresh berries or a fruit compote to create a vibrant and fruity twist to the traditional glaze.
This combination adds freshness and makes a stunning visual presentation.
These ideas invite you to elevate your own Spicy Buttermilk Fried chicken dinner by introducing these irresistible Glazed Buttermilk Beignets as a sweet finale!
What to Serve with Glazed Buttermilk Beignets
Imagine the warm aroma of freshly baked beignets wafting through your kitchen, enticing everyone to gather around your table for a delightful meal.
- Fresh Fruit Salad: A vibrant mix of berries and citrus cuts through the sweetness of the beignets, adding freshness and color to your brunch spread.
- Rich Coffee: A robust cup of freshly brewed coffee beautifully balances the sweetness of the beignets, enhancing your morning or afternoon treat.
- Whipped Cream: Lightly sweetened whipped cream adds a luscious touch that’s perfect for dipping your beignets, creating a dreamy experience in every bite.
- Chocolate Sauce: Drizzling warm chocolate sauce over the beignets brings a rich flavor twist, making dessert even more indulgent and satisfying.
- Spicy Buttermilk Fried Chicken: The heat from the chicken complements the sweetness of the beignets, creating an exciting contrast that’s sure to impress at any gathering.
- Vanilla Ice Cream: A scoop of creamy vanilla ice cream served alongside warm beignets creates a delightful dessert duo that’s hard to resist.
- Mint Tea: Refreshing mint tea offers a light and invigorating contrast, cleansing the palate after the sugary indulgence of the beignets.
- Honey Drizzle: A touch of honey brings a floral note that beautifully complements the vanilla glaze, enhancing the overall flavor experience with every bite.
Glazed Buttermilk Beignets Recipe FAQs
How can I ensure my yeast is fresh enough for the dough?
To check the freshness of active dry yeast, simply dissolve it in warm water with a bit of sugar. If it becomes frothy and bubbly within 5-10 minutes, it’s good to go. If not, it’s best to replace it as stale yeast will not activate your dough properly.
What’s the best way to store leftover Glazed Buttermilk Beignets?
Store any leftover beignets in an airtight container at room temperature for up to 2 days. They’re best enjoyed fresh, but this method will keep them soft. If you need to keep them longer, freezing them is a great option.
Can I freeze glazed beignets?
I recommend freezing unglazed beignets for the best results. Place them in a single layer on a baking sheet first, then transfer to an airtight container once frozen. They can be stored for up to 2 months. When ready to enjoy, simply reheat in a preheated oven at 350°F for 10-15 minutes and glaze while slightly warm for the best texture.
What if my dough is too sticky?
If your dough feels too sticky, it’s a good idea to sprinkle in a little more flour, one tablespoon at a time, while gently mixing until you reach the desired soft, slightly tacky consistency—this will help achieve fluffy Glazed Buttermilk Beignets.
Are Glazed Buttermilk Beignets suitable for those with egg allergies?
Absolutely! You can substitute the egg with a flax egg by mixing 1 tablespoon of ground flaxseed with 3 tablespoons of water. Let it sit for about 5 minutes until it thickens, then use it in place of the regular egg in the recipe for a delightful vegan option.
Glazed Buttermilk Beignets: Melt-in-Your-Mouth Delight
Ingredients
Equipment
Method
- In a small bowl, combine warm water, sugar, and active dry yeast. Let it rest for 5-10 minutes until frothy.
- In a separate bowl, whisk together buttermilk, egg, and melted butter. Fold in the yeast mixture.
- Gradually add the flour, mixing until a soft, slightly sticky dough forms.
- Transfer the dough to a greased bowl, cover, and let it rise for about 1 hour until doubled in size.
- Punch down the dough, roll it out to ½-inch thickness, and cut into 2-inch squares.
- Heat oil in a deep fryer or heavy pot to 350°F.
- Fry the dough squares in batches for 1-2 minutes on each side until golden brown.
- Drain on paper towels and dip in the glaze while warm. Set on a cooling rack to allow glaze to set.
Leave a Reply