
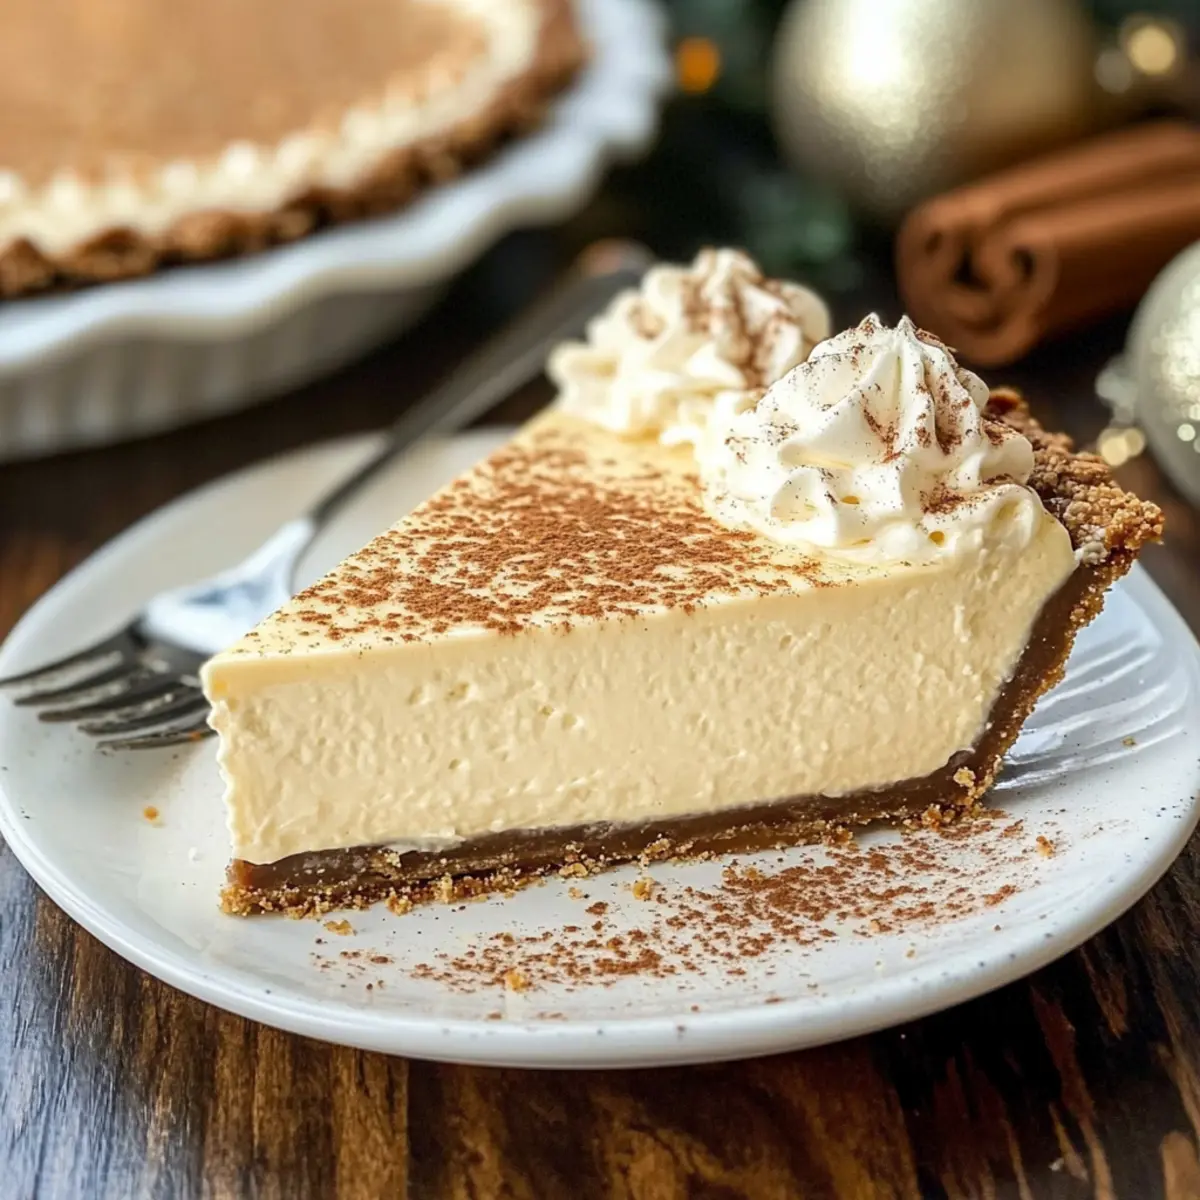
The holidays are all about bringing loved ones together, and what better way to celebrate than with a show-stopping dessert? Picture this: a creamy, dreamy No-Bake Eggnog Cream Pie that captures the essence of festive gatherings without requiring a hot oven. This delightful holiday treat combines the classic flavors of eggnog with the buttery crunch of a graham cracker crust, making it a simple yet unforgettable addition to your menu. Not only is it a no-bake wonder, which means less time fussing in the kitchen, but it also serves as a crowd-pleaser—perfect for family get-togethers or casual holiday parties. So, are you ready to whip up this dreamy delight and impress your guests? Let’s dive into the recipe!
Why Choose No-Bake Eggnog Cream Pie?
Ease of Preparation: No need to preheat your oven, making this recipe accessible for both novice and seasoned bakers looking for a quick festive treat.
Festive Flavor: Infused with classic eggnog spices, this pie delivers the warm, cozy essence of the holidays in every bite.
Versatile Variations: Feel free to mix it up—try a gingersnap crust for added spice or even a splash of bourbon for an adult twist, creating a dessert that can be tailored to your tastes.
Crowd-Pleaser: Perfect for gatherings, this light and creamy pie is sure to impress your family and friends, just like other favorites such as Candy Cane Pie and Coconut Cream Dream.
Stunning Presentation: A dusting of nutmeg and cinnamon not only enhances the flavor but also adds a beautiful finish, captivating your guests before they even take a bite!
The Best No-Bake Eggnog Cream Pie Ingredients
For the Crust
• Graham Crackers – About 1¼ cups crushed, forms the crust’s base; substitute with gingersnaps for extra spice.
• Granulated Sugar – 6 tablespoons; adds sweetness to the crust—no substitutions required.
• Brown Sugar – 4 tablespoons; enhances the flavor of the crust—no substitutions required.
• Unsalted Butter – 8 tablespoons (1 stick), melted; binds the crust together; can be replaced with coconut oil for a dairy-free option.
For the Filling
• Cream Cheese – 8 ounces, softened; provides a rich and creamy texture; use ricotta for a lighter alternative.
• Ground Cinnamon – 1 teaspoon; spices the filling with classic holiday flavor; adjust to taste for your preference.
• Nutmeg – ¼ teaspoon, freshly grated; adds aromatic depth to the filling; use store-bought ground nutmeg if needed.
• Sweetened Condensed Milk – 1 (14-ounce) can; stabilizes the filling—no substitutions advised.
• Golden Eggnog – 2 cups; this is essential for that eggnog flavor; feel free to use homemade or store-bought.
• Instant Jell-O Cheesecake Mix – 1 (1.5-ounce) box; helps thicken the filling; substitute with a flourless option if preferred.
• Instant Jell-O Vanilla Pudding Mix – 1 (1.5-ounce) box; enhances the texture; can be omitted for a simpler filling.
• Heavy Whipping Cream – 1½ cups; whipped to create an airy texture in the filling; use coconut cream for a dairy-free version.
For Garnish
• Ground Cinnamon and Nutmeg – Dust on top before serving to add flavor and a stunning presentation—no substitutions necessary.
Indulge in the flavors of the holidays with this delightful no-bake eggnog cream pie, a true showstopper that your loved ones will cherish!
Step‑by‑Step Instructions for The Best No-Bake Eggnog Cream Pie for the Holidays
Step 1: Crust Preparation
Crush about 1¼ cups of graham crackers into fine crumbs using a food processor or place them in a zip-top bag and roll with a rolling pin. In a mixing bowl, combine the crumbs with 6 tablespoons of granulated sugar, 4 tablespoons of brown sugar, and 8 tablespoons of melted unsalted butter. Mix until evenly combined, then press the mixture firmly into the bottom and up the sides of a 10-inch pie dish. Transfer to the freezer for about 30 minutes to set.
Step 2: Filling Preparation
In a stand mixer, beat 8 ounces of softened cream cheese until smooth and creamy, about 2 minutes. Gradually add 1 (14-ounce) can of sweetened condensed milk and 2 cups of golden eggnog while mixing on low speed. Add 1 teaspoon of ground cinnamon and ¼ teaspoon of freshly grated nutmeg, mixing until everything is well incorporated and the filling is free from lumps.
Step 3: Thicken Mixture
Switch to a whisk attachment on your stand mixer, and add 1 (1.5-ounce) box each of instant Jell-O cheesecake mix and vanilla pudding mix. Whisk for about 2 minutes until the mixture thickens and becomes fluffy. This step is crucial for achieving the perfect texture in your no-bake eggnog cream pie, so be patient as it comes together beautifully.
Step 4: Whip Cream
In a separate, chilled mixing bowl, whip 1½ cups of heavy whipping cream until stiff peaks form, which should take about 3-5 minutes on medium-high speed. Gently fold the whipped cream into the eggnog mixture in batches, taking care to preserve the airy, light texture. This is what makes your filling velvety and delightful—aim for a uniform consistency without deflating the whipped cream.
Step 5: Assemble Pie
Take the chilled crust from the freezer and pour your luscious filling into it, smoothing the top with a spatula. Aim for a nice, even layer for a beautiful appearance. Cover the pie with plastic wrap and freeze for at least 4 hours, or preferably overnight, until the filling is firm enough to slice neatly.
Step 6: Garnish and Serve
Once set, remove your No-Bake Eggnog Cream Pie from the freezer and let it soften at room temperature for about 10-15 minutes before slicing. For a festive touch, dust the top with additional ground cinnamon and nutmeg for a warm, inviting presentation. Slice, serve, and watch your family enjoy this seasonal delight!
Expert Tips for the Best No-Bake Eggnog Cream Pie
-
Crust Pressure: Firmly press the crust mixture to ensure it holds together when sliced; a well-packed crust prevents crumbling.
-
Spice Adjustment: Feel free to tweak the spices in your filling; more cinnamon or nutmeg can enhance the eggnog flavor, making it a more personal holiday treat.
-
Whip Cream Correctly: Beat your heavy cream to stiff peaks to ensure a light filling; underwhipped cream can lead to a dense texture that doesn’t hold well.
-
Cooling Time: Allow the pie to soften for 10-15 minutes before serving; this helps achieve the perfect creamy texture for enjoying every bite of the best no-bake eggnog cream pie.
-
Storage Reminders: Store any leftovers in the freezer but remember to let them soften before serving, making it easy to enjoy this delicious holiday dessert over several days!
What to Serve with No-Bake Eggnog Cream Pie
Nothing wraps up a holiday dinner quite like the creamy indulgence of this festive pie—it’s the perfect sweet ending to your meal.
- Warm Spiced Apple Cider: The rich spices in this drink echo the flavors of the eggnog and enhance the pie’s holiday spirit.
- Gingerbread Cookies: Crunchy, flavorful gingerbread cookies are a delightful contrast to the soft, creamy texture of the pie.
- Whipped Cream Topping: A fluffy dollop on top of each slice adds extra creaminess and a touch of elegance. It amplifies the dessert’s lightness.
- Chocolate-Dipped Strawberries: The sweetness and slight tartness of strawberries create a wonderful balance with the rich cream pie.
- Pecan Pie Bars: These bars add a chewy, nutty element that complements your dessert beautifully, appealing to those who love textures.
- Cinnamon Hot Chocolate: Cozy up with a mug of cinnamon-infused hot chocolate for a comforting drink that pairs perfectly with every slice of pie.
- Holiday Cheeseboard: Include brie, nuts, and seasonal fruits for a savory counterpoint to the sweetness of the pie. Each bite will be a new experience!
- Peppermint Bark: This sweet treat offers a refreshing minty flavor that contrasts nicely with the creamy eggnog pie, awakening the palate.
- Eggnog Milkshakes: For the true eggnog lover, blend this holiday favorite for a festive, creamy drink that mirrors the pie’s flavors in liquid form.
- Caramel Sauce Drizzle: A subtle drizzle atop the pie adds an additional layer of sweetness, elevating the whole experience beautifully.
Storage Tips for The Best No-Bake Eggnog Cream Pie for the Holidays
Fridge: Keep leftovers covered in an airtight container in the refrigerator for up to 3 days; this allows the flavors to meld beautifully while ensuring freshness.
Freezer: For longer storage, freeze the pie tightly wrapped in plastic wrap and aluminum foil for up to one week. This helps maintain the texture of the best no-bake eggnog cream pie.
Thawing: To enjoy, transfer the pie from the freezer to the fridge for several hours, or let it sit at room temperature for about 10-15 minutes until slightly softened before slicing.
Reheating: Since this pie is served cold, no reheating is necessary; simply cut and serve for a refreshing holiday treat!
The Best No-Bake Eggnog Cream Pie Variations
Make this festive pie truly yours by exploring these delightful twists!
-
Gingersnap Crust: Replace graham crackers with gingersnaps for a spiced, flavorful base that resonates perfectly with the eggnog filling.
-
Bourbon Boost: Stir in 1 tablespoon of bourbon or dark rum to the filling for a spirited adult version that adds depth to your dessert.
-
Nutty Surprise: Fold in ½ cup of chopped pecans or walnuts into the filling for a delightful crunch that complements the creaminess.
-
Chocolate Delight: Drizzle chocolate ganache over the pie before garnishing to create a rich contrast that will impress chocolate lovers.
-
Alternative Sweeteners: Use maple syrup or honey instead of white sugar for a more natural sweetness, adding a unique flavor dimension.
-
Coconut Cream Substitute: Swap out heavy whipping cream for whipped coconut cream for a deliciously tropical dairy-free alternative that’s light and airy.
-
Fruit Fusion: Top with fresh cranberries or pomegranate seeds for a burst of color and tartness that brightens the creamy filling, enhancing the overall taste.
-
Flavorful Citrus: Add the zest of one orange or lemon for a bright, zesty twist that cuts through the richness, creating a refreshing flavor contrast.
By incorporating any of these creative variations, you can cater to your family’s likes and make this pie an even more special holiday treat, just like our other favorites such as Pepper Jelly Cream or Vanilla Custard Pie!
Make Ahead Options
These delightful No-Bake Eggnog Cream Pies are perfect for meal prep enthusiasts! You can prepare the crust up to 3 days in advance, simply press it into your pie dish and store it covered in the refrigerator to keep it fresh. The filling can also be whipped up a day ahead—just be sure to fold in the whipped cream just before serving to maintain its light texture. After pouring the filling into the crust, freeze the pie for at least 4 hours or overnight until set. This way, you can enjoy a stress-free holiday gathering with a dessert that’s just as delicious, saving you precious time for what truly matters: spending time with loved ones!
The Best No-Bake Eggnog Cream Pie Recipe FAQs
What type of graham crackers should I use for the crust?
You can use any standard graham crackers for the crust, but I recommend opting for the honey variety for a touch of sweetness. If you’re feeling adventurous, gingersnap cookies make a fantastic substitute, adding a spicy kick that perfectly complements the holiday theme!
How should I store leftover No-Bake Eggnog Cream Pie?
After enjoying your No-Bake Eggnog Cream Pie, store any leftovers in the refrigerator in an airtight container for up to 3 days. To keep it longer, wrap it tightly in plastic wrap and aluminum foil and freeze it for up to one week, preserving that delightful texture and flavor!
Can I freeze this pie? If so, how?
Absolutely! To freeze your No-Bake Eggnog Cream Pie, wrap it securely in plastic wrap and then in aluminum foil to avoid freezer burn. It’s best to freeze it for no longer than a week. When you’re ready to enjoy it, simply transfer it to the refrigerator for several hours or allow it to sit at room temperature for about 10-15 minutes until it softens up before slicing.
What should I do if my filling doesn’t thicken properly?
If your filling doesn’t thicken as expected, ensure that you’ve correctly added and whisked in both the instant Jell-O cheesecake mix and vanilla pudding mix. It’s crucial to use the whisk attachment on your mixer and whisk for about 2 minutes until the mixture becomes fluffy. Additionally, make sure your heavy cream is whipped to stiff peaks before folding it in; this contributes to the light, airy texture.
Is this No-Bake Eggnog Cream Pie safe for people with allergies?
This pie contains gluten (from the graham crackers), dairy (cream cheese and heavy cream), and eggs (in the eggnog). If you’re catering to allergies, consider using gluten-free cookies for the crust, coconut cream instead of heavy cream, and a dairy-free eggnog or homemade alternative. Always check the labels of store-bought ingredients to ensure they fit your dietary needs!
How long can I keep the pie in the fridge after making it?
You can keep the No-Bake Eggnog Cream Pie in the fridge for up to 3 days. I often find that the flavors develop nicely during this time, but if the pie starts to develop dark spots or odors, it’s best to discard it for safety. Enjoy this festive delight while it’s fresh!

The Best No-Bake Eggnog Cream Pie for the Holidays Delight
Ingredients
Equipment
Method
- Crush about 1¼ cups of graham crackers into fine crumbs. In a mixing bowl, combine crumbs with granulated sugar, brown sugar, and melted butter. Press mixture into the bottom and sides of a 10-inch pie dish and freeze for 30 minutes.
- In a stand mixer, beat softened cream cheese until smooth. Gradually add sweetened condensed milk and golden eggnog while mixing on low speed. Add ground cinnamon and nutmeg, mixing until incorporated.
- Switch to a whisk attachment and add cheesecake mix and vanilla pudding mix. Whisk for about 2 minutes until the mixture thickens.
- In a separate bowl, whip heavy cream until stiff peaks form. Gently fold the whipped cream into the eggnog mixture.
- Pour the filling into the chilled crust, smoothing the top with a spatula. Cover and freeze for at least 4 hours.
- Let the pie soften at room temperature for 10-15 minutes before slicing. Dust with additional ground cinnamon and nutmeg before serving.
Leave a Reply