
You know that moment when you’re craving something sweet, yet you want to avoid that sugar crash afterward? Enter my Healthy Homemade Butterfingers! With just five simple ingredients, I’ve crafted a guilt-free snack that perfectly balances indulgence and health. These treats are not only gluten-free and dairy-free, but they’re also naturally sweetened, making them a delightful option for anyone looking to satisfy their sweet tooth without the usual guilt. They’re a quick breeze to whip up and can be stashed away for those late-night cravings or post-workout boosts. Curiosity piqued? Let’s dive into this healthy twist on a classic favorite!
Why are these Butterfingers addictive?
Simplicity: With only five ingredients, making these Healthy Homemade Butterfingers is a breeze! No extensive prep needed, just mix, freeze, and enjoy.
Guilt-Free Indulgence: Made gluten-free and dairy-free, they offer a guiltless way to satisfy your sweet cravings without compromising on flavor.
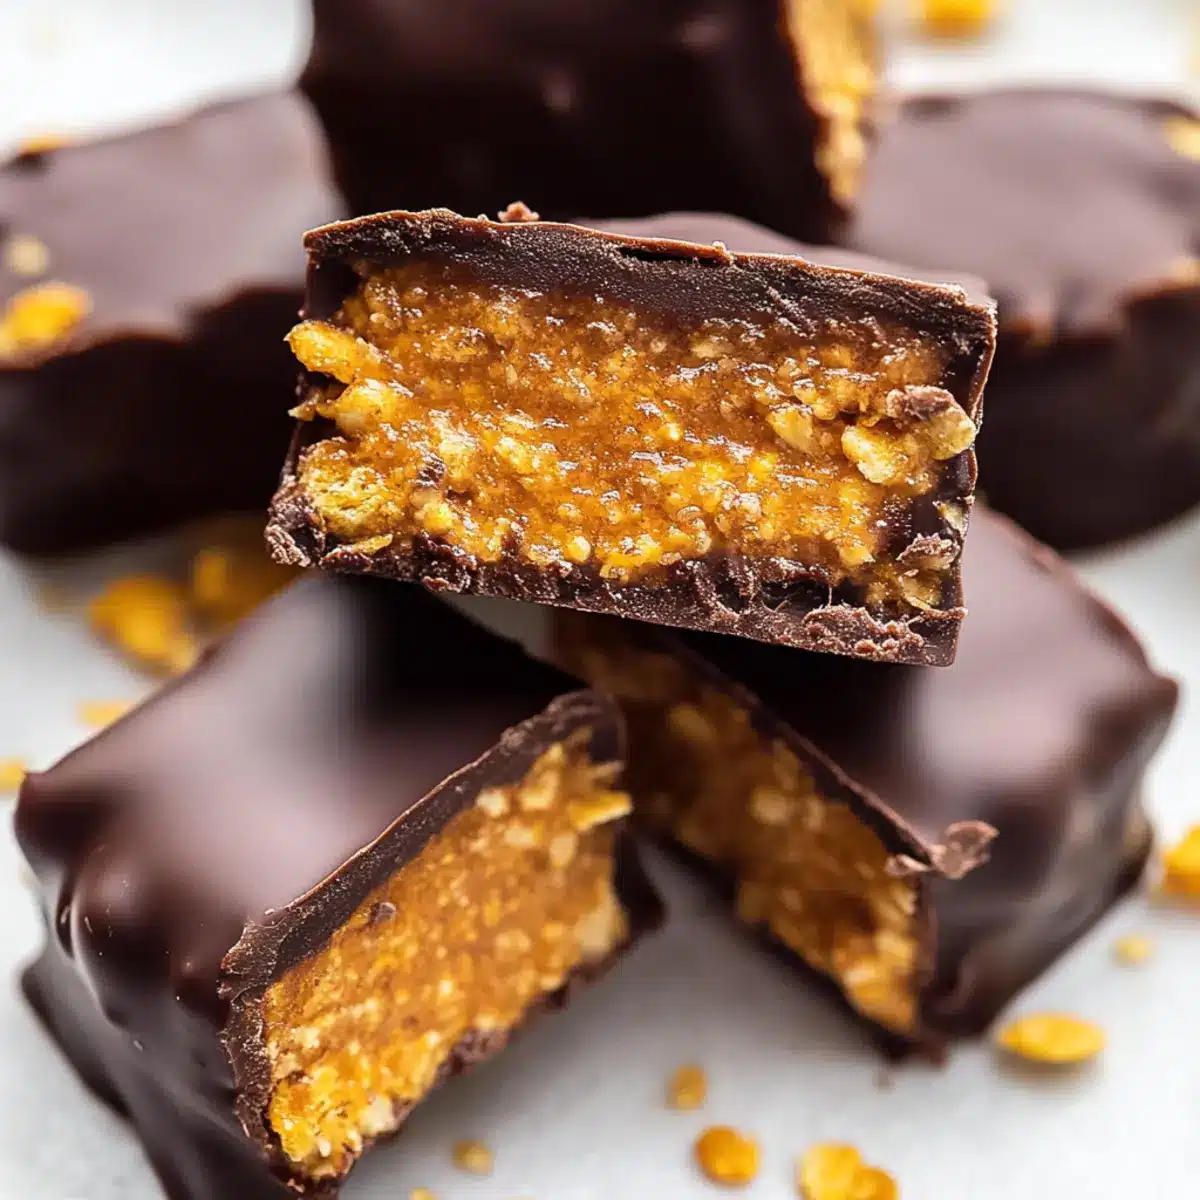
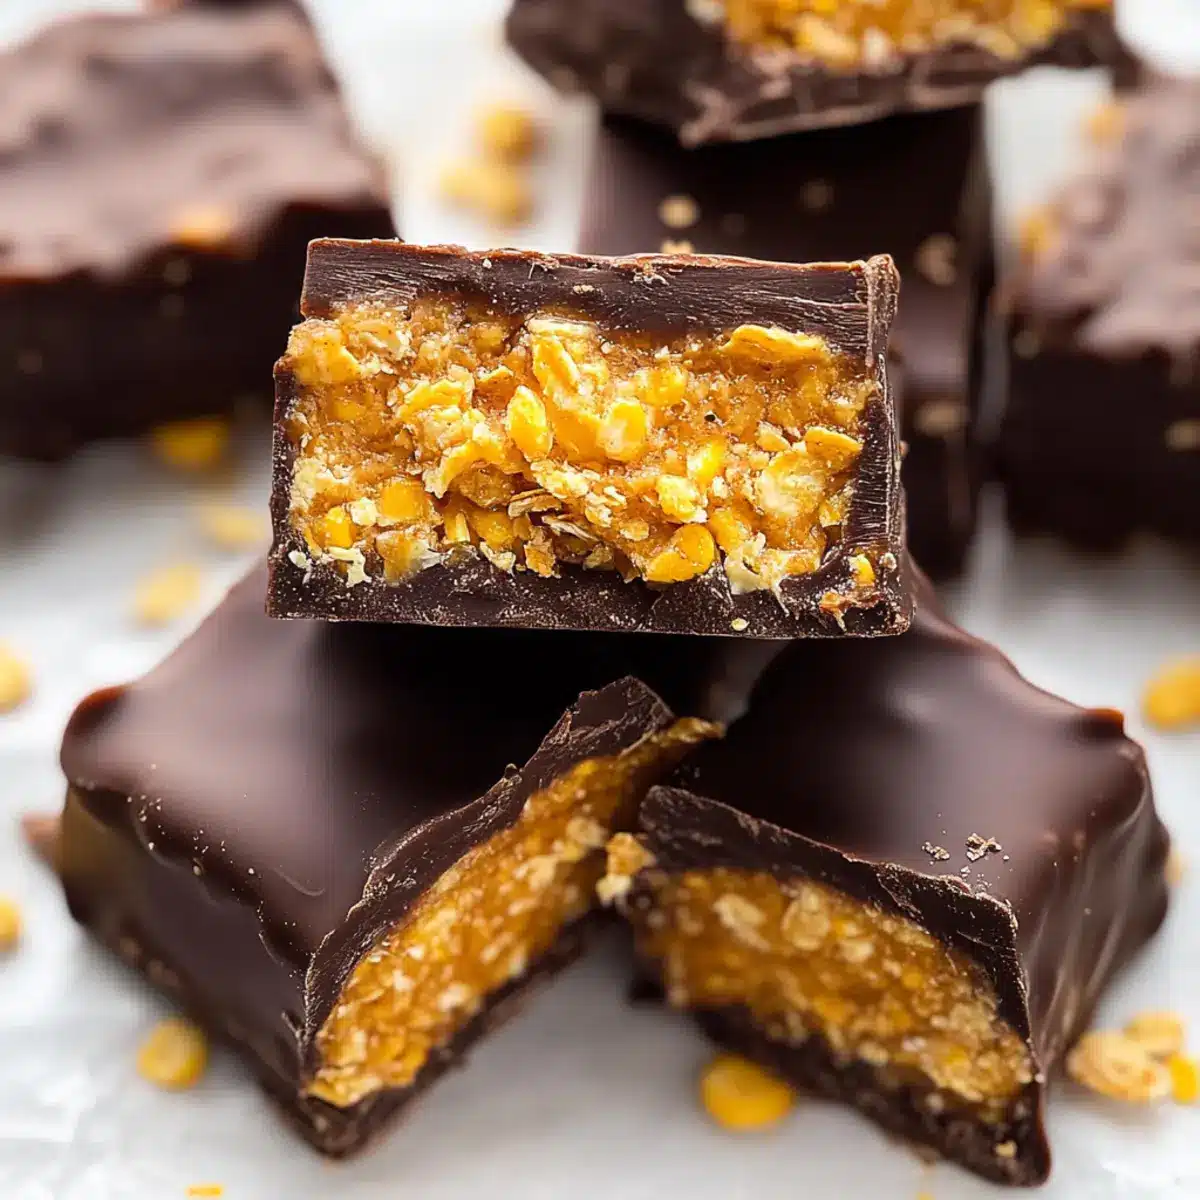
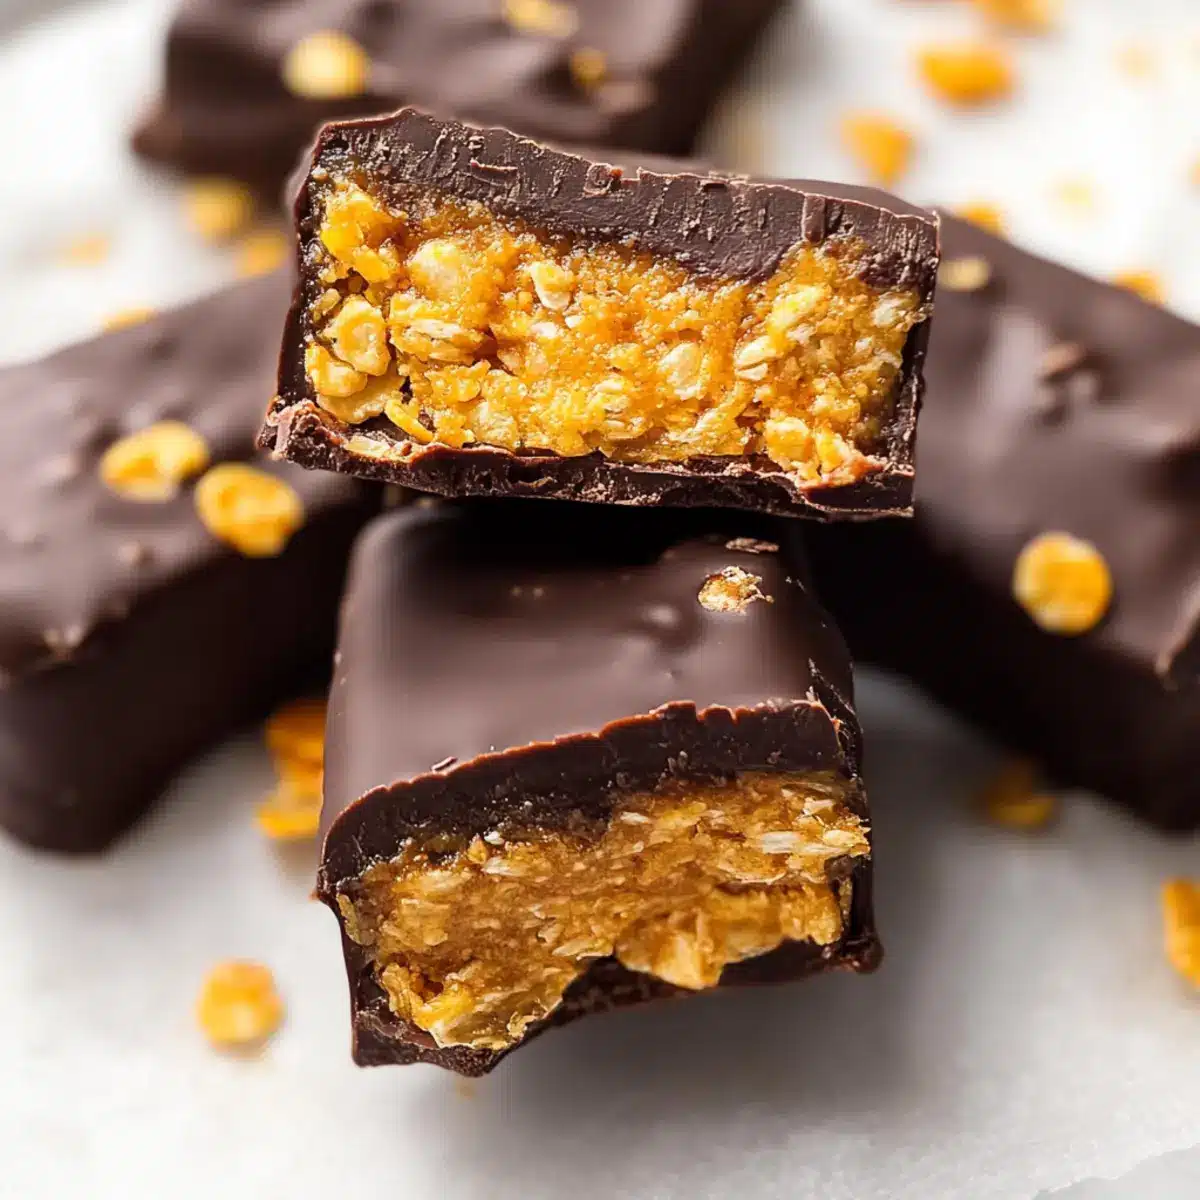
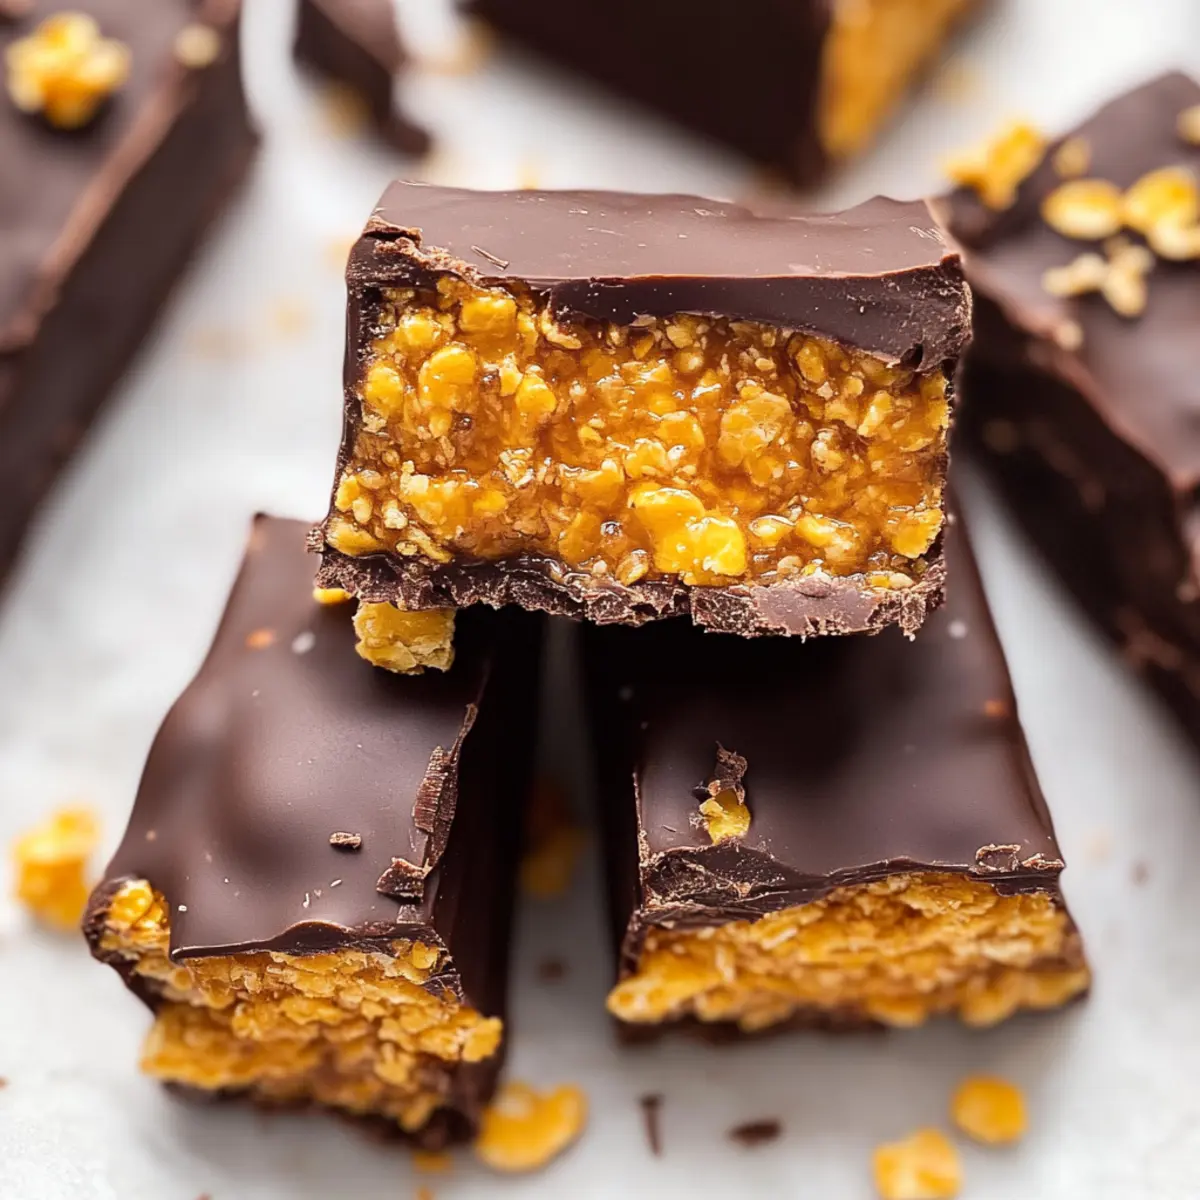
Crunchy Texture: The corn flakes add the perfect crunch, reminiscent of the classic treats we all know and love.
Versatile Options: Feel free to swap in your favorite nut butter or even sprinkle in some dried fruits for an extra boost, making this recipe customizable for any dietary needs.
Quick and Easy: These treats can be whipped up in no time and stored for weeks, perfect for those unexpected sweet cravings! They’re just as delightful as my other recipes like Veggie Fruit Snacks or Twix Style Cookies.
Healthy Homemade Butterfingers Ingredients
Get ready to create a guilt-free treat that satisfies your cravings!
For the Butterfinger Base
- Peanut Butter – Provides creaminess and flavor; feel free to substitute with almond butter or sunflower seed butter for nut allergies.
- Maple Syrup or Honey – Acts as a natural sweetener to bind ingredients together; you can use agave syrup for a vegan option.
- Corn Flakes – Adds crunch and structure to the bars; if gluten-free is a priority, opt for gluten-free cereal.
For the Chocolate Coating
- Chocolate Chips – Creates a rich, indulgent coating; dairy-free chocolate chips work well for strict dietary needs.
- Coconut Oil – Helps melt the chocolate smoothly and adds a hint of coconut flavor; it can be omitted if necessary.
Now that you have everything ready, you’re just moments away from enjoying your Healthy Homemade Butterfingers!
Step‑by‑Step Instructions for Healthy Homemade Butterfingers
Step 1: Prep Corn Flakes
Start by placing your corn flakes in a zip-top bag and seal it tightly. Using a rolling pin or your hands, crush the flakes into tiny pieces—aim for a mix of small crumbs and larger bits. This will add the perfect crunch to your Healthy Homemade Butterfingers.
Step 2: Mix Ingredients
In a large mixing bowl, combine the creamy peanut butter and maple syrup (or honey). Stir until the mixture is smooth and well-blended. Next, add in the crushed corn flakes, folding carefully until everything is evenly coated. The mixture should feel sticky but manageable, creating a delicious base for your sweet treats.
Step 3: Set in Pan
Transfer the vibrant mixture into a parchment-lined loaf pan, using a spatula to evenly spread it into a flat layer. Press it down firmly to help create structure while freezing. Place the pan in the freezer for at least 1 hour—this will solidify the base of your Healthy Homemade Butterfingers for easy cutting later.
Step 4: Cut Bars
Once the mixture is firm, remove it from the freezer and carefully lift it out of the pan using the parchment paper. Place it on a cutting board, and slice it into 12 equal bars with a sharp knife, ensuring they are of uniform size for consistent coating and enjoyment.
Step 5: Melt Chocolate
In a small microwave-safe bowl, combine your chocolate chips with coconut oil. Heat the mixture in the microwave for 30 seconds, stirring well, then return it to the microwave in 15-second intervals until smooth and fully melted. The creamy chocolate will create a delectable coating for your Healthy Homemade Butterfingers.
Step 6: Dip Bars
Take each peanut butter bar and dip it into the warm melted chocolate, allowing it to coat the bar completely. Use a fork to lift it out and gently tap against the bowl’s edge to remove excess chocolate. Place the coated bars on a parchment-lined plate, keeping them spaced apart to prevent sticking.
Step 7: Final Freeze
Once all bars are coated in chocolate, place them back in the freezer for about 10 minutes. This step will ensure the chocolate hardens perfectly around the bars, giving them the signature crispy coating. After this final freeze, your Healthy Homemade Butterfingers are ready to enjoy!
Healthy Homemade Butterfingers Variations
Feel free to get creative and make these Healthy Homemade Butterfingers perfectly suited to your taste buds!
- Nut Butter Swap: Replace peanut butter with almond or cashew butter for a different nutty flavor that’s equally delicious.
- Sweet and Salty Twist: Sprinkle a pinch of sea salt on top of the chocolate before freezing; it enhances the flavor beautifully.
- Add Dried Fruits: Mix in chopped dried fruits like cranberries or apricots for extra nutrition and a burst of natural sweetness.
- Crunchy Texture Boost: Use crushed nuts or seeds in place of some corn flakes for a protein-packed, crunchy surprise in every bite.
- Different Sweetener: Agave syrup can be used instead of honey or maple syrup for a vegan-friendly alternative without compromising on sweetness.
- Chili Chocolate: For a heat kick, add a dash of cayenne pepper to the chocolate for a sweet and spicy flavor combo.
- Protein-Packed Version: Stir in some protein powder into the mixture for an added boost that’s perfect for workouts—like a healthy post-gym treat!
- Coconut Flakes: Mix in unsweetened shredded coconut for extra flavor and texture, turning them into a tropical delight!
These variations will ensure every batch of butterfingers is special, just like the delightful Healthy Pumpkin Blossoms I love whipping up for my family!
Make Ahead Options
These Healthy Homemade Butterfingers are ideal for busy home cooks looking to save time on meal prep! You can prepare the butterfinger base by mixing the peanut butter, maple syrup, and crushed corn flakes up to 24 hours in advance. Just store the mixture in an airtight container in the refrigerator to maintain its freshness and prevent it from drying out. When you’re ready to serve, simply transfer the chilled mixture to a loaf pan, freeze for at least 1 hour, and then follow the steps to coat and cut the bars. This way, you’ll have delicious, guilt-free treats ready in no time, perfect for snack cravings or sweet indulgence!
What to Serve with Healthy Homemade Butterfingers
Get ready to create a delicious feast that complements the sweet indulgence of your favorite guilt-free snack!
-
Creamy Almond Milk: This smooth, nutty drink perfectly balances the sweetness of bars, giving a delightful, refreshing contrast.
-
Fresh Berries: Juicy strawberries or blueberries add a burst of freshness and nutrients, enhancing the overall taste experience of your dessert.
-
Crunchy Apple Slices: Crisp apples provide a satisfying crunch and light tartness, making them the ideal companion for the rich flavors of butterfingers.
-
Nutty Granola: A side of homemade granola adds texture and a wholesome crunch, making for a wonderfully satisfying snack plate.
-
Dark Chocolate Dip: For true chocolate lovers, serving some extra melted dark chocolate creates an indulgent experience that enhances your butterfingers.
-
Coconut Yogurt: This creamy, tropical treat brings a refreshing twist and complements the coconut oil flavor of your Healthy Homemade Butterfingers beautifully.
-
Iced Herbal Tea: A chilled herbal tea can cleanse your palate between bites, offering floral notes that enhance the buttery nuances of the bars.
Expert Tips for Healthy Homemade Butterfingers
-
Crushing Corn Flakes: Make sure your corn flakes are finely crushed for the best texture. Larger pieces may disrupt the crunchiness of your Healthy Homemade Butterfingers.
-
Prevent Sticking: Line your loaf pan with parchment paper to ensure easy removal and avoid breaking the bars when taking them out.
-
Check Chocolate Consistency: When melting chocolate chips, if it appears too thick, add a bit more coconut oil. This will create a smooth coating for your treats.
-
Cutting Uniform Sizes: Use a sharp knife to cut the bars evenly, ensuring all pieces are the same size for consistent enjoyment and coating.
-
Storing Properly: Store your Healthy Homemade Butterfingers in an airtight container in the freezer for up to 3 months to maintain their delicious flavor and texture.
How to Store and Freeze Healthy Homemade Butterfingers
Airtight Container: Place your Healthy Homemade Butterfingers in an airtight container to protect them from freezer burn and maintain their delicious flavor.
Freezer Life: These treats can last up to 3 months in the freezer without losing quality, so feel free to make a batch ahead of time!
Thawing: When you’re ready to enjoy, simply take out the desired amount and let them sit at room temperature for about 10–15 minutes to soften slightly before indulging.
Reheating Not Recommended: For best results, do not reheat; enjoy them chilled or at room temperature to appreciate their delightful crunch!
Healthy Homemade Butterfingers Recipe FAQs
How do I select the right peanut butter?
Absolutely! When choosing peanut butter for your Healthy Homemade Butterfingers, opt for a natural version without added sugars or preservatives for the healthiest choice. Look for brands with just peanuts and salt if possible. If you have nut allergies, almond butter or sunflower seed butter makes excellent substitutes.
How long can I store Healthy Homemade Butterfingers?
These delightful treats will keep well in an airtight container in the freezer for up to 3 months. Just ensure they are properly sealed to avoid freezer burn. They’ll maintain their delightful flavor and texture, ready to satisfy your cravings whenever they strike!
Can I freeze the Healthy Homemade Butterfingers?
Yes, indeed! To freeze your Healthy Homemade Butterfingers, place the individually coated bars in a single layer on a parchment-lined baking sheet first, allowing them to freeze solid for about 1-2 hours. Once frozen, transfer them into an airtight container separated by parchment paper to prevent sticking. This way, you can easily grab one whenever you want!
What should I do if the chocolate coating is too thick?
Very good question! If you find that your chocolate coating is too thick for dipping, simply add a teaspoon of coconut oil to the melted chocolate and stir until smooth. This will create a much silkier consistency, making it easier to coat your bars completely. If you want a more decadent touch, you can also add a splash of milk (or a dairy-free alternative), but remember to adjust the melting time accordingly!
Are there any dietary considerations for these bars?
Of course, it’s important to consider dietary needs! These Healthy Homemade Butterfingers are naturally gluten-free and dairy-free, making them suitable for a variety of diets. If you’re concerned about allergens, always check labels on ingredients like chocolate chips and nut butters to ensure they meet your dietary restrictions. If making them for children or pets, remember to avoid any ingredients they may be allergic to, especially nuts.
Can I modify the ingredients?
Absolutely! Feel free to customize your Healthy Homemade Butterfingers to fit your taste preferences or dietary needs. You can swap the peanut butter for almond or cashew butter for a different flavor, or try adding a pinch of sea salt on top of the chocolate for a sweet and salty crunch. You can even mix in some dried fruits or nuts for added nutrition and texture. The more the merrier!
Healthy Homemade Butterfingers for Guilt-Free Indulgence
Ingredients
Equipment
Method
- Start by placing your corn flakes in a zip-top bag and seal it tightly. Crush the flakes into tiny pieces using a rolling pin or your hands.
- In a large mixing bowl, combine the creamy peanut butter and maple syrup (or honey). Stir until smooth. Add the crushed corn flakes, folding carefully until coated.
- Transfer the mixture into a parchment-lined loaf pan. Spread it into a flat layer and press down firmly. Freeze for at least 1 hour.
- Once firm, lift the mixture out of the pan using the parchment paper and cut into 12 equal bars.
- Combine your chocolate chips with coconut oil in a microwave-safe bowl. Heat in the microwave in 30-second intervals until melted.
- Dip each peanut butter bar into the melted chocolate, allowing it to coat completely. Tap to remove excess chocolate and place on a parchment-lined plate.
- Freeze the coated bars for about 10 minutes until the chocolate hardens.
Leave a Reply